

Let me know if you have any questions or want help registering for the courses!
Green Garlic Puree
I’ve written before about the difference in my two garlic beds. I planted Inchelium Red garlic last October as usual, but this time I split the crop into my two fire-ring beds. One bed had a cover crop of cilantro in with the garlic, and those bulbs grew tall and green and fat - and they are ‘curing’ in place now, without irrigation, filling out and waiting for harvest in early June. In the other bed, the garlic was alone, without a cover crop, and it didn’t do as well. The bulbs were short and measly, and didn’t seem to be getting any bigger. I decided to harvest it early and use it as green garlic. However, I couldn’t use it all at once, so I thought I might try to find a way to preserve it, long-term.
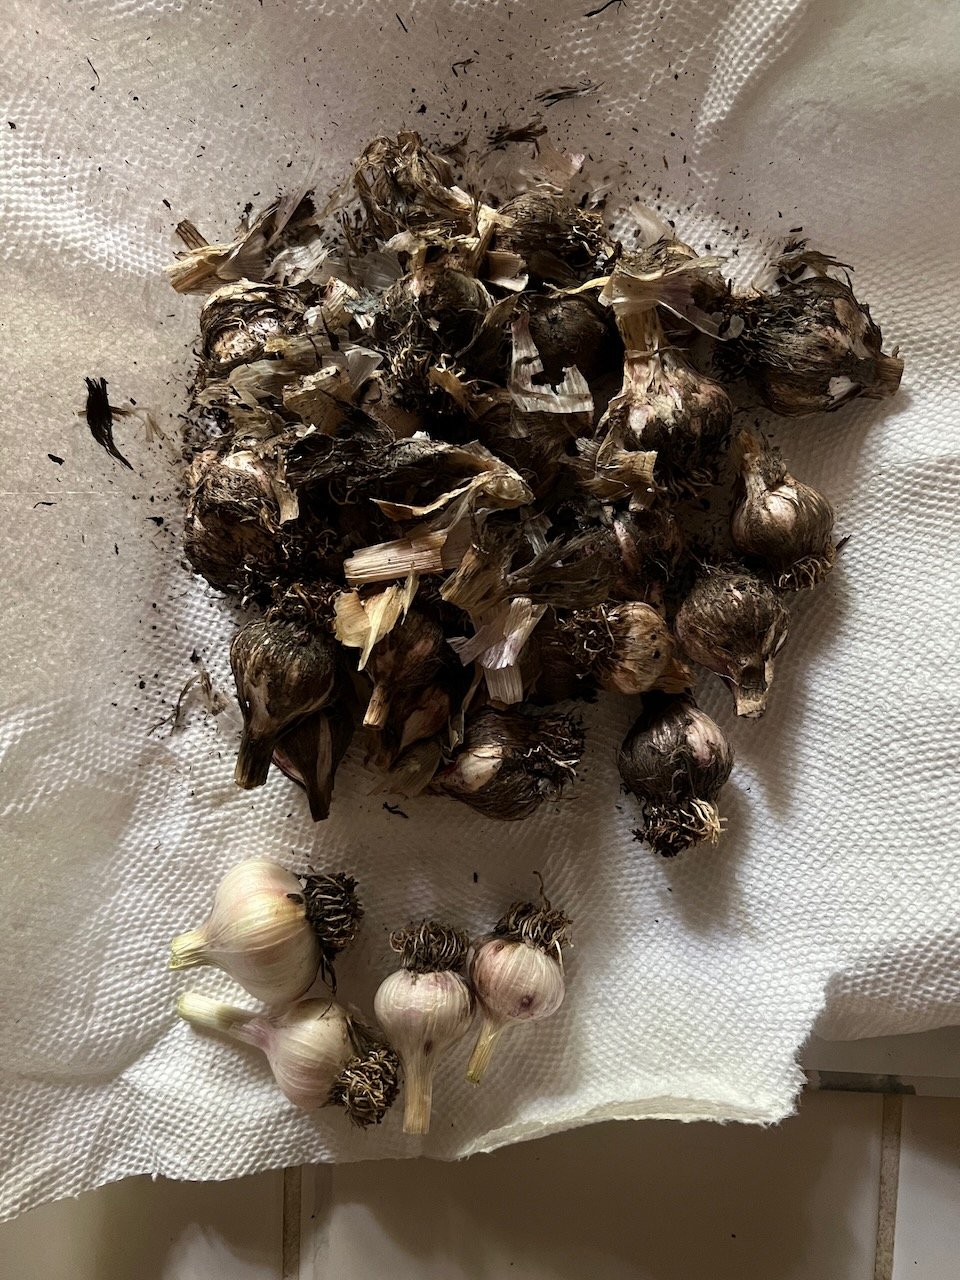
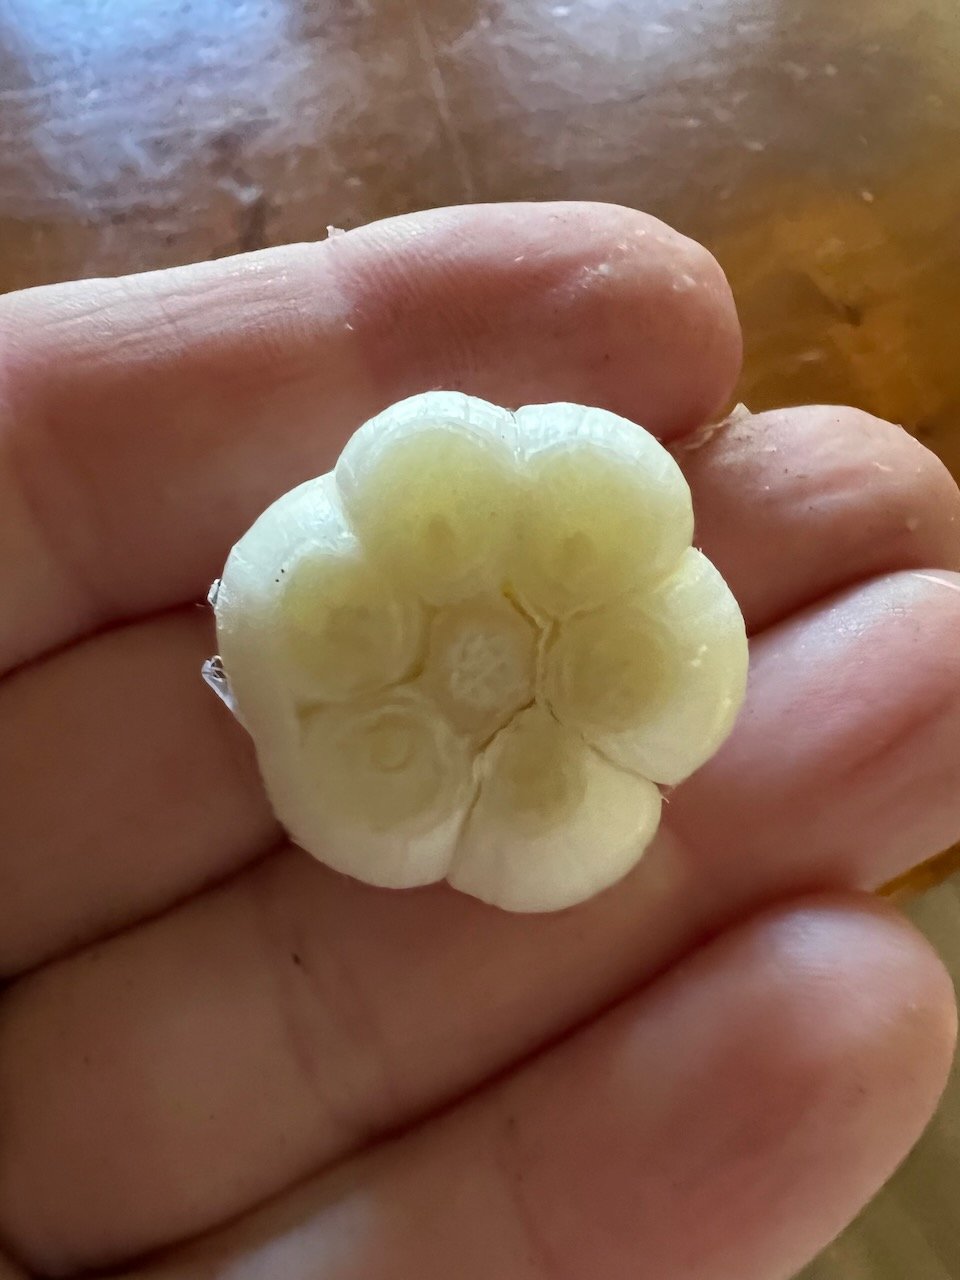
‘Green’ garlic is simply immature, taken out of the ground before the bulbs grow to a typical size. Interestingly, I discovered that many of the bulbs had already ‘headed up’ - that is, grown individual cloves, which you can see from the cross-section picture at the top of this post - but they were smaller than normal. However, many of the bulbs were simply one swollen clove, and had not yet headed up. Regardless of their size or development, I cut the green stalk off each one (which you can also use like scallions or chives) and let the small bulbs dry out on a paper towel inside for a couple of weeks. They were dirty, but as soon as they dried out, I could rub off the outer dirt and skin and reveal the clean, small bulbs underneath.

Then it was just a matter of peeling each one. Green garlic, being immature, doesn’t get all papery like mature garlic does; this means the peels are still quite moist and easy to take off. I decided to make a puree of the cloves with olive oil, and freeze them in cubes to use in cooking later. You cannot store garlic in oil in the fridge, because of the risk of botulism. The USDA Center for Food Preservation recommends storing garlic in oil in the freezer. Here is their blurb about that:
“Garlic-in-Oil
Research performed by the National Center for Home Food Preservation confirmed that mixtures of garlic in oil stored at room temperature are at risk for the development of botulism.
Garlic-in-oil should be made fresh and stored in the refrigerator at 40°F or lower for no more than 4 days. It may be frozen for long term storage for up to several months. Package in glass freezer jars or plastic freezer boxes, leaving ½-inch headspace. Label, date and freeze.”

Blending the garlic with oil was easy, and it made a pretty yellow puree, which I then decanted into an ice cube tray and put in the freezer. This amount yielded only 7 large cubes. Granted, they are pungent and will certainly pack a punch in any recipe. How handy to be able to take a cube out of the freezer, toss it in the frying pan, and have a lovely flavored oil in which to cook a mess of greens, or meat, or eggs. They could also be defrosted to make salad dressing (though it would be strongly-flavored!).

Nothing we grow in the garden should go to waste. There is always a use for it, and if not in the kitchen, it can be fed to livestock or added to the compost pile, where it goes back to feeding the next crop.
Fallow to Farm
One of my students, the very talented Kate Berlin, made this video about our class this semester. One of my other students, Mac Munson, is playing the music you hear throughout! This four-minute video encompasses our 16 weeks of class, building our garden from a weedy, abandoned place, into a lush flower-and-vegetable oasis, which provided us with daily salads and incredible joy! It also highlights some other urban farms we visited around the Bay Area. Enjoy!
Makin' Hay

Or more accurately, straw.
What’s the difference, you ask? Well, straw is usually the by-product of a grain crop. In my case, this was winter rye. You might recall that grain crops are grasses, and rye is indeed a grass. It grew tall all winter, and then began to go to seed to produce that grain that makes such delicious bread. I didn’t grow it for the grain, though. I grew it for its stalk. The ‘straw.’
Ok, so what’s hay? Hay is not a by-product, but a product in itself. Hay is often a mix of legumes and grasses, such as alfalfa and wheat, and is used as a dry feed for livestock. This is not to be confused with silage, which is green hay that is compacted into bales and put up ‘wet’ in order to ferment and increase the nutrition, and then is fed to livestock. Confusing?

Rye straw piled up under the apple tree, waiting to be used as mulch
Technically, what I did was grow hay - a green crop of rye and clover (grass and legume) - but I didn’t use it to feed livestock, and I didn’t use it for people food. As I’ve mentioned, I grew it only for the straw.
Why would I do such a thing? In a word: Biomass.
Grain crops - grasses - grow a ton of biomass, both above and below the soil. The above-ground part of the plant can grow many feet in a very short time. I actually reduced the size of my plants several times, to prevent them from setting seed. The first time I chopped them (reducing them by about two feet), they were already five feet tall. Then they grew that same amount back again and I chopped them again a second time. After that, they were slower to grow again, but still put on several inches before I chopped them down the final time. It’s just in their DNA to grow tall. This produces a huge amount of biomass above the ground, which can be used in several different ways.
But grasses also grow an enormous amount of biomass underground. They have vast and complicated root systems, which have evolved to anchor them, and that tall growth, in windy conditions. Think about where grain grows best - flat prairies in the middle of the country, where the soils were formed by ancient lakes, and are loose but nutritious, and there are no mountains around to block the wind. The grain (and other prairie plants) needed to evolve to have very strong roots to support their growth.

a famous illustration of prairie plant roots by Heidi Natura c.1995
What does this underground biomass do? It takes the sugars (made by the plant in the process of photosynthesis) and pumps them into the soil, attracting the trillions of microscopic creatures - bacteria, fungi, protozoa, nematodes - to their roots, increasing the interactions between the plant and the life in the soil. This creates an ecosystem which is incredibly favorable to the plant, providing micro-manure for nutrient uptake, as well as allowing for shared resources between plants. When the above-ground biomass (that is, the actual plant) is removed, that whole underground ecosystem is just there waiting and ready for the next crop. The soil ecosystem has been vastly improved.
This is why cover crops are so valuable. They can provide food for us, food and habitat for insects, and biomass for use in the garden. That biomass is also of great use in the compost.

The compost pile in the chicken run, under the fig tree
As you can see, much of the material that I am not using as straw goes onto the pile in the chicken run. They like to eat the bits of things I throw there, such as the green leaves and stems of the clover, and they find all kinds of bugs to enjoy, too. After the chickens are done scratching around in it, it all rots down into a deeply nutritious soil that I add to my veg beds in the fall, thus completing the cycle.
This whole process is a fun one. A bit of work, yes - but any crop requires a bit of work in order to reap a lot of benefit. It’s taken me a week to remove the covers from the North Garden, separate out the straw, put the rest on the compost, and then plant summer crops. It’s good exercise, and it feels wonderful to bend and stretch and squat and sweat in the warm spring sun. Summer is on the way, and soon this space will be filled with good things to eat, like tomatoes and basil. And I can feel satisfied knowing that I’ve improved the conditions for those crops, and that I’ve made my own organic straw with which to mulch them.
Mayan Milpa Garden

There are many things that I love about teaching. One is that my students have terrific ideas and are enthusiastic about making them a reality, which lights a fire under me to try new things. Another is that I am on high alert for any program that will send us free stuff to use in the garden. I belong to many such organizations now, such as CalCAN, the California Agriculture and Climate Network, which provides helpful information and resources. Through them, I got a notice of a cover crop seed company (Green Cover Seeds) providing milpa seeds, for any organization that wanted to grow them, as long as some of the food it provided was given away to the community for free. We are already giving lots of greens to our school food bank, Merritt S.O.U.L. Food Pantry, so I knew that I could also contribute some of the produce from the milpa bed, in time. And, my students themselves eat what we grow, both taking extra home each day, and also they enjoy it at school (they make salads and smoothies every time we meet)!

Ok, so two things to share with you here: One, what the heck is a milpa garden? And two, what kind of bed did we build to house this garden?
A milpa garden is simply a bit like a three-sisters garden, based on indigenous knowledge of growing certain plants together. In the three-sisters case, it’s corn, beans, and squash. The corn grows tall, the beans twine up the stalks and also provide nitrogen to the soil, and the squash spreads out and covers the soil, preventing weeds and water loss. A milpa is a similar kind of idea. It’s also sometimes called a ‘chaos’ garden, because it’s lots of different seeds in one place. Above you can see how many different kinds of seeds were in this package! It’s fun to see which seeds are coming up and picture how the bed is going to look when it really gets going.
And speaking of the bed: My students wanted to build a hugelkulture bed, with logs and branches that we found on the property, as well as much of the contents of our compost pile. We dug a trench around the perimeter, then laid down cardboard to smother the weeds, then set the big logs in the trench, and lined the bottom with smaller logs and sticks. Then we carefully packed it with all the dry matter from our compost pile. Then we covered the whole thing with soil, watered it, and planted the seeds!

This is a birds-eye view (literally; my co-worker climbed a tree on the nearby hill to take this picture) of our garden space. You can’t see another space between the house and the barn on the left, which is where we have a bed of peas and a bed of potatoes, as well as an enormous pollinator garden. We got the seed for the pollinator garden from Pollinator Partnership, a local non-profit who I’ve been collaborating with for years. Below is a picture of some of the flowers coming up - native goldfields, tidy tips, and California bluebells! We are finally starting to see lots of bugs on the property. At the start, when this was just a weedy, abandoned place, we didn’t see any bugs at all.

It’s fun to try new things. One of my students was keen to build a keyhole bed, so we made a double keyhole using old slate that we found on the property (and took turns breaking up using a pick, the only tool we had that was somewhat appropriate), and planted our tomatoes in it. You can see that in the top photo up above the milpa bed.
It’s been tricky making a garden with very little money. Most of our budget has gone to buy soil, gloves and eye protection for the students, and seed. It’s very helpful to find these organizations who are willing to donate seed to a good cause. I’ve even had some friends give me seeds and starts and trellises (thanks B!) which has been terrific. Of course, it’s a good lesson to build an urban farm using only materials that are found on the property (we call this ‘scrappy farming’), so there’s definitely a silver lining to making do with less.