Buckwheat

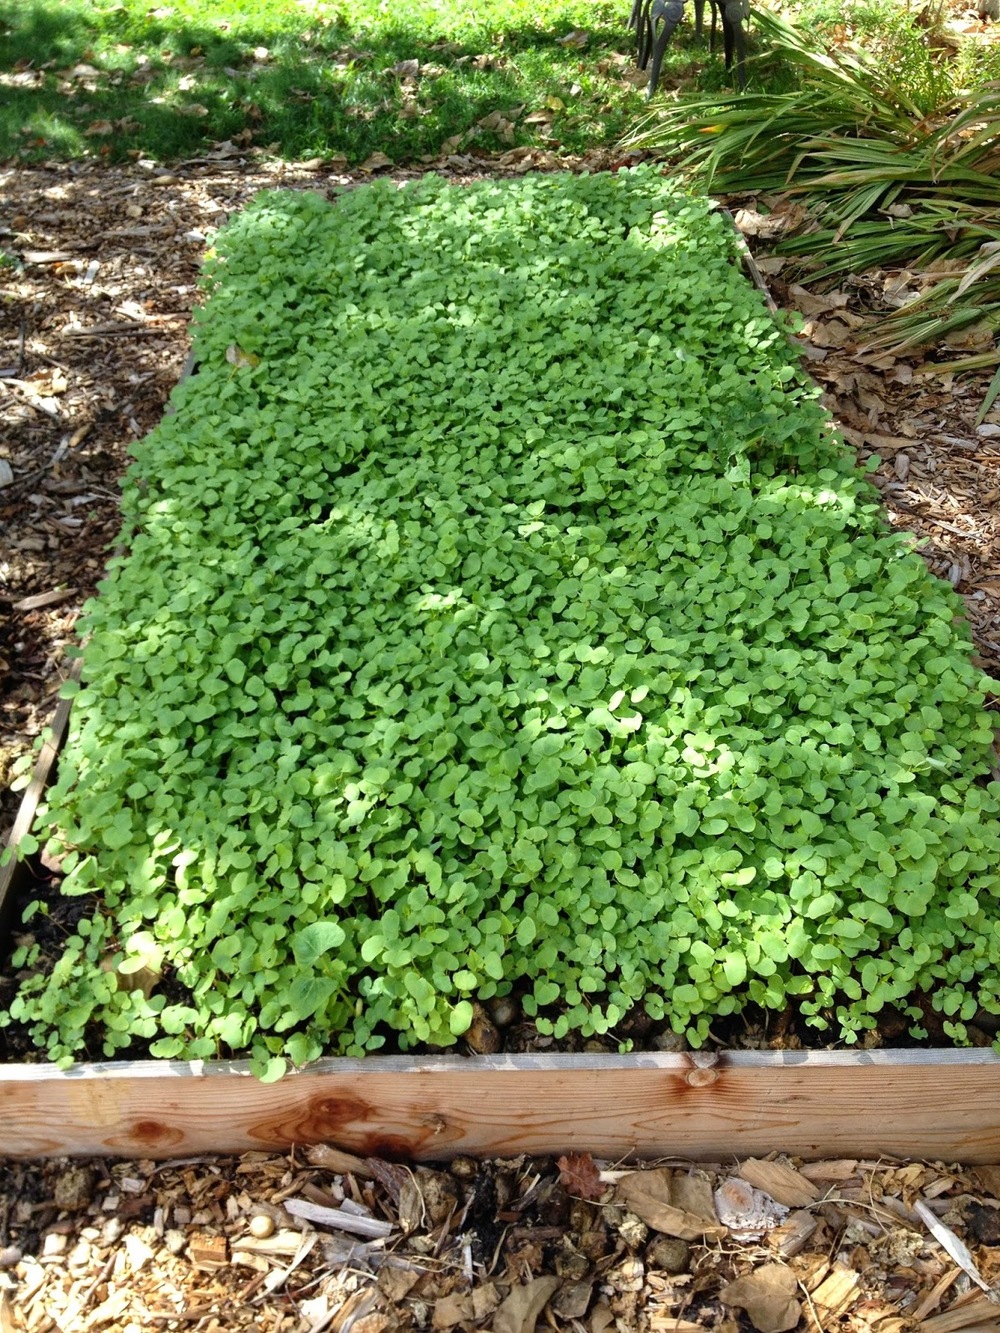
The buckwheat bloomed a month after planting. I was hopeful that I could get a crop in before my  winter planting, and I did! The plant is quite lovely, with heart-shaped leaves and delicate white flowers.


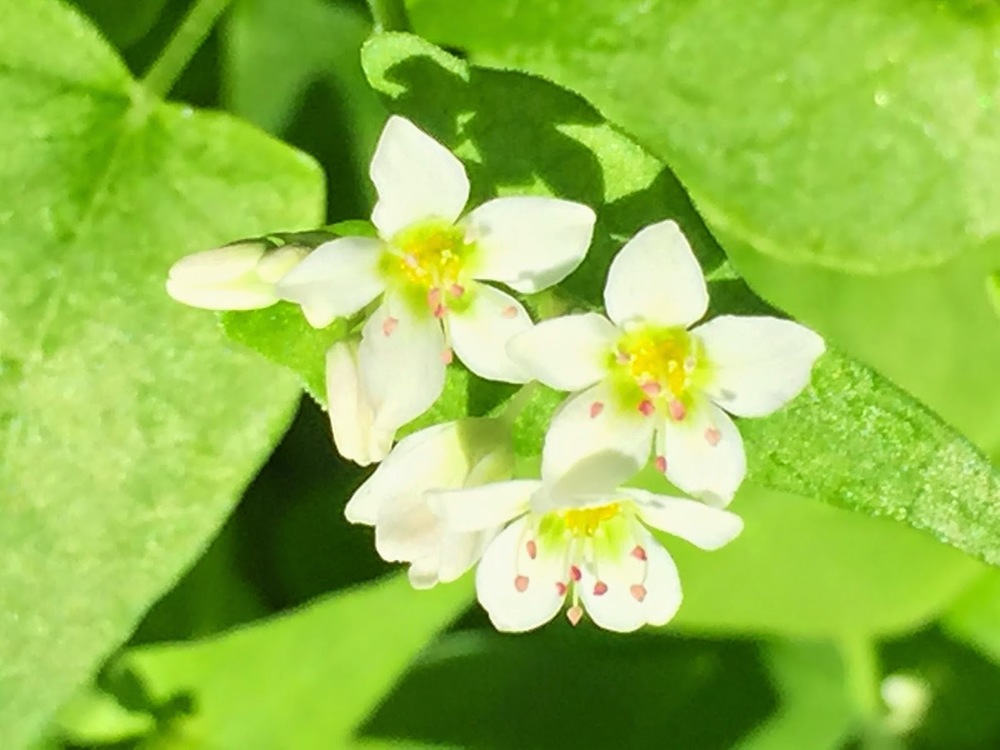
I'm seeing lots of interesting pollinators on the flowers, some I've never seen before, like tiny flies and native bees.


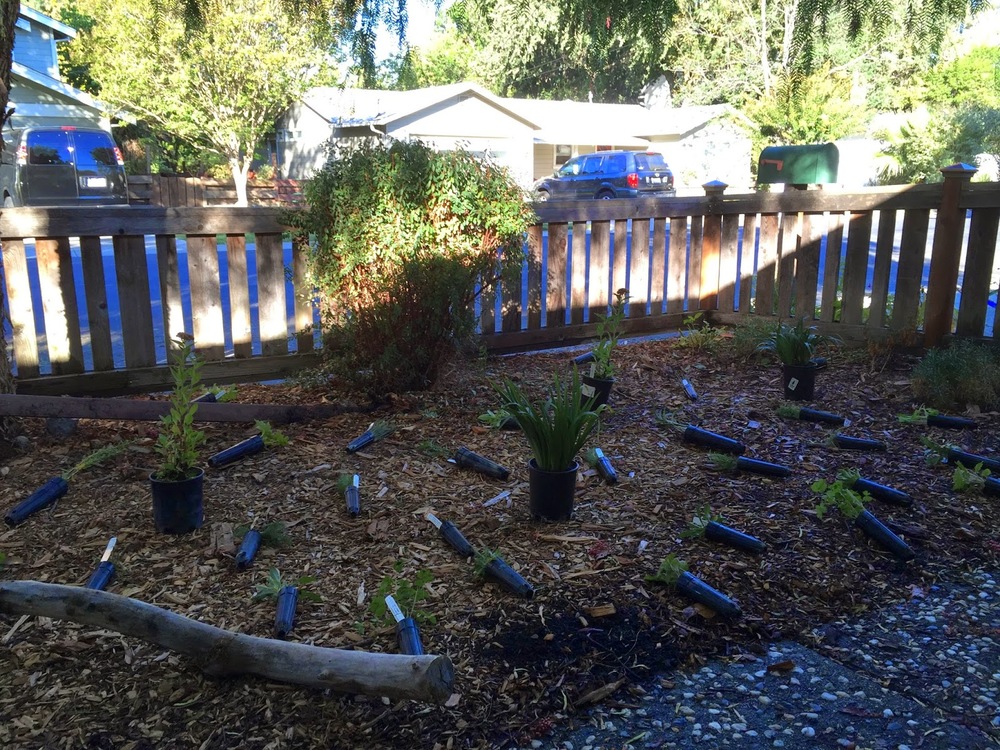
The timing now is tricky; I need to turn the entire crop under in 7-10 days after it blooms, in order to prevent it going to seed. I will spade it up, turn it upside down, and let the forage rot under a layer of dirt. Then, about a week after that, I can plant all my winter crops.

Unfortunately, I have seen my honeybees show only a cursory interest in the plant. I'm hoping that when more flowers open up, the bees will go AHA! and they will swarm it. Buckwheat honey is supposed to taste quite unique, and I'm hoping I will get to try a bit of buckwheat nectar.

Speaking of bees, I watched an interesting movie called "Queen of the Sun" - available on Netflix - which might be the best bee movie I've seen yet. Though there are some interesting characters and some dubious statements about the more, shall we say, 'metaphysical' aspects some feel from keeping bees, most of it was grounded in science and good information. I learned from this film that I am a biodynamic beekeeper - which basically means I let them live as they want to. I let them build their own comb, I let them swarm when they want to (rather than trying to prevent it), and I let them keep a significant portion of their honey to eat, rather than taking the honey and feeding them high fructose corn syrup. I also plan to treat any diseases or pests in a natural way, without chemicals. This all means biodynamic, I guess. I dunno, I just want the hive to express their bee-ness as much as possible, which sounds frighteningly close to those metaphysical aspects I was talking about earlier. (There's one guy in the film that does yoga in his pajamas next to the hive and meditates with the bees. I'm not there yet.)

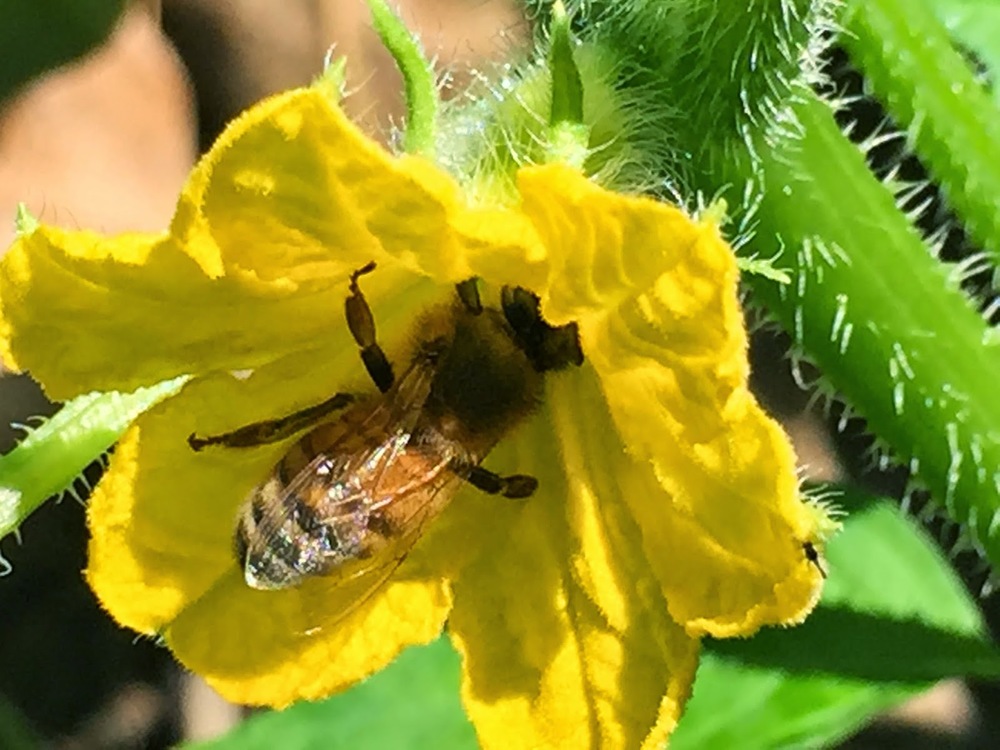
I watched the bees in my cucumber flowers this morning - and remembered that 4 out of every 10 bites we eat is due to pollinators.


Dad made me a sort of 'cleat' to close off part of the hive entrance. This will serve two purposes - one, to help them defend the entrance more easily by making it smaller (the amount of yellow jackets skulking around, even with my traps, is staggering) - and two, to help keep the inside of the hive warmer. It's quite handy to have a father who can provide me with these items when I need them! And not only are they functional, they are beautiful. I had two ladies stop by my yard the other day and comment about the beautiful beehive in my backyard.

In other news, we are having a mast year for acorns, at least in California. (Researching this phenomenon caused me to read an article from the UK, where they are having a 'drought' year for acorns, and it's causing some distress.) There is actually something called "The California Acorn Report," but there are no results for 2014 as of yet. However, in my experience, this is definitely a mast year. I've read various things about it, and I'm not sure I can be backed up by science. But there are places in the open space where I walk continuously on acorns, rather than earth. Well, whatever the reason, the squirrels and the turkeys are happy.

Yesterday we celebrated Adam's 13th birthday, a bit early, with a pool party. I think this picture sums up the fun that was had.


A Lovely Surprise!

I got home from work today, and there was a package waiting on the porch.

Guess what was in it???

This!


A glass pumpkin of my very own! I cannot believe it, it is so incredibly beautiful, and it's exactly the color I would have chosen had I been able to choose one for myself.

Inside the box was this very cryptic card:


So I have no idea who sent this wonderful gift to me. So let me say a huge THANK YOU to my secret Great Pumpkin! I LOVE IT and will cherish it forever.

Oh, and by the way - there's no way this piece of art is going to be living in my garden. It's too precious, and is in my house on a table by the front window, so the light can shine through it. It's gorgeous, no matter where I put it. Yay!

Front Yard Re-do

Last April, we sheet-mulched the 'grass' in our front yard (it was a mixture of grass and a lot of weedy things that looked a bit like grass). Our front yard is dominated by a huge Brazilian pepper tree and is dappled shade. In the winter, the front yard is often soggy, as it is on a very slight downhill from the rest of our property. I really liked the idea of making a seasonal creek bed; in my fantasy, the creek would fill up in the winter, and go dry in the summer, just like the creeks in the open space. But in reality, I wasn't sure how to do this. Liner? No liner? Rocks? No rocks? And how do we keep the raccoons from washing food in it? And would it get super weedy? and honestly, how would it even fit, given the long, thin dimensions of our front yard?

So, creek bed out. Next fantasy, a woodland garden. This one seemed much more doable. Since it's been six months since we did the sheet- mulch, I figured everything would be decomposed; hopefully, rain will be coming soon; therefore, the timing is good for planting. Plus, I was tired of looking at a front yard of bark.

I started researching native plants that do well in part shade. Yes, our front yard is dappled shade, but there are times in the day when the sun is so low that it gets direct sun, and also, it's often quite hot. So from time and experience in my yard, if I go to a nursery in, say, Alameda, and they have something marked as 'full sun', it will not do well in my Walnut Creek valley full sun. It will do well in my part shade. So I chose plants for part shade rather than full shade. (Our 'zone' is tricky; not only do we regularly get temps over 100 in the summer, often for weeks at a time, in the winter, we get quite frosty nights and mornings. Last winter, we had a full month of hard frost every night.)

I love the website for Las Pilitas Nursery, I have learned so much from exploring it! I did a search there for California natives that like part shade, and got a lot of info. However, they are based in Southern CA, so some of those plants aren't available nor wise for this area. As I was searching around, I came across a nursery in Richmond, CA, that I had never visited - The Watershed Nursery. Wow! What an excellent place! Not only are they experts in native plants, they know in which watershed they are local! I was smitten. I started looking at their plant lists and came up with a checklist of things I wanted to buy. I figured I would need about 50 plants, so it would be a serious trip. I contacted my good friend Barbara, who is always up for a plant adventure, and off we went yesterday to this wonderful place.

What a trip! I ended up buying about 60 plants, most native to my watershed. Someone greeted us right away and explained how things were organized - they categorize plants by habitat, which is so smart and different.


Browsing through the plants, each one was marked with the origin of the seed - that is, which county it came from, which watershed. Some were of an unknown origin. It was like a treasure hunt! The nursery itself is in an industrial area, and no frills - but we were helped quite a bit by the employees and enjoyed shopping in relative solitude. There were only a few other people there, which I hope was because of the season only, because this place was really neat and I want it to stay around. As we walked in, they had us step in some disinfectant so we wouldn't bring in any seeds or contaminants from our environment.


This morning, I started working on my front yard at 7 am. We are in the middle of a heat wave (it was 97 today) and I knew I needed to get going while it was still cool. Turns out, the project took me 12 hours. I was out there from 7 to 7, barring one quick trip to get more supplemental compost, and a couple quick breaks for cooking (I chose this day to volunteer to make dinner for Adam's Odyssey of the Mind team, what was I thinking?). I put the last plant in as it was getting dark, just after seven, and I couldn't even take a picture because the light was so bad. But here is one in progress:


You can see all the plants laid out, ready for planting. Figuring out where I wanted to put everything took a good hour. There is another side of the garden, which you can't see very well, but you can see the path. I decided to leave the path project for another time, so for now, the mulch path is lined with logs from our tree trimming projects.


The plants in the foreground are from other plantings, and they are doing great here - coral bells, butterfly bush, fuchsias, and a hydrangea vine that my mother-in-law gave Adam when he finished chemo.

Well, the project is finished, and I'm exhausted. It turned out to be a much harder day than I expected. Because we sheet-mulched, I thought I'd be able to just move aside the mulch, dig into the compost, and put in a plant. Ta-da! But no, it wasn't at all like that. It was easy to move the mulch, easy to dig through the compost layer and the decomposed cardboard, but the ground underneath? The ground the grass had been in? It was hard as a rock. Our East Bay clay soil was in rare form, creating the hardest barrier I have ever dug in, in our garden. I needed a pick; I didn't have one. So it was me, my trusty shovel, and whatever muscles I could muster. It took forever. Kate helped me for a bit, but she wasn't strong enough to dig here. Tom helped me for a bit, and that was great. But mostly it was me. And I'm going to be hurting tomorrow. Sheet mulching works to get rid of the grass, but it doesn't necessarily improve the soil UNDER that grass immediately, or at least not in six months; or maybe it needs repeated application. Lesson learned! There are two more areas in the yard we want to sheet mulch, so I'll keep all this in mind.

Another disappointing thing was that I used a LOT of supplemental compost and I wasn't anticipating having to do that. And I hated the way the nursery packs their plants. All those long thin containers! I had to cut them open, which was a step I could have done without.

One amazing benefit that I DID see, however, and which made the day much better, was worms! HUGE worms! Worms everywhere! Tons of worms! I was so so pleased.


A list of plants, you want? Well I'd love to give it to you, but I threw it out. What a dingbat! Near the fence, I planted big stuff - or, what will eventually GET big, like Ribes (Flowing Currant) and Thimbleberry. Cow parsnip. One coffeeberry bush. Medium plants included scarlet monkey flower, gumplant, fleabane, gray rush, artemesia, california sunflowers. Smaller plants included asters, columbines, yarrows, and huecheras. There are others, but I've forgotten what they are. Oh, more California honeysuckle for against the porch railing... I can't wait to see how they all grow up and fill in and make my woodland garden. They are all pollinator and bird friendly, drought-tolerant, and hopefully uninteresting to deer. Pictures to come!

While Barbara and I were in Richmond yesterday, we visited an artisan glass blower that was having a different kind of pumpkin patch. They blow glass pumpkins, then place them all over their garden. It was spectacular. I wanted to buy them all, but let's just say I'll have to go back when I win the lottery. I love things that are handmade, and I love seeing folks practice crafts that are disappearing, and these pumpkins were worth every penny. I wanted to support this place, so I will go back for their Christmas open house and buy an ornament (smaller and affordable!). Here's one of the pumpkins in the garden - like a mini-Chihuly:


And here's a giant robin's nest with eggs:


I can't say enough about how beautiful the pieces are. Please visit if you're in the area!

Ok, off to eat some dinner and replenish the muscles. I hope I can move tomorrow!

Buckwheat and other stuff

The buckwheat cover crop experiment is going well, so far. I put the seeds in about a week and a half ago, right after I dug in the horse manure. They germinated in three days. Three days! The soil must be quite warm, for them to germinate so quickly. 10 days later, the crop looks like this:


I really have no idea how tall this stuff will get, or when it will flower. All I hope is that I can get a flowering before I have to till it all in, in time to plant winter crops. I've seeded four of my raised beds with the buckwheat.

In the two remaining beds, I still have plum tomatoes, watermelons, cucumbers, tomatillos, acorn squash, butternut squash, and some nasturtiums. Everything is looking good, and the deer have stayed away lately, thank goodness. Though we HAVE heard coyotes in our garden at night. Maybe that's why the deer haven't been visiting!

Kate and I sowed more herb seeds in the spiral - cilantro, basil, chives, parsley, dill, and oregano, hoping for one more crop before colder weather. They have not germinated - I'm finding that herb seeds take FOREVER to germinate, no matter how warm the soil is. I'm beginning to think that all my herbs from now on will be grown from starts.

In the flower garden, I sowed some seeds of breadfruit poppy, chamomile, and something else I can't remember. I still have a lot of late-season flowers blooming - cosmos, coreopsis, zinnias, salvias, and a ton of California Fuchsia, which the bees adore. I see them crawling in the flowers as well as feeding from the outside of the flowers - there is a small slit in the top of the flower, which allows the bees to stick in their tongues and collect the nectar without going inside. But like I said, they do both.


I've had a small continuing crop of strawberries, even though the deer decimated the leaves. It hasn't been even enough for a small bowl, but I'm enjoying picking them and eating them as soon as they ripen, one or two every few days.


Today, I received a shipment from Renee's of garlic, shallots, and wildflower seeds. I will store all of these in the fridge for the time being, and plant the garlic and shallots in the middle of October, and the wildflower seeds in December, along with all the others I collected from my own garden this year. The garlic and shallots will grow all winter, and be ready for harvest in early summer 2015.


In the neighborhood, I'm noticing the cotoneaster and pyracantha have started to produce berries. This is a sure sign that, even though it doesn't feel like it, winter is on the way.


In other news, my son Adam is gearing up to perform in the San Francisco Opera's production of "La Boheme." We had a costume fitting last week, and that was a fun visit to the Opera's costume shop. It's in an old building between Howard and Mission, and as we climbed the stairs, we passed poster after poster of famous operas performed in SF. Up on the higher floors, there were rooms with racks upon racks of shoes, and cavernous halls filled with racks of costumes.


Adam had his measurements taken in a large, elegant room with huge floor-to-ceiling mirrors on either side. We mused about the famous singers who had stood in that very place. The costume ladies confirmed that they've all been there.


They were extremely specific in their measurements, I've never seen anything like it. They are also making him a pair of boots. Here are the sheets they used.


It was a fun visit. Our first rehearsal at the War Memorial Opera house is in mid-October.

My daughter Kate auditioned for and was accepted in to the next stage of her theater program. So we have two very dedicated performers in this house, which makes us proud.

It's the Cheese!

Guest post from my husband Tom today... enjoy!

For my birthday, Elizabeth got me a cheese making class at the Institute for Urban Homesteading, a place in Oakland that has classes in all sorts of interesting things -- in addition to cheese making, they've got classes in food preservation, fermenting, animal husbandry, etc. A place right up our alley.

Class was last week, and it was excellent! We made yogurt, ricotta, and started a feta cheese. The yogurt and ricotta were very straightforward -- we ate the ricotta at the end of the class, and I had the yogurt for breakfast the next day. The feta takes longer -- about 4-5 days start to finish.

Duly inspired, I picked up a couple of supplies on the way home and made the ricotta. It really couldn't have been easier -- you just heat milk up to 175°F, add some lemon juice so that it curdles, then strain the curds from the whey (thinking about Ms. Muffet all the time). After draining, I added some salt and some fresh herbs from the herb spiral, and it was great. When I do it again, I think I won't drain it quite as much -- it got a little crumbly.

In some ways, making cheese is a lot like making bread. There's just a few ingredients, there's some specific process, it takes a while, but there's a lot of waiting involved, too. There's some excellent science involved, too.

Today I'm trying my hand at the feta. This cheese requires a few more specific ingredients, which I ordered online from the New England Cheesemaking Supply Company:

  • Mesophilic starter culture
  • Rennet
  • Real cheesecloth

The difference between the cheesecloth that you get in a regular grocery store and real cheese making  cheesecloth is striking -- take a look at the difference in the weave:

Safeway cheesecloth on the left; the real stuff on the right

The starter culture is lactococcus lactis bacteria (official state microbe of Wisconsin), which eats the lactose in the milk and produces lactic acid, lowering the pH of the milk and making it harder for icky bacteria to set up shop. For the feta I'm making, I had to heat up the milk to about 90°F, and keep it there while the starter culture did its thing. The "mesophilic" refers to the moderate temperature that the bacteria prefer.

The high-tech "beach towel" method of temperature control

Once the starter culture has done its thing, it's time for the rennet. With the ricotta, I'd used lemon juice to curdle the milk, and it formed lots of little curds. The rennet will form a big mass of curd, which you then slice up into smaller pieces. There's different kinds of rennet out there -- traditionally, it comes from the lining of calf stomachs, but there's vegetable-based rennets as well. I'm using a liquid animal rennet, mostly because it was the thing I had the most confidence in ordering online. They also sold dried rennet in pill form, but I didn't feel like cutting and crushing up pills. The vegetable rennet is more expensive and doesn't store as long.

For the rennet step, you're waiting for what's called a "clean break", where there's a clear separation between curds and whey. It's kind of like sticking a toothpick in a cake.

After the clean break, I sliced up the curd into smaller cubes using an icing spatula, stirred it gently so that the curds gave up more of the whey, then drained it in cheesecloth, gathered it up, and hung it to dry for a few hours. The amount of whey that drains out is fairly tremendous - I started with a gallon of milk (about 9 lbs) and will wind up with about 1 pound of cheese at the end of all this.

 This is a 4 1/2 quart pot, so that's a lot of whey.

After a couple of hours, I flipped it over, and will let it hang overnight.

The curd, right before the flip.

There's more process after the overnight hang, but that'll have to wait for another day...