Garden Markers

It became clear to me in the last week or so, that since I had planted more kinds of seeds than I usually do, I was having trouble remembering what I had planted, and where. Now that the seedlings are coming up, it's easier to tell what veg is where, but I still wanted a handy way to see what I was growing quickly, rather than having to consult my chart (which requires running into the house). Also, I wanted people walking by to know what they were looking at. And, I wanted to add beauty to the garden.

I didn't want to just go out and buy something - rather, I wanted to invest time and talent in some sort of way to the garden. I love homemade things, whether it be cookies or paintings, and I love looking around at things that I (or loved ones) have made.

I spent some quality time researching how other folks have marked their garden. There are some great ideas out there, but what I decided on ultimately was to paint stones. I went to Home Depot to see if they had large river rocks on the cheap. They didn't, but they did have lots of paving options. I finally chose something called a 'rumbled' brick.


I bought 30 of them. They were about $.50 per brick.


I already had lots of paint on hand, as I like to paint. But you could just buy craft paint (acrylic) at the craft store. A small bottle will go a long way. I had all the colors I needed already.


You'll also need various brushes, I like very thin ones for better control, and some sort of palette or a tray where you can put the colors, and mix them if you need to. A paper plate would work.


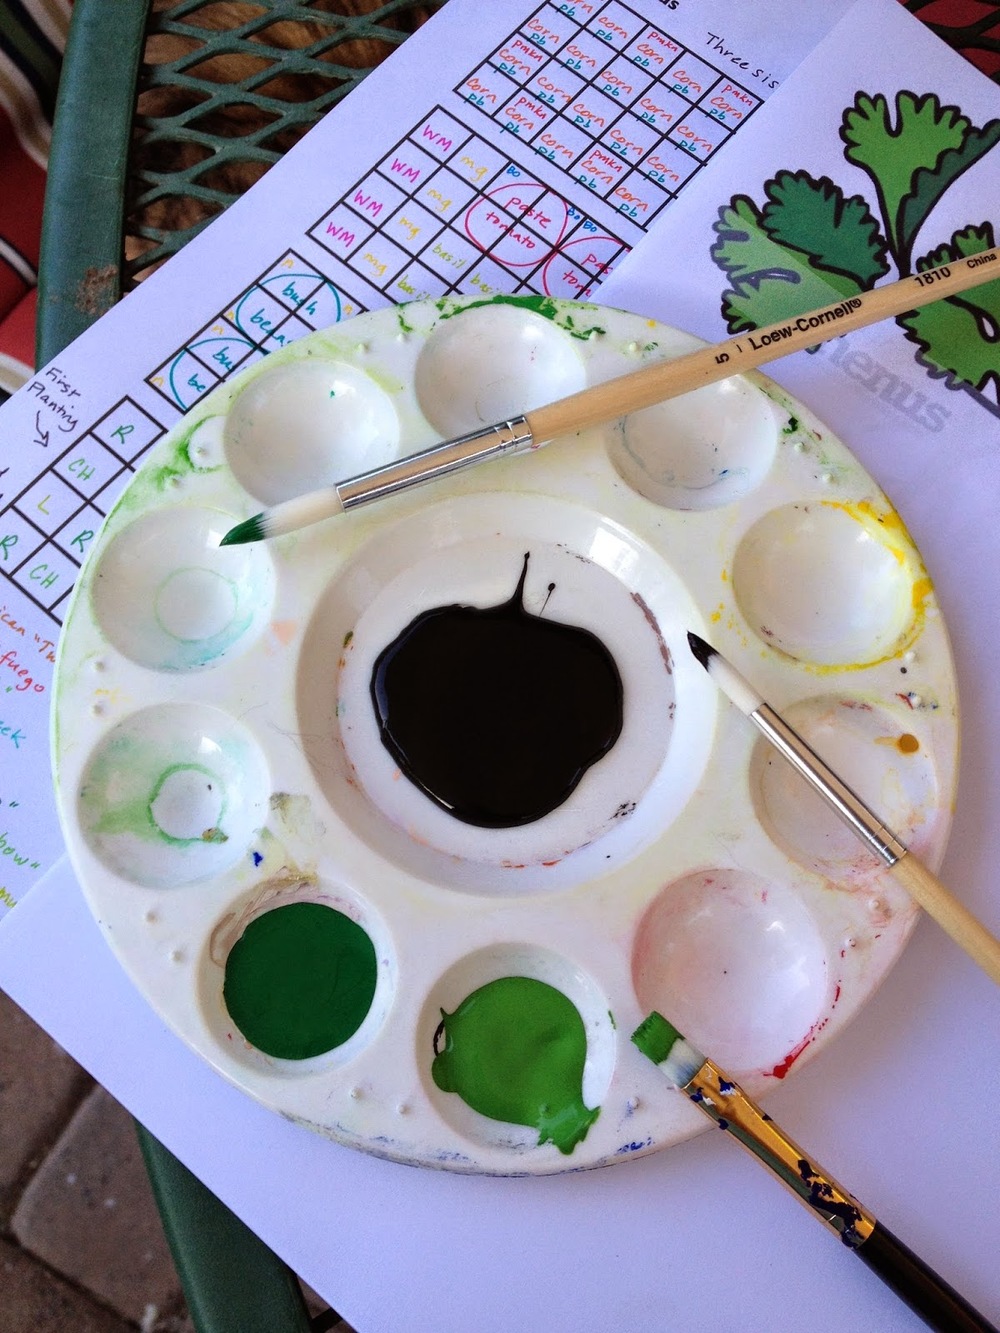
I went online and printed out pictures (clip art or cartoon pictures, not real pictures) of the plants in my garden. I find it's easier to paint if I have a picture to look at, rather than painting just from memory.

IMPORTANT: When painting or creating, you must give yourself permission to just try it and possibly fail. If you mess up, big deal. Turn the brick over and try again on the other side. Or paint over it with white or black and try again on top of that. Or, if all else fails, buy another brick for a measly fifty cents. No sweat. When I started my first brick, Tom said to me, "you are a fearless painter." Well, not really - but the stakes here are very, very small, so it was easy to give myself permission to try. I'm an amateur artist and it shows, but it gives me pleasure, makes my brain work differently, and makes things in the house personal. I believe my kids will remember, someday, that instead of just going and buying more stuff, their mom took time out of a busy schedule and did something that made her happy, and that made their environment more pleasurable.

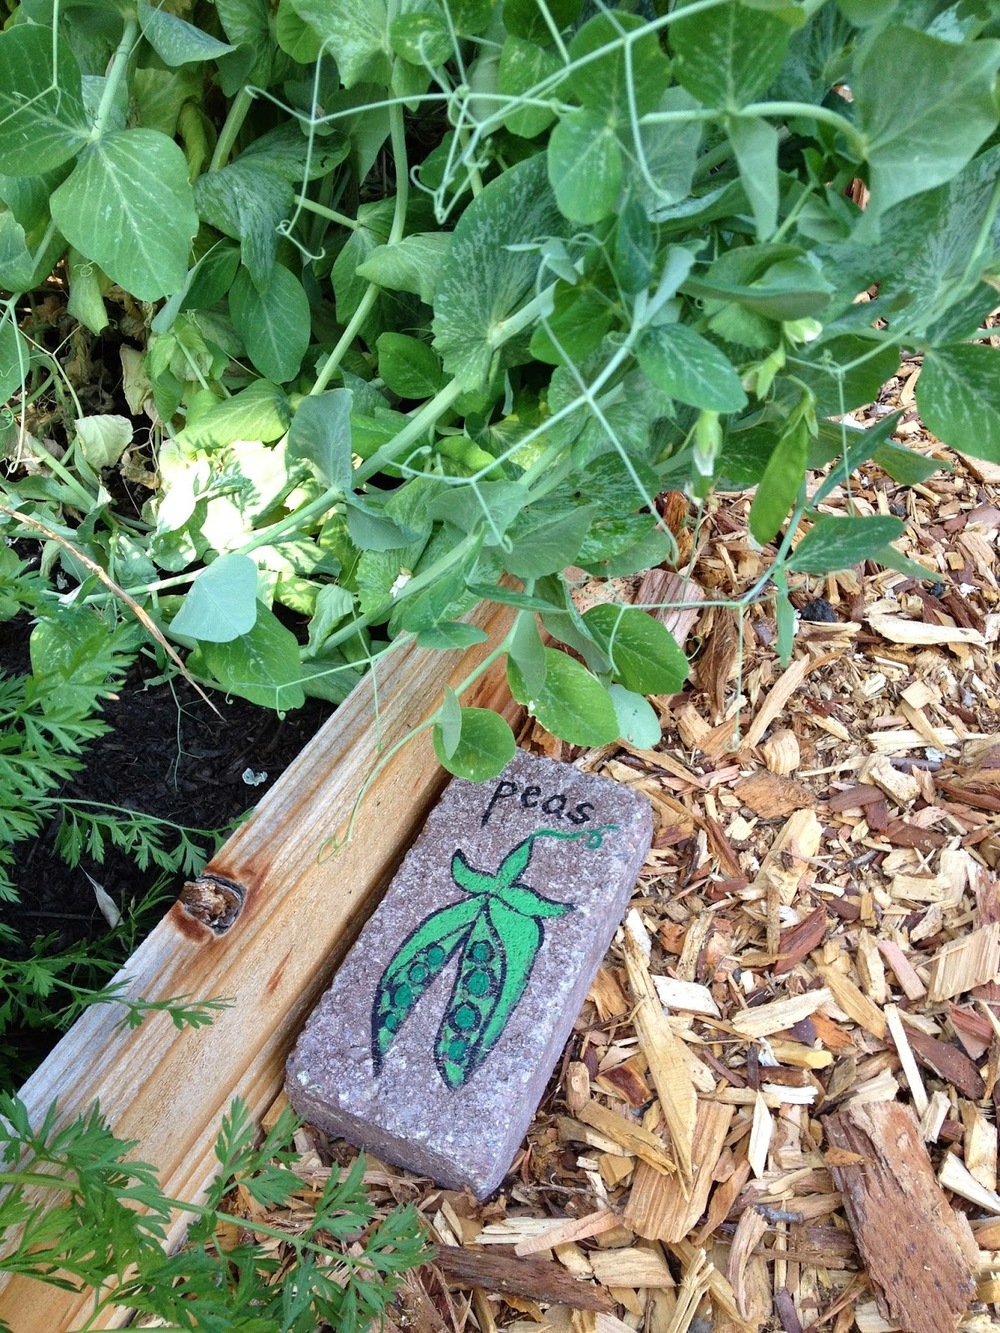
I decided to paint a picture and words, but you could do either or, or anything you want to, really.

And it was fun! And I was really pleased with the results.


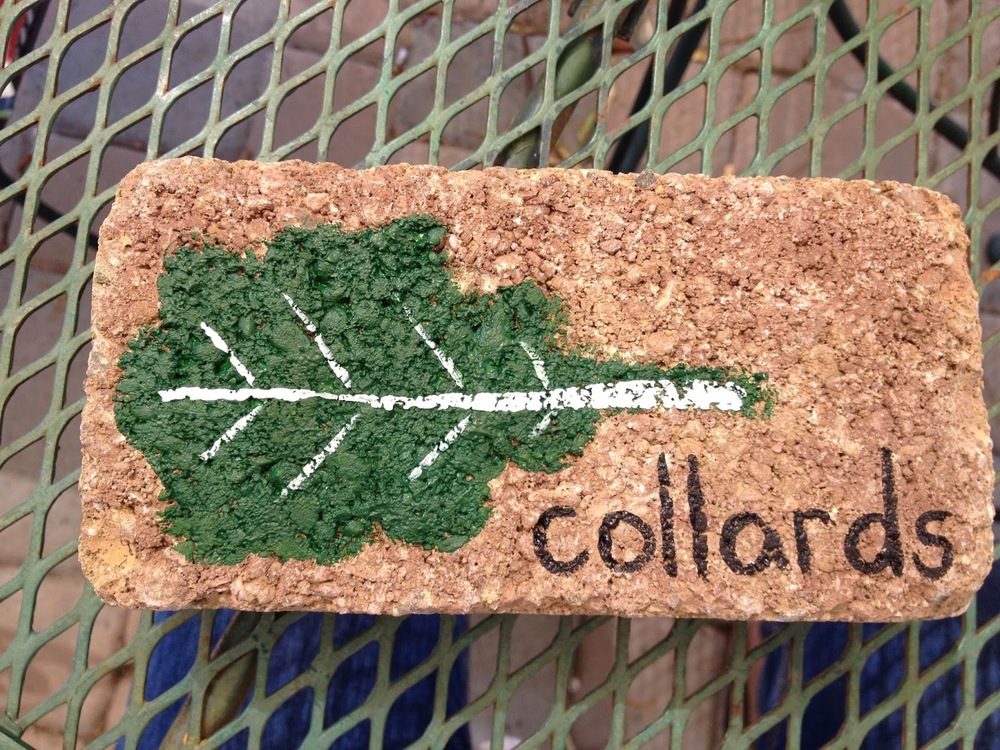
And they look really nice in the garden, out amongst the plants.


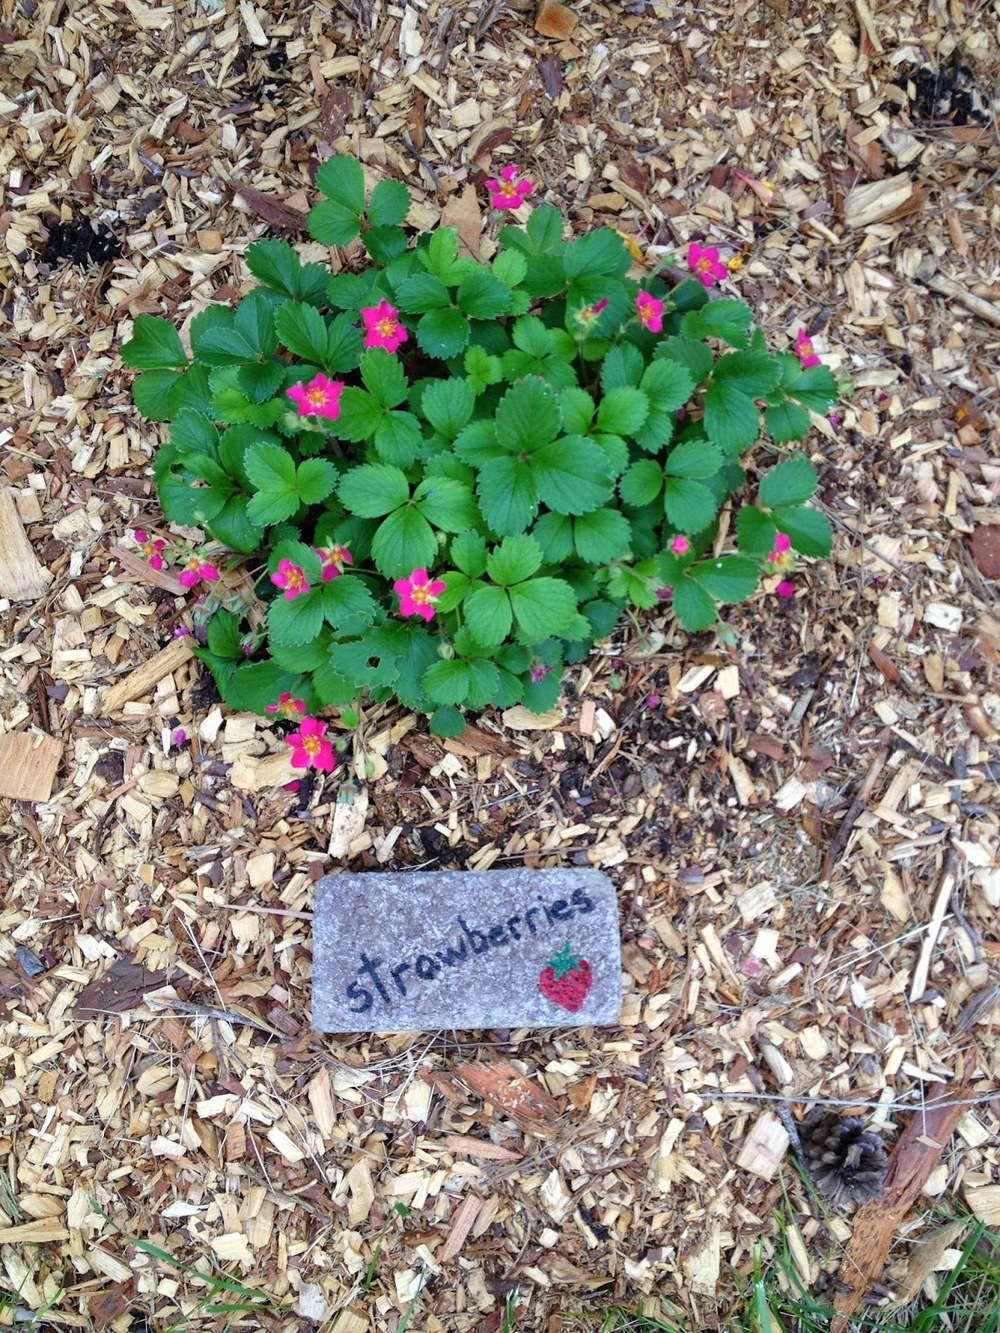
They look nice around the beds, too - and will look even nicer once the plants come in.


Opening the Hive

I opened the hive five days ago to take out the queen cage. At the time, I couldn't see any comb being made, just swathes of bees in small catenary curves. The queen cage was empty - all the candy in the plug gone, and worker bees crawling in and out of it.


I have been noticing lots and lots of activity near the hive. I often take my morning coffee out and sit right near the entrance, watching the bees. They've been bringing in nectar and pollen. I can't SEE them bringing in nectar, but I see them in trees and flowers where I know they are collecting nectar. The pollen can be seen, as the bees stuff it in sacs attached to their legs. They look like bright yellow pillows. I've been continuing to feed them sugar syrup, and they've been going through it at an alarming rate, so I was hoping that meant that they were busy building comb. In a top bar hive, that's the first job - they have to build comb, in order to lay eggs, raise young, and store pollen and honey.

So I hoped to see comb when we opened the hive today, and boy, did we!


The comb is a beautiful, fresh white. In it, we could see pollen being stored, and honey as well. What we didn't see is eggs. Or the queen. So, next week I'll open up the hive again and see if those things can be spotted. The bees will probably also need another bar or two to build on. I gave them 7 bars to start, and each one has comb on it. This is exactly how bees build their hives in the wild - in hollowed out trees or logs - these wonderful U-shaped curves. I thought the comb might be twisted or several bars worth attached, but each bar had a perfect, straight comb on it.

I'm so thrilled. Everything looks good with the bees. They are so calm and happy, we barely needed our hoods today; they didn't bother us at all, even though we were bothering them plenty.


Aren't they beautiful?

Easter Eggs

When I read this post on The Kitchn, I knew I had to try dying our eggs naturally. We've always just used food coloring, but I liked the idea of using things from nature.

And let me just say from the outset, it was a hassle. It required many pots and pans, I had to go to the store especially for some of these ingredients, and it took half the day. Also, this was kind of a one-person job; no one helped me, and honestly no one really could. It didn't have that 'sit around the table and have family time' feel. But my kids are getting older, they didn't really seem into it this year anyway, so I went ahead with this. I'd like to find a way to do this that includes others.

Those are the cons. But I still really enjoyed this project and I'm glad I did it.

Last year, with the Girl Scouts, during a Native American-themed week, I experimented with smashing different fruits and vegetables on a  white muslin cloth with a hammer. We wanted to see what colors they made. Imagine our surprise when red cabbage made dark green marks on the cloth, and onion skin made bright yellow. So in the spirit of that kind of experimentation, I went into this with high hopes.

I used yellow onion skin, red onion skin, turmeric, spinach, broccoli, red cabbage, and hibiscus tea.

First, boil eggs. You can use white or brown; I used a dozen white. (I think it would be fun to see how the brown turns.) Then you put each ingredient in its own pan, cover with water, and boil for 1/2 hour. Strain the produce out and mix some vinegar in to the colored water. Put the eggs in mason jars (or something that won't stain) and pour the colored liquid over the eggs. (The instructions were to wait until the liquid cooled; I didn't do that. I imagine my eggs might be colored/flavored inside, as well.) Then you put them in the refrigerator to soak for a good long time.


After many hours, take the eggs out and let them dry.
Here's the finished result:


From left to right: spinach/broccoli, red cabbage, turmeric, red onion skin, hibiscus tea, yellow onion skin.

I think the tea reacted with the vinegar somehow, because those eggs ended up speckled. My favorite are the blue ones made with red cabbage. I wish I could have found a way to make a spring green.

They look nice in a crate, ready for Easter.


A Surprise on the Trail

I get off work each day at 2. I rush home and grab the dog, and we hit the trail for 10 minutes before I have to be at school to pick up my daughter. Today, as Joe and I were walking near Shell Ridge, I spotted a tiny lump in the middle of the trail. I realized it was some sort of creature - a rodent - and as I bent down to look at it, it tried to run away and couldn't.

So I picked it up - it squealed - and deposited it in some soft leaves. There it continued to move blindly, mewling. No mom in sight. Well, I couldn't just leave it there, rat or no. I picked it up and drove one-handed, stopping at home for a small box. I grabbed Kate from school, and we high-tailed it out to the Lindsay Wildlife Museum and Hospital, checking on the creature at every stop light. It was breathing, but it's snout was buried in the corner of the box, and it didn't want to be exposed to light.


Its tiny eyes never opened, and it didn't put up much of a fight. I was worried. (By the way, that's my thumb in the picture, so you can see how small it was.)

Lindsay is a rescue organization as well as a museum, and they take in any injured creature that folks find. Kate had once found a baby rat near our compost. We took it to Lindsay, where they identified it as a European black rat, definitely non-native and therefore disposable. The helpful volunteer said, with an eye on six-year old Kate, "we'll take care of this rat for you!" while drawing a finger across her neck. I'm sure that baby rat became food for a recuperating owl or hawk. I've never felt bad about killing the rats I found in the compost ever since, knowing that they are non-native and invasive.

However, this little creature looked different. I was pretty sure it was a mouse of some sort.

We dropped it off with the volunteer and waited to hear the news. Turns out, it was a baby vole! They gave me a sheet with a number on it, and told me to call in a few days, to see how the vole was doing.  Well, Kate and I headed off to piano lessons feeling smug and proud, since we had saved a baby vole.

I didn't know much about voles, except that they wreak havoc in the garden. But this one was on the trail, in its natural habitat, so I didn't have to be indignant. Besides, it was so darn cute. Here's what my research turned up:

Baby California voles grow fur at 5 days after birth, but don't open their eyes until 9 days after birth, so this little guy must have been between 6-8 days old. Female voles are ready to breed again 15 hours after giving birth. (Bless them.) The litters are usually 4-5 young, but can be as large as 10 babies. Voles are crepuscular (active at dawn and dusk) or nocturnal, and feed mostly on grasses (if a tasty garden is not nearby). They spend most of their time underground. It has numerous natural predators, including hawks, owls, skunks, and snakes.

Here's an adult vole:


Still cute, right?


Compost

I'm a pretty lazy composter. I keep a bucket of kitchen scraps under the sink, and I add to it throughout the day. Usually I empty it every other day into our outdoor compost bin.


Dad made this bin for me almost 10 years ago, out of reclaimed redwood deck boards. It's not terribly large, because at the time, I wasn't sure whether I wanted a big composting system, or a worm bin. This is sort of both. It's not large enough to generate a ton of heat, so things break down slowly. However, I buy worms every few years to add to the bin, and they speed up the process, not to mention add their castings to the mix.

From the kitchen, we add food scraps (anything trimmed off a veg or fruit), coffee grounds and filters, eggshells, plain white paper towels and napkins, and sometimes even nail or hair clippings. I don't add any dairy or meat products, but if there is leftover moldy bread or pasta, I'll add that as well. I also try to add toilet paper rolls.

From the garden I add leaves and clippings. I usually don't have room for branches. I don't add weeds, because the bin doesn't get hot enough to kill the weed seeds. I often have too many leaves for the bin, in which case we'll put them in our weekly green can pickup, or I'll make a pile and let them mold. Leaf mold is excellent in the garden. I then add the leaves from the pile, to the compost,  whenever I can.

I probably never get the right ratio of carbon and nitrogen. I live by the motto "compost happens" and it always does, no matter what I add to the bin. My bin gets watered every few days by a sprinkler, and once in a great while I'll go out and aerate it. (I can't say what I do is actual 'turning' or 'mixing.' It's usually too full for that, and besides, I'm a lazy composter. I said that, right?)

Then, 3-4 times a year, I'll harvest some compost from the bottom of the bin.

I open the bin.


Then I pull up one of the front two panels, and prop it up with a stick.


This allows me access to the bottom of the bin, where the goods are. Sometimes it's hard to see the good stuff. Our magnolia leaves never break down.


After I dig around a little, this is what I'll find:


I just shovel it out. It's awkward, the angle is hard, and it takes some effort. But it's worth it.


The finished compost is not even and sifted, like store bought. It's wet and rich and bumpy and wonderful.


I use this in my garden as needed. I'll either add it in a hole that I am preparing for planting, or side dress a mature plant. They really love it.

I don't need many tools to access my compost bin. My trusty shovel, and a few long sticks.


I buy 1-2 pounds of red wigglers every couple of years to add to the bin. Usually I just check Local Harvest to see who, locally, is selling worms. They cost about $20/pound. I try to leave them in the bin, when I harvest the compost, but if they come out and go in the ground, that's ok. I imagine some of them dig down under the bin (which is open at the bottom) and make a break for it, but most must stay, as it's a constant supply of good food. Sometimes I'll open the bin and see thousands of baby worms. Most often I see ants, fruit flies, sow bugs, and spiders. Like this doozy who came out to greet me:


No idea what kind of spider this is. I named her 'creepy.' I'm not a huge lover of spiders, but they sure are important in the garden, so I try to appreciate them.

A side note:
When I got my most recent bag of worms in the mail, I took a few in to the classroom where I work, in a jar with some items from the bin. (I am a para for a little boy in First Grade.) I showed the kids the worms, and asked them how many of them compost at home. Not one said yes. I was astounded. I explained the process. The classroom teacher noted the kids interest, and the next time we went to the nature area at school, the nature teacher showed the kids the compost bins and asked them to dig in it, and make a list of all the creatures they found. It was fun to see the excitement, mixed with a little disgust, and a lot of curiosity. This was several weeks ago. Today, two kids told me they started composting at home after that lesson. This made me very happy! Composting is one of the easiest and best things we can do for the earth, and I'm glad kids are learning this at an early age.