A Surprise on the Trail

I get off work each day at 2. I rush home and grab the dog, and we hit the trail for 10 minutes before I have to be at school to pick up my daughter. Today, as Joe and I were walking near Shell Ridge, I spotted a tiny lump in the middle of the trail. I realized it was some sort of creature - a rodent - and as I bent down to look at it, it tried to run away and couldn't.

So I picked it up - it squealed - and deposited it in some soft leaves. There it continued to move blindly, mewling. No mom in sight. Well, I couldn't just leave it there, rat or no. I picked it up and drove one-handed, stopping at home for a small box. I grabbed Kate from school, and we high-tailed it out to the Lindsay Wildlife Museum and Hospital, checking on the creature at every stop light. It was breathing, but it's snout was buried in the corner of the box, and it didn't want to be exposed to light.


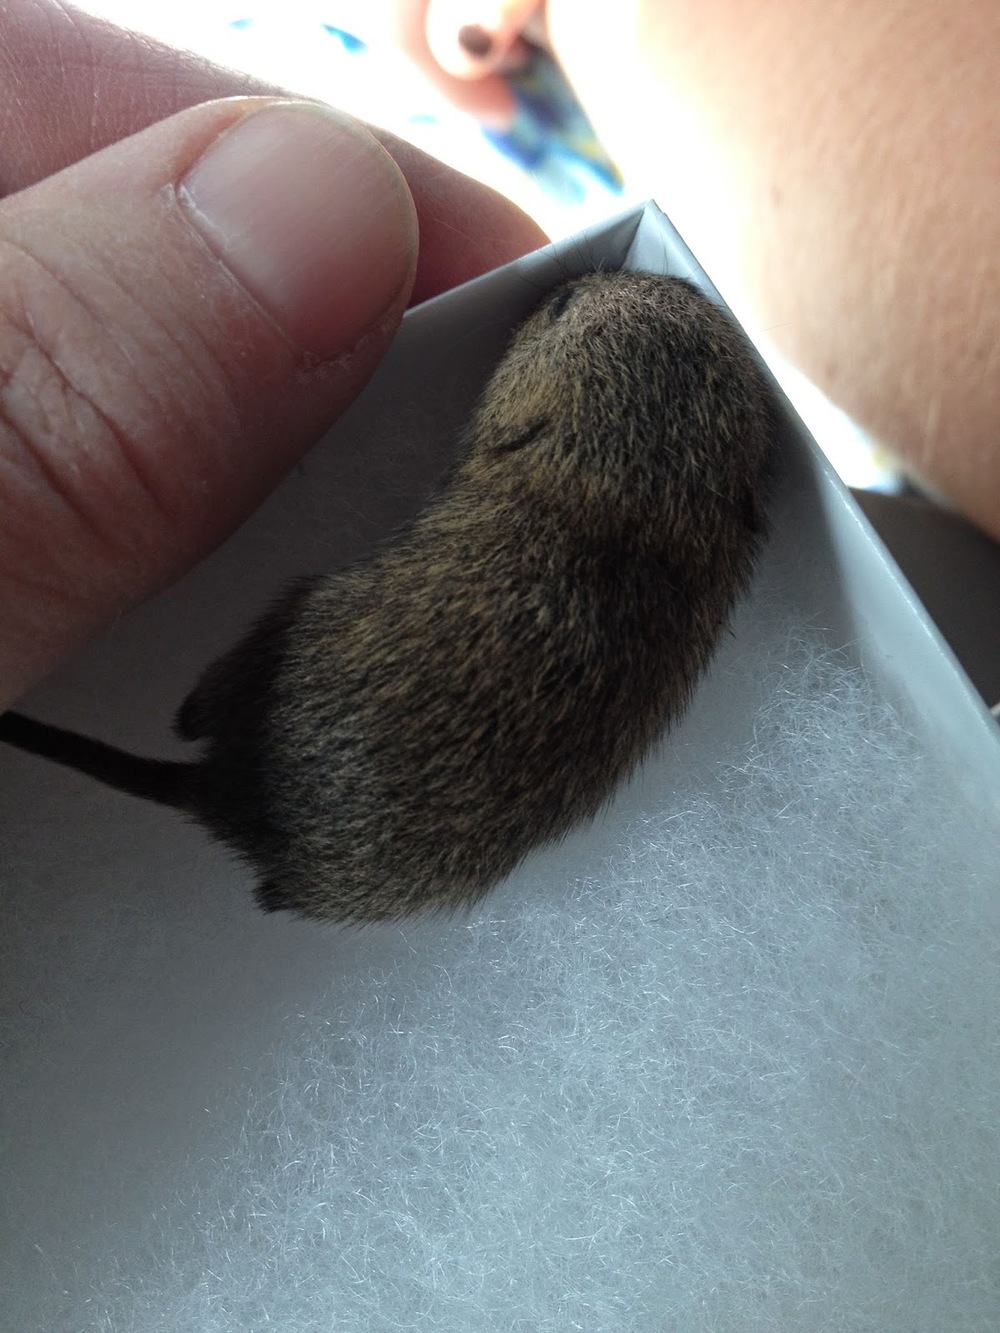
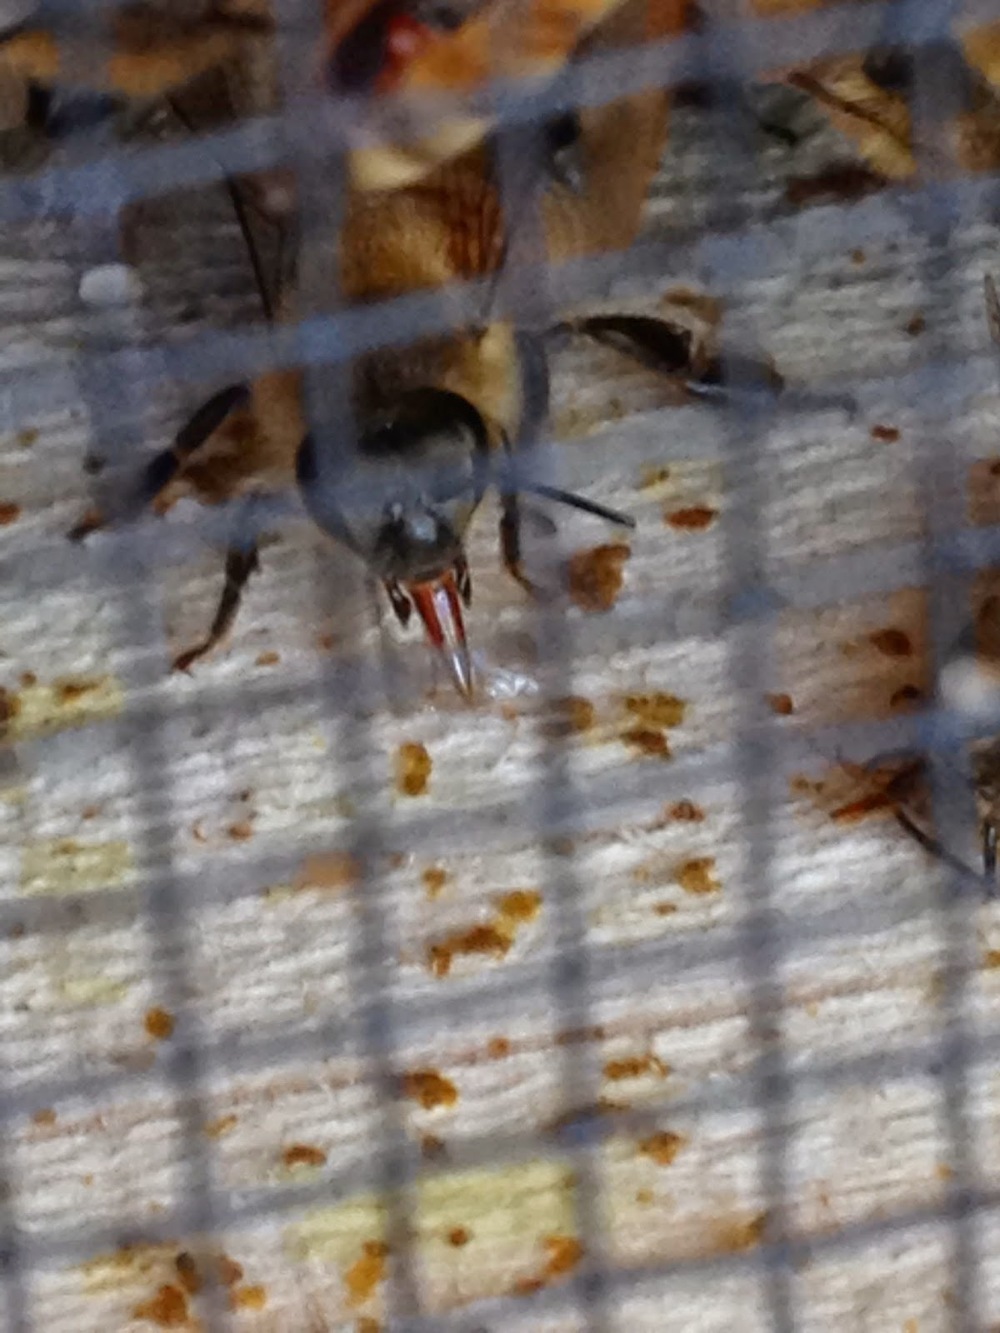
Its tiny eyes never opened, and it didn't put up much of a fight. I was worried. (By the way, that's my thumb in the picture, so you can see how small it was.)

Lindsay is a rescue organization as well as a museum, and they take in any injured creature that folks find. Kate had once found a baby rat near our compost. We took it to Lindsay, where they identified it as a European black rat, definitely non-native and therefore disposable. The helpful volunteer said, with an eye on six-year old Kate, "we'll take care of this rat for you!" while drawing a finger across her neck. I'm sure that baby rat became food for a recuperating owl or hawk. I've never felt bad about killing the rats I found in the compost ever since, knowing that they are non-native and invasive.

However, this little creature looked different. I was pretty sure it was a mouse of some sort.

We dropped it off with the volunteer and waited to hear the news. Turns out, it was a baby vole! They gave me a sheet with a number on it, and told me to call in a few days, to see how the vole was doing.  Well, Kate and I headed off to piano lessons feeling smug and proud, since we had saved a baby vole.

I didn't know much about voles, except that they wreak havoc in the garden. But this one was on the trail, in its natural habitat, so I didn't have to be indignant. Besides, it was so darn cute. Here's what my research turned up:

Baby California voles grow fur at 5 days after birth, but don't open their eyes until 9 days after birth, so this little guy must have been between 6-8 days old. Female voles are ready to breed again 15 hours after giving birth. (Bless them.) The litters are usually 4-5 young, but can be as large as 10 babies. Voles are crepuscular (active at dawn and dusk) or nocturnal, and feed mostly on grasses (if a tasty garden is not nearby). They spend most of their time underground. It has numerous natural predators, including hawks, owls, skunks, and snakes.

Here's an adult vole:


Still cute, right?


Compost

I'm a pretty lazy composter. I keep a bucket of kitchen scraps under the sink, and I add to it throughout the day. Usually I empty it every other day into our outdoor compost bin.


Dad made this bin for me almost 10 years ago, out of reclaimed redwood deck boards. It's not terribly large, because at the time, I wasn't sure whether I wanted a big composting system, or a worm bin. This is sort of both. It's not large enough to generate a ton of heat, so things break down slowly. However, I buy worms every few years to add to the bin, and they speed up the process, not to mention add their castings to the mix.

From the kitchen, we add food scraps (anything trimmed off a veg or fruit), coffee grounds and filters, eggshells, plain white paper towels and napkins, and sometimes even nail or hair clippings. I don't add any dairy or meat products, but if there is leftover moldy bread or pasta, I'll add that as well. I also try to add toilet paper rolls.

From the garden I add leaves and clippings. I usually don't have room for branches. I don't add weeds, because the bin doesn't get hot enough to kill the weed seeds. I often have too many leaves for the bin, in which case we'll put them in our weekly green can pickup, or I'll make a pile and let them mold. Leaf mold is excellent in the garden. I then add the leaves from the pile, to the compost,  whenever I can.

I probably never get the right ratio of carbon and nitrogen. I live by the motto "compost happens" and it always does, no matter what I add to the bin. My bin gets watered every few days by a sprinkler, and once in a great while I'll go out and aerate it. (I can't say what I do is actual 'turning' or 'mixing.' It's usually too full for that, and besides, I'm a lazy composter. I said that, right?)

Then, 3-4 times a year, I'll harvest some compost from the bottom of the bin.

I open the bin.


Then I pull up one of the front two panels, and prop it up with a stick.


This allows me access to the bottom of the bin, where the goods are. Sometimes it's hard to see the good stuff. Our magnolia leaves never break down.


After I dig around a little, this is what I'll find:


I just shovel it out. It's awkward, the angle is hard, and it takes some effort. But it's worth it.


The finished compost is not even and sifted, like store bought. It's wet and rich and bumpy and wonderful.


I use this in my garden as needed. I'll either add it in a hole that I am preparing for planting, or side dress a mature plant. They really love it.

I don't need many tools to access my compost bin. My trusty shovel, and a few long sticks.


I buy 1-2 pounds of red wigglers every couple of years to add to the bin. Usually I just check Local Harvest to see who, locally, is selling worms. They cost about $20/pound. I try to leave them in the bin, when I harvest the compost, but if they come out and go in the ground, that's ok. I imagine some of them dig down under the bin (which is open at the bottom) and make a break for it, but most must stay, as it's a constant supply of good food. Sometimes I'll open the bin and see thousands of baby worms. Most often I see ants, fruit flies, sow bugs, and spiders. Like this doozy who came out to greet me:


No idea what kind of spider this is. I named her 'creepy.' I'm not a huge lover of spiders, but they sure are important in the garden, so I try to appreciate them.

A side note:
When I got my most recent bag of worms in the mail, I took a few in to the classroom where I work, in a jar with some items from the bin. (I am a para for a little boy in First Grade.) I showed the kids the worms, and asked them how many of them compost at home. Not one said yes. I was astounded. I explained the process. The classroom teacher noted the kids interest, and the next time we went to the nature area at school, the nature teacher showed the kids the compost bins and asked them to dig in it, and make a list of all the creatures they found. It was fun to see the excitement, mixed with a little disgust, and a lot of curiosity. This was several weeks ago. Today, two kids told me they started composting at home after that lesson. This made me very happy! Composting is one of the easiest and best things we can do for the earth, and I'm glad kids are learning this at an early age.

Making Things Pretty

I was outside today, admiring the twine trellises Tom made for the clematis. He spent a good two days making these; they took math, knot, and art skills. The clematis' love them, and they are speedily climbing the heights.


Tom also made me some twine pot holders. These are simple, but should last forever.


As I was out looking at the pretty stuff Tom made, I decided to refresh some other places in the garden that needed prettying.

We have cheap concrete stepping stones that provide a path through our back yard, past the water feature, past the hive, by Adam's shed. These I paint with craft paint every few years. I like using bright, fun colors - why not?


They get dull after a few years, so I spend an afternoon and redo them. I'm always so happy when they are fresh. I love the pop. It's a simple and cheap project.

I found some interesting mosaic materials in the garage the other day, so I decided to add them to the stones below the water feature. This fountain is something Tom and I made when we moved in, almost 10 years ago. We dug a huge pit and filled it with water and a pump, then covered it with mesh and the pot, then the stones. It has reliably bubbled for us all these years, and it's been the single best thing we did in our yard for the wildlife. Birds visit this fountain all the time, not to mention larger creatures. We love looking out our kitchen window and watching hummingbirds bathing.

The stones had started to look a little boring, though. And I wanted to make sure the bees knew where to go to safely perch and drink. So, in went all the mosaic materials.


You can really tell which side of the path is awaiting paint, can't you?

I also found a bag full of pretty shells. So I put it around in some pots that are waiting to grow in with coleus. It looks pretty in the dark dirt.


I've always liked looking around people's gardens and seeing little surprises.

We've long collected interesting stones from the beach, and logs from our trees. They add little touches in the yard.


The kids have also added their own flavor, with colored rocks (heat the rocks, then draw on them with crayon - it melts and lasts for years). This one is nestled in some yet-to-bloom nemophila:


All this to say, you can decorate in the garden cheaply, as long as you think creatively and look around the places you visit for interesting collectibles.

That said, I do love when folks give me presents of garden art - thanks Mom!


I have yet to see any real quail in my garden, so it's nice to have these pretty guys around.

Mushrooms

When it's wet in the garden, we notice lots of wild mushrooms popping up on the mulch. Some are lovely, some are quite ugly, but I delight in all of them, knowing that there is a wonderful web of mycelium down in my soil. Mycelium breaks down organic compounds and makes the nutrients more available to the plants. Heavy toxins can be safely consumed by mushrooms and make the soil safer for vegetable growing. If you have a healthy mycelium, you have a healthy soil!

Recently I dug out a neglected part of my back yard, getting some spots ready for some strawberry transplants. When I turned the top six inches over, I found a beautiful webby network of mycelium. Seeing that, along with earthworms in the soil, means our frequent additions of organic matter over the years have really made a difference to our heavy, clay dirt.

A month or so ago I read a wonderful book called Edible Landscaping with a Permaculture Twist, and  there is an entire chapter about growing mushrooms in your yard. On-purpose mushrooms, not the wild ones that come up and are hard to identify. It turns out you can grow mushrooms in almost any decomposing matter; sawdust, wood chips, coffee grounds. I decided to try it in logs.

First I ordered the spore, from a company called Field and Forest. (If anyone knows a more local company, please let me know. I used this one because it was recommended in the book.) The website has a great sort of flow chart that helps you know what to grow in your yard and when. I determined that the best ones for me to try are oysters. So I picked a variety called Golden Oyster, or Pleurotus cornucopaie. I stored them in the refrigerator until we were ready to inoculate the logs.


The amount of interesting things in my fridge continues to grow.

We picked a log of California Live Oak out of my parents woodpile, trimmed from the trees in their yard. And then we trimmed our Chitalpa tree, and kept a small portion of that to inoculate as well. We'll see which one is better for the job - old cutting, or new?

Today we finally had some time to get the job done, so Tom and I assembled our supplies.


The author of the book highly recommends some good beer, but we didn't have any available. We weren't sure we could carry on without it, but we soldiered through.

The log on the left is the oak, chitalpa on the right. We had a drill with a 5/16" bit, the spore plugs, a lighter, some candles, and a hammer.

First Tom marked the drill bit with tape about an inch down, so he would know how far in to drill the holes. Then we started drilling. We placed the holes in rows with the holes about 6" apart. We made 5-6 rows all around the logs.


Then we took out the plugs, which are inoculated with the mushroom spore.


We put one in each hole, then pounded it in with the hammer...


... until the plug was flush with the log.

We did this with every hole.

Then, the instruction is to fill in around each plug with melted beeswax, using an old dish to melt it in, plus a brush. We didn't have any of that stuff. What we did have was old Halloween candles, so we used those.


By the end, the logs looked like they'd been through some weird party, or were wounded.


I placed the logs in our wettest, shadiest spot in the front yard. They'll stay on the ground for the next few weeks, then I'll lean them up against the pepper tree. They'll need to stay wet and cool, even though they are a heat-tolerant summer mushroom.


There's already quite a bit of natural fungus growing on these logs, so I don't know if that makes me more hopeful for the mushroom crop, or less. Maybe the oyster mushrooms will get crowded out by these other fungi. I'll report back and let you know.

Bees!

Several months ago, Dad and I agreed that I would take his old hive to my house, and I would begin to keep bees here at Poppy Corners. I went ahead and ordered a colony of bees, and we've just been waiting for them to arrive.

A couple weeks ago, I was walking the dog in a local park, when I came across this swarm:


I called Dad, and he said we should go pick it up. So, we did. They were attached to a mock orange tree branch, quite low to the ground. All we had to do was suit up, clip the branch, and put the swarm in a cardboard box, which we then taped up. Dad took them home to his house and put them in the old hive. They are doing well there, collecting both nectar and pollen, but Dad isn't sure there is a queen, or at least there are no eggs yet. We'll see what happens in the next few weeks.

Meanwhile I wondered what I would do for a hive, since Dad's was now being used? He said he'd make me a new one, and so then I knew I could choose a different design if I wanted.

You see, most people use Langstroth hives. You've seen these millions of times:


I decided, after much research, that I wanted to try a Top Bar Hive. They look like this:


They don't produce as much honey all at once, you need to check them more often in the beginning and near harvest; but the method seems more natural to me - the bees build their own combs in the shape they prefer - and it seems easier to get inside the hive and see what's going on. Also, I think it's interesting looking. And different.

I remembered a house near the open space where I walk Joe... it had a box in the front yard that looked a lot like this. Dad and I drove up and knocked on the door, introduced ourselves, and asked about the hive. This sweet young couple opened up the hive, in the rain, so we could see inside and take pictures.


Then, they actually GAVE US the blueprints for the hive. This kind of thing seems to happen all the time with beekeepers, what a great bunch of people.

So Dad built me a top bar hive, and it's been waiting... and waiting...

Finally, today I went to pick up my bees! I had ordered a colony of Italians from one of the people at the Mt Diablo Beekeepers Association. Today they had their spring workshop; folks could come pick up the bees they had ordered, watch hives being opened, taste different honey, and get to know each other. It was at someone's house, and there were hives set up all around the yard!


There were large stacks of bees waiting for pick up.


The bees all seemed quite calm.


I wandered around a bit, met some folks, looked inside a few hives, and purchased a hive tool. Then I got my bees. The queen was attached inside in her own cage, inside the big crate. I left with instructions on how to replace the plug of her cage with some candy. The worker bees will eat the candy to get to the queen; this allows them to get to know her before she is released.

The crate of bees rode home on the front seat of the car.


There were several bees hanging on the outside. I guess they were from the yard where these bees were awaiting pick up. I tried to gently brush them off, but they just kept hanging on. During the drive home, two of them let go and drifted around my head and finally out the sun roof. The others remained on the crate. Guess they belong to me, now.


The bees hung out on our cool and shady front porch for the day, until late afternoon when it was finally time to set up the hive and release the bees. Every so often, I would spritz them with a 1:1 sugar/water syrup.


Then the bees would stick out their long tongues and lick up all the sugar water.


Dad came over late today, with the hive. (Experienced beekeepers recommend that you release your bees later in the day, so they have time to get to know the joint and decide to stay, rather than flying off right away to a nicer place. Not that there's a nicer place than Poppy Corners.) We set it up in the backyard, near the water feature, away from heavy traffic.


Then we had a 'rehearsal' of sorts, talking about the process and figuring out the steps. We took off the roof of the hive, and made room in the bars so we could get the bees inside. A top bar hive uses bars instead of frames. The bees build natural comb downward from the bars.


Then we suited up, opened the bee crate and took out the queen.


We replaced the cork in her tiny cage with a candy plug - that's the part that the workers will eat to get to her.


The queen was frantic. I was glad to get her cage attached inside where the workers would start letting her out.


Then it was time to release the workers into the hive. We had to really shake 'em out of that crate.


Finally they were all in, except for a few stragglers who were still hanging out in the old crate. We left that down on the ground beside the hive - they'll figure out where to go.


Then we closed it up, and hung out and watched the bees explore their new home.


This is the entrance. Next to it is a feeder; they'll need food for the next few days, maybe even longer, while they build comb. Soon they'll start collecting nectar and pollen, and it won't take long before they can feed themselves. Meanwhile, I'll keep the sugar syrup feeder full.


All done. Isn't that hive gorgeous? Aren't the sawhorses cute?


Poppy Corners has a beehive!


Now, how am I going to tear myself away from watching them???