• About
  • Blog
  • Contact
  • Favorites
  • Archive
Menu

Poppy Corners Farm

Street Address
Walnut Creek, California
Phone Number
Walnut Creek, California

Your Custom Text Here

Poppy Corners Farm

  • About
  • Blog
  • Contact
  • Favorites
  • Archive

Always a Trade-off

January 15, 2019 Elizabeth Boegel

I have a confession to make. For the past many years, we’ve been using paper napkins. I don’t know why we had this disconnect…. perhaps it has something to do with the transition from having kids to young adults, and we’re behind in making that transition. Neither Tom nor I grew up with paper napkins, but when kids are little, it sure is handy. And I would comfort myself that many of those used napkins would go in our compost, to be reborn in our garden. But many went in the trash. What a waste of resources.

Likewise with paper towels. I tend to reach for them more than for the cloth towel that is hanging on the oven door.

Recently I somehow woke up to the fact that this was happening, and set about making a change. My mother has bins upon bins of unused cloth napkins and was happy to gift me a pile. I found cute napkin rings on Etsy which makes it more fun. I started putting cloth napkins in the kid’s lunch bags. And I asked my dad to figure out some kind of cloth towel rack that would sit next to our sink, in place of the paper towel rack. He immediately adapted an old Shaker design for a quilt rack and made me this beautiful thing.

IMG_2172.jpg

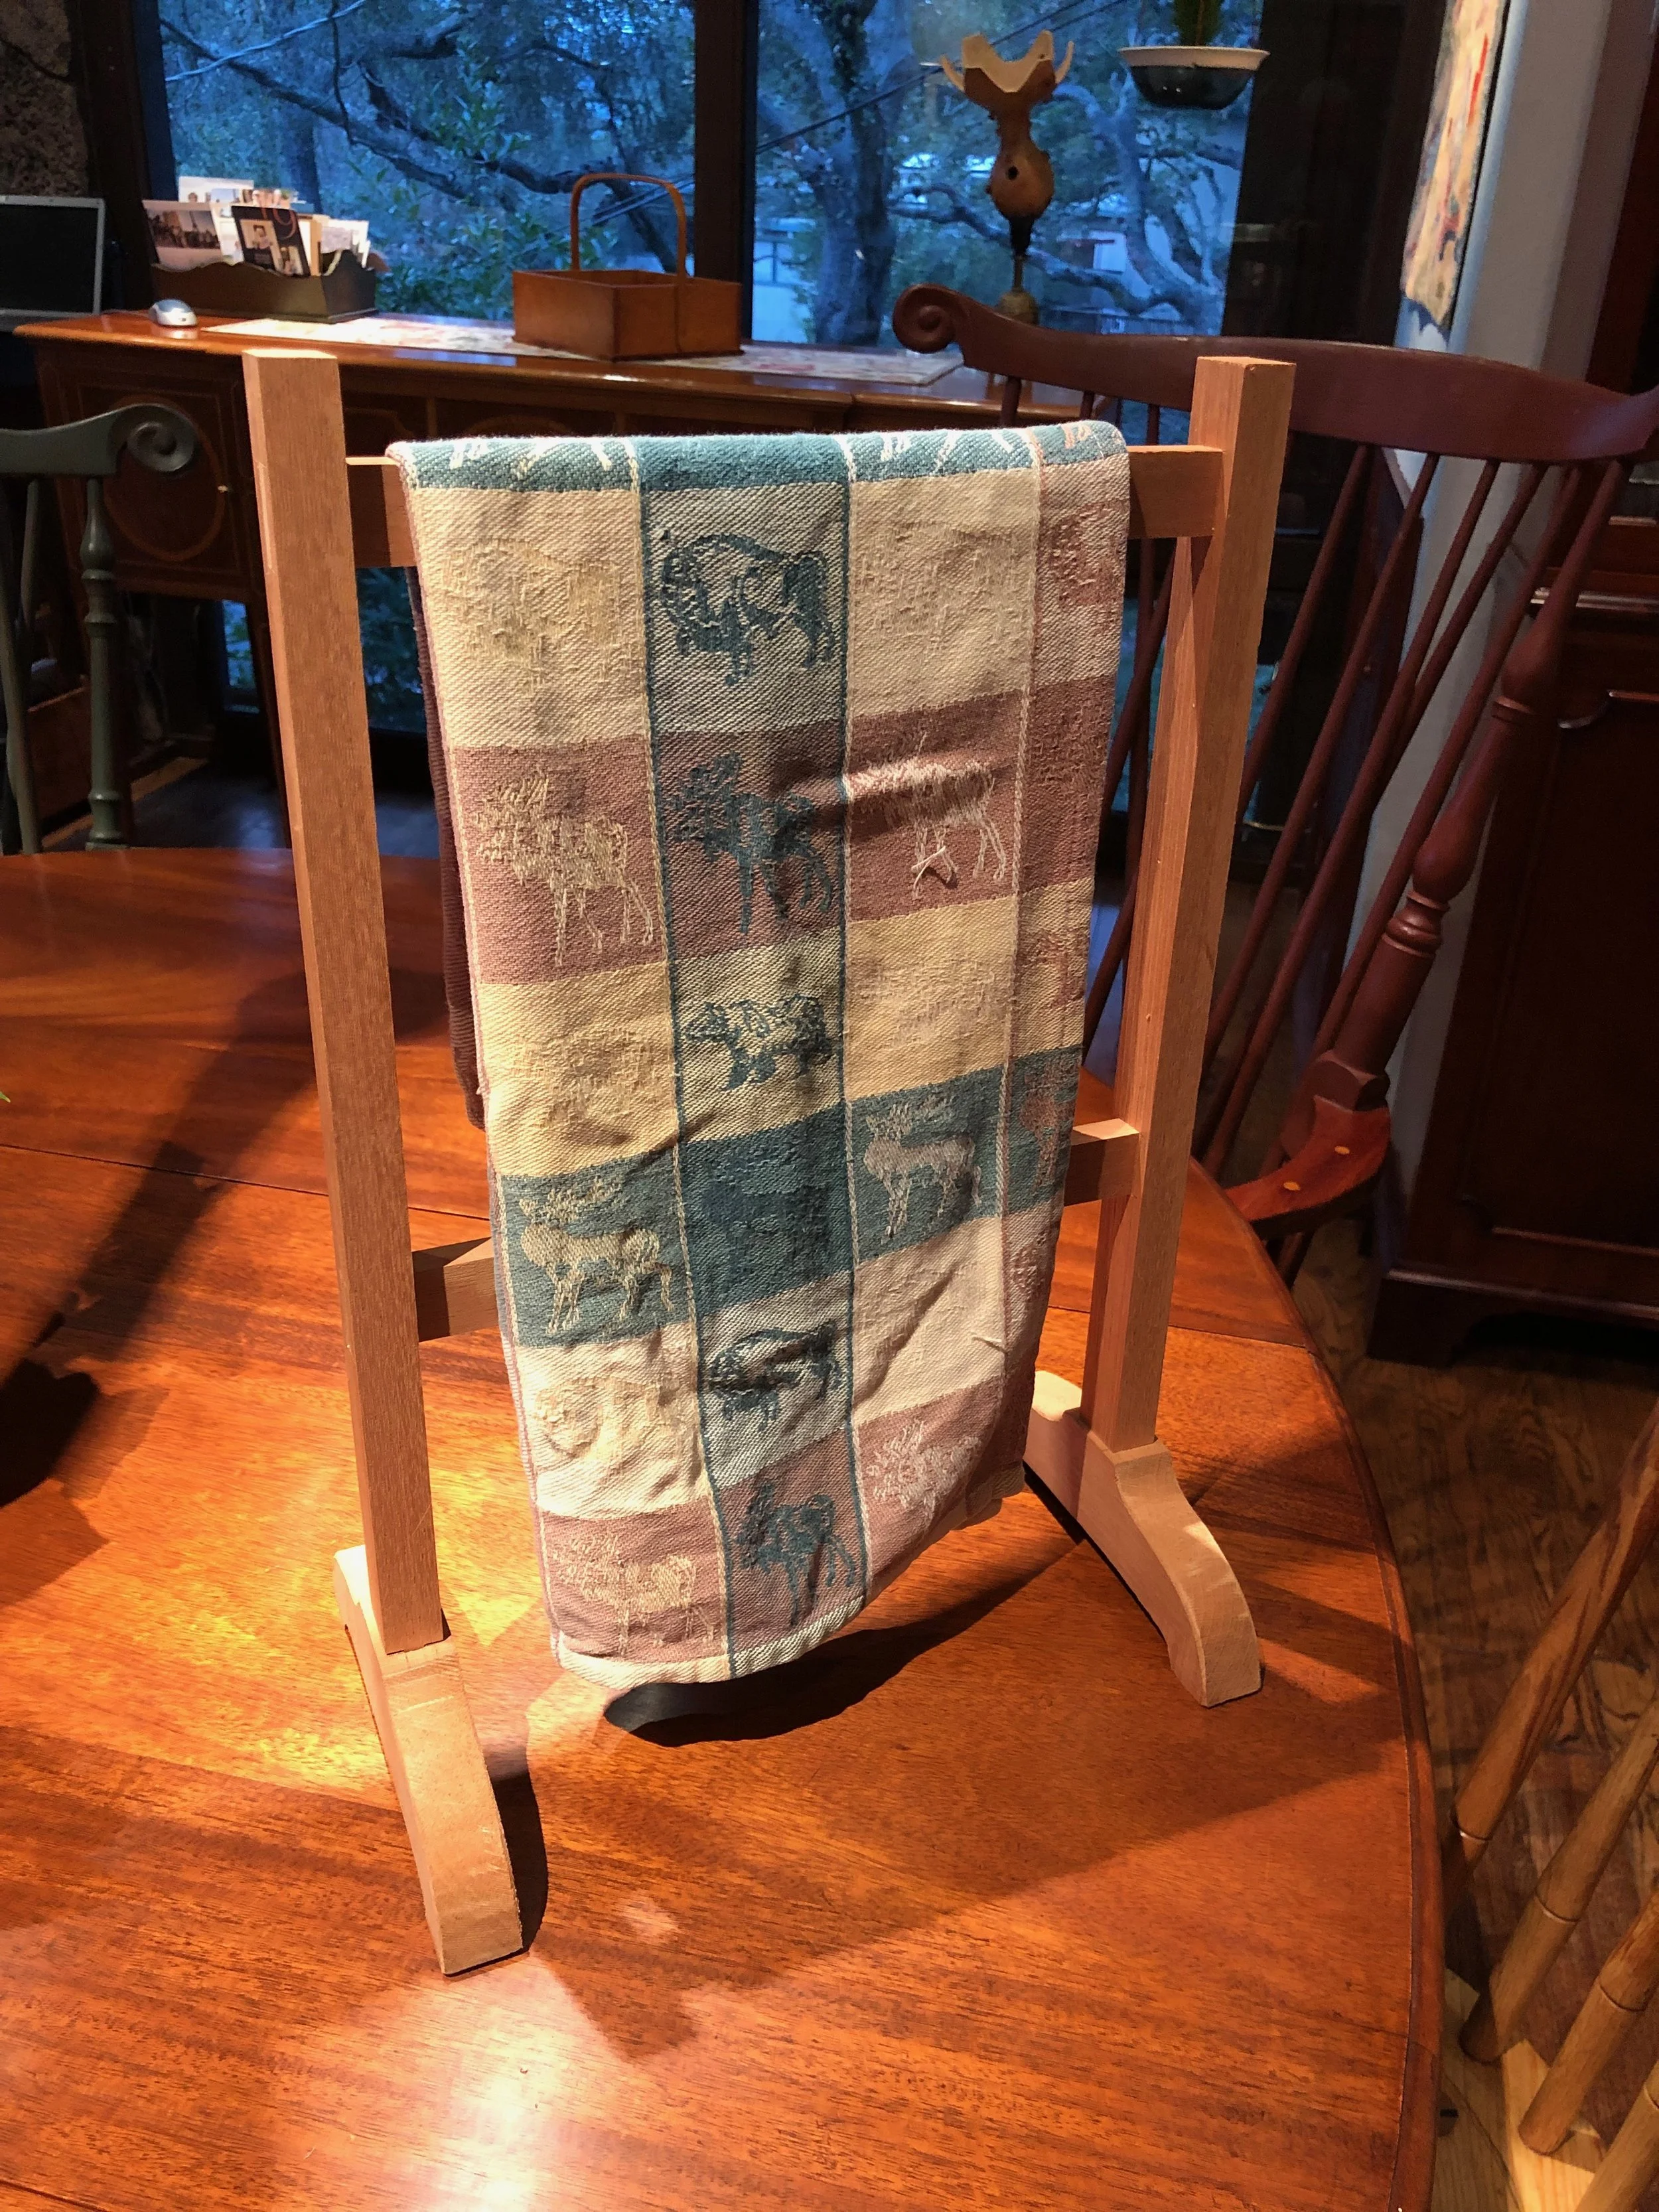
I have a million cloth towels, so changing it out every couple of days is not an issue. And we won’t forgo paper towels entirely, I imagine. But just putting this in arm’s length, right next to the sink, will eliminate most of our paper towel use.

I recently, also, cleaned out our linen closet, and we had so many old towels and rags. There’s only so many that need to be saved for cleaning or painting; and so, when I packed up the Thanksgiving and Christmas items, I used these to cushion breakable things, instead of replacing the old ratty packing paper with fresh packing paper. It felt good to find a purpose for those cloths.

Tom also goes through undershirts; you know, those white t-shirts, and has to buy new ones a couple times a year. I had a pile of them that I wasn’t sure what to do with, and finally realized that I could spend 15 minutes cutting them into strips and storing them for summer, to use as tomato or pepper ties. And at the end of the season, they can be composted, since they are 100% cotton.

So all of this was making me feel pretty good! Maybe a little self-righteous… walking around like I had my stuff together, man. Then I went to do laundry. And I realized: All this stuff has to be washed. Which is fine, I don’t mind washing and folding (by the way, I love the Marie Kondo way of folding, I’ve become a convert), but WHAT ABOUT WATER? Isn’t that just as precious a resource as trees (which make paper)?

And so, chastened, I was newly cognizant of the fact that there is always a trade-off. Sure, you can argue that I’m doing laundry anyway, so adding these little towels and napkins isn’t that big a deal, and you’d be right about that. But it IS still using resources. No method is perfect. I mean, you can find this everywhere - like my seed starting mix from the other day. I’m not using peat, because it’s not renewable, but I AM using coconut coir, which comes from palm trees, which are a by-product of the coconut water and milk industry, which has it’s own BIG issues, not the least of which is shipping those coconuts to the United States. Or how about our electric car? It doesn’t use any oil, true, but it does use electricity, which in CA is partly wind-powered, partly water-powered, but also coal-powered.

I think, therefore, that we can’t be perfect. All we can do is make a better choice. And honestly, that takes some pressure off. We weigh our paths, our goods, our consumerism. And we make a knowledgable, conscious choice. That’s all we can do, really.

IMG_1408.jpg

In other news:

I think we may have a skunk living under the train shed with the opossum.

My dad has a new website for his woodworking. You can access that site HERE. There are dozens of furniture plans available, along with step-by-step YouTube videos instructing you how to make them. Tom redesigned this website to make it more user-friendly, and I hope you’ll stop by and check it out, if for nothing else than to view the gorgeous period furniture.

Today is the 15-year anniversary of our son, Adam, being diagnosed with leukemia. He’s the healthiest person we know, now.

Tags learning, environment
Comment

Soil Blockers

January 12, 2019 Elizabeth Boegel
Our friend the opossum, making her way along the fence about 8 a.m., back to Adam’s train shed, under which she has lived for many years

Our friend the opossum, making her way along the fence about 8 a.m., back to Adam’s train shed, under which she has lived for many years

I do a lot of seed starting, beginning now with spring flowers, and then in March all our summer veg, and then again in August for winter veg. I go through a lot of seed mix and I have used and re-used those flimsy plastic seed trays for years. There’s a lot of problems with those seed trays; they tear and break easily, you have to dig out the seedlings to pot them up which often hurts the roots, and they don’t sit well in the flats that are made to go with them. They’re standard: Everyone uses them, but everyone rather dislikes them. Me especially.

I’ve experimented with other ways of starting seeds. You can put them in half an eggshell, you can make little paper pots for them, you can buy ‘cow pots’ made out of manure. You can start them in peat pellets, but peat is a very unsustainable medium. I just wanted a better way. And then I started hearing about soil blockers.

image credit: Lee Valley Tools

image credit: Lee Valley Tools

People seem to have great luck with these little machines. I figured it was worth a try and asked for them for my birthday. Tom ordered two sizes for me - one is a block of 3/4” squares - there are 20 of those squares in the block. The other is a block of 4 2x2” squares. I experimented with them today to start Iceland Poppies, along with some other seeds. The tiny blocks were good for the poppies because I just scattered the seed over the whole block, those seeds are so tiny. The larger blocks are good for bigger seeds, like sunflowers or beets.

IMG_1466.jpg

The trick is to really saturate your soil mix. I used an organic seed starting mix made of shredded coconut coir and perlite, with organic worm castings mixed in. You really add a lot of water and let it sit awhile to hydrate. This makes it easier to form the blocks. I have to say that the larger blocks were MUCH easier to make than the small ones.

My examples are not terribly good because I need to put the soil blocks closer together. Otherwise when you water them, they spread all over the place. I’ll just use a spray bottle on these, but in the future, the soil blocks will cover the trays with no gaps between blocks.

IMG_1463.jpg

One really nice thing about these soil blocks is that you don’t disturb the roots when you transplant them, as you lift the block of roots out whole. No digging, no pricking out, no separating roots.

A lot of folks make wooden trays in which to hold these blocks; three sided trays so the water can run out the other side, and you can slide out the blocks to plant them in your beds. I knew we did not have a lot of time to be building wooden trays; hopefully we’ll make some in the future. Meanwhile I bought some trays I had seen at the Heirloom Seed Festival in Santa Rosa in September. They are made by Bootstrap Farmer. They are super sturdy and will last for years. Plus, they come in fun colors.

The ones on the left are called ‘microgreen trays’ - see how they have a slight bit of drainage in the bottom? These are good to put the soil blocks in. Then I set that tray on top of a regular tray, like the ones on the right, to catch any water, which I reuse. I’m really happy with these trays. Not cheap, but certainly will last longer than those cheap ones.

I seeded a bunch of different flowers today, and those trays are in the greenhouse. It’s really to early to do much of anything, but I wanted to see if I could get those (notoriously difficult) Iceland Poppies to germinate in the next month, so I can plant them out as soon as it starts warming up in February. I also sowed-in-place a million California poppy, Clarkia, Phacelia, and California bluebell seeds all over the pollinator gardens. Hopefully we’ll have a good show in a month or so.

Tags flower garden, seed starting, recommendations
4 Comments

January Cooking: Using up a Stored Supply of Goods

January 9, 2019 Elizabeth Boegel

January can be a depressing month in the kitchen, especially if you aren’t growing anything in your garden. Since we’re lucky enough to live in a mild climate, January in our garden means all-you-can-eat greens, with kale, lettuce, and chard the star of the vegetable beds, and we love picking them for sautéing, salads, gratins, and frittatas. But man cannot live by greens alone (or at least this one can’t). The broccoli, cabbage, and cauliflower are just starting to produce heads and are still a month or so off. The parsnips are just about ready. The peas that are flowering and producing are getting eaten by me straight off the vine; there aren’t enough to pick for the family. Carrots have lovely foliage but not enough root to pluck out for a meal.

Fortunately, we’ve got plenty of food we dried, canned, or stuck in the freezer back in the summer and fall, as well as stores of winter squash, shallots, and garlic that we’ve got hanging about in cool places. In the busyness of harvest, it’s hard to fathom why we stand over a hot canner or dehydrator, but January makes those days worth it. And even if you haven’t prepared ahead, these things are (mostly) readily available in the store for you to purchase.

IMG_1433.jpg

BEANS

One of the best things I did this summer is allow a good portion of my ‘Rattlesnake’ pole beans to dry on the vine. I finally pulled them all up and spent a good week shelling them, yielding about a quart of dry beans. Not only do I have enough to plant again this spring, I’ve also been doling them out a cupful at a time in the kitchen. If you don’t have dried beans, you can buy very fresh dry beans from a reputable place. I like Rancho Gordo, as they sell only the previous season’s beans, and they are local to me. Soaking dry beans requires some preparation (remembering the night before, and then cooking them in the morning before preparing a dish), but they taste great. However there is absolutely no shame in buying canned beans - they are easy and fast and delicious and good for you. I prefer the organic brands with lower salt, but get whatever you can in a pinch. Beans have that special thing that’s hard to describe: They satiate. They make your stomach satisfied. They ‘stick to your ribs.’ This is a quality that’s necessary in winter food, whether you’re in deep snow in upstate New York, or soggy, foggy Northern CA.

We’ve had two bean recipes lately that were simply delicious, and I include them below. A lot of bean recipes also include canned tomatoes, which brings me to…

TOMATOES

We just can’t get enough tomatoes. No matter how many I preserve, we always run out long before the first fresh cherry tomatoes make it into our kitchen in June. I put up tomatoes in numerous ways: Canned, as crushed, as sauce, in salsa; frozen, as chunky tomato-basil sauce, tomato paste, or whole; and dried, in slices. I like to add the dried slices to grilled cheese sandwiches (while the men in my family prefer to add dried or frozen jalapeno slices). The chunky tomato sauce from the freezer is used for either pasta or shakshuka. All the other tomatoes get used up mostly in our dinners. I recently found a recipe for a roasted tomato soup that blew us away. See below for that recipe.

WINTER SQUASH

All winter squash varieties can easily be stored in a basket or bin in your coolest room. They will keep for months this way. We grow a good amount of butternut squash, and enjoy eating them for months after harvest. Still, we run out before we stop wanting to eat it, so it’s brilliant that there are still squash available in the stores. Acorn and delicata are also usually available in January, as well as other heirloom varieties like kabocha.

I usually resort to roasting squash with olive oil and salt and eating it that way (with ricotta on toast, as a side dish, as a hash with eggs and any other veg), but it’s nice to have a fancier recipe on hand for company or events. The one below is delicious and satisfying.

IMG_0766.jpg

PEPPERS

I mainly freeze or dry peppers (both sweet and hot) to use throughout the year as a seasoning. But we do also use frozen strips of pepper for fajitas all winter, as it’s a quick and easy dish that we all love to eat, and makes great leftovers for a packed salad lunch the next day. We especially love fajitas in the summer with fresh sweet peppers, but it’s not unpleasant to eat frozen in the winter as well. You can use any color sweet pepper for this, and if you haven’t frozen any from your garden, you can easily find them frozen at your grocery. Recipe below.

I also make romesco sauce in the summer and stash it in the freezer. This makes a zingy sauce for steaks or roasted veg all through the winter. Recipe at the link.

Hot peppers, whether dried, frozen, or pickled, make an excellent condiment for many meals in dark months. Adam and Tom like them on sandwiches, sprinkled into soup, tossed with pasta, and with charcuterie like salami or prosciutto. To that charcuterie plate, they also add other pickles, which brings me to…

CUCUMBERS

Tom makes oodles of pickles over the summer, mostly from cucumbers but also from carrots, beans, and hot peppers. You couldn’t imagine, honestly, anyone eating this many pickles, but eaten, they always are. Tom and Adam especially like to eat them as a side at lunch with a sandwich and chips. They like them all - spicy, dill, garlic, bread n’ butter, sweet. I prefer them fermented and always make a jar of half-sours, but those go fast and early with my own lunches. The rest of winter is filled with the crunch of canned pickles. Tom says that using ‘pickle crisp’ (calcium chloride) is the best way to keep them crunchy.

GARLIC/SHALLOT/ONION

Except for this past year (in which we had a crop failure for alliums), we always have abundant garlic and shallots hung in braids on every available Shaker Peg Rail. Nothing will make your meals taste better than a good addition of some sort of allium. Having plenty about (organic, if you can find it) is a sure-fire way to make your dinners taste even better. I also freeze some cloves each year so I can take those out as needed. I add garlic to nearly everything, but it also tastes wonderful roasted and spread on toast or added to soup. And we’ve already talked about using caramelized onion.

CITRUS

The only fresh fruit we consume this time of year is citrus. We have several neighbors with trees and they are generous in sharing, but the stores all carry wonderful seasonal oranges and grapefruits. It’s fun to try all the different varieties as they become available. I always love the first Satsuma mandarins, and Cara Cara oranges are also favorites of ours. Fresh lemons are squeezed into several pints of juice for the freezer, and if I get a chance, I dry some slices and some zest for cooking and baking the rest of the year. Usually we make some sort of marmalade with any excess citrus given to us from neighbors, or lemon curd, or any kind of orange or lemon loaf cakes, which brighten up cold nights.

OK! Below are the recipes I’ve talked about. If you try one, let me know how it goes. I’d also love to hear about your favorite meals for wintertime, using what you’ve preserved or are growing - I always need new dinner ideas!

All of these recipes are geared for four people with 2-3 servings as leftovers. So I guess you could say each recipe is for 4-6 people. It just occurred to me that most are vegetarian. We are not vegetarian, but have consciously been trying to eat less meat. Some, like the squash recipe, is more a side dish but could be pumped up with the addition of a little marinated tofu.

“Chunky Tuscan Bean and Kale Soup (made pasta e fagioli style), adapted from ‘Salt Fat Acid Heat’ by Somin Nosrat

Olive oil
Pancetta or Bacon, 2 oz (or omit for vegetarian)
Yellow onion, medium, or two shallots, diced
2 celery stalks, diced
3 carrots, diced
2 bay leaves
salt/pepper
2 garlic cloves, thinly sliced
1 pint crushed tomatoes in juice (or 15 oz can)
3 cups cooked beans (about 1 cup fresh), with cooking liquid included
I oz grated parmesan (plus more for serving) plus the rind
3-4 cups chicken stock (or veg stock for vegetarian)
2 bunches of kale (or spinach, or chard, or whatever you’re growing), stems removed, chopped
3/4 cup uncooked pasta (small shape)

Heat a tablespoon of oil in a large Dutch oven or stockpot over medium-high heat. Add pancetta or bacon and cook, stirring, until just beginning to brown. Add the onion, celery, carrots, bay leaves, salt and pepper. Reduce heat to medium and cook about 15 minutes. Stir frequently. Add garlic, cook 30 seconds. Add tomatoes. Simmer for about 10 minutes, then add beans and cooking liquid, the pasta, the parmesan and its rind, and then enough stock to cover. Add some splashes of olive oil. Bring to simmer and stir frequently. Add kale (or whatever) and bring to simmer again. Cook until tender, about 20 minutes. Add salt if needed. Add more stock if needed. Fish out the parmesan rind and the bay leaves, and serve with extra grated parmesan and a fresh crusty bread.”
“White Bean and Mushroom Gratin, adapted from Cook’s Illustrated

1/2 cup olive oil, divided
10 oz mushrooms, trimmed and sliced
salt and pepper
4-5 slices of thick country bread (something you’ve baked, or a French boule, etc), cut into cubes
1 cup water
1 T flour
1 small onion or large shallot, finely chopped
5 minced garlic cloves
1 tablespoon tomato paste
1-ish teaspoons of thyme - fresh or dried
1/3 cup dry white wine or sherry
2 15-oz cans white beans (or make your own fresh, about 1-1/2 dry beans or maybe 2 cups, and save cooking liquid)
3 carrots, chopped in 1/2 inch peices

Heat oven to 300. Heat 1/4 cup oil in ovensafe skillet over medium high heat. Add mushrooms, some salt and pepper, and cook, stirring occasionally, until mushrooms are well browned, 10-12 minutes. While they cook, toss bread, 1/4 cup olive oil, and some pepper in a bowl (you can add parsley if you like it, I don’t). Set aside. Stir water and flour together until there are no lumps; set aside. Reduce heat to medium, add onion, cook until onion is translucent, 5 or so minutes. Reduce heat to medium-low, add garlic, tomato paste, and thyme. Cook, stirring constantly, until bottom of skillet is dark brown, 2 or so minutes. Add sherry or wine to deglaze, and scrape up brown bits. Add beans and their liquid (maybe 1/2 cup of water if you made the beans yourself), carrots, and flour mixture. Bring to boil on high heat. Then remove from burner. Arrange bread mixture on top in even layer. Transfer skillet to oven and bake 40 minutes. Then turn on broiler and broil until crumbs are brown, checking frequently (4 minutes or so). Remove from oven and let stand 20 minutes before serving.”
“Roasted Tomato Soup with Broiled Cheddar, adapted from Smitten Kitchen

3 lbs tomatoes (I let whole tomatoes from the freezer defrost and used these, with the liquid that comes off them in the defrosting process)
2 tablespoons olive oil
2-4 cloves of garlic, or more, don’t peel
fresh or dried thyme, 1/2 to 1 teaspoon
crushed red pepper to taste
4 cups chicken stock (or veg for vegetarian)
thick country bread, four slices or leftover cubes
raw (chopped finely) or caramelized (slices) onion
grated cheddar, 1-2 cups

Heat oven to 400. Wrap garlic cloves, with a drizzle of oil, tightly in foil. Place tomatoes whole in a casserole dish with liquid/juice from defrosting, or if using fresh (summer only!), cut in half and place on cookie sheet. Drizzle with olive oil and sprinkle with salt and pepper. Put both tomatoes and garlic in oven and roast for an hour. Let cool slightly. (Then turn down oven to 350.) Unwrap garlic and pop out cloves, add to blender ( I used about six cloves). Add tomatoes and juices to blender too. Puree. Transfer to medium pot, add crushed red pepper and stock, and bring to boil. Then simmer for about 25 minutes uncovered. I then added just a splash of heavy cream but you don’t need it. Put four ovensafe bowls on a cookie sheet and add soup to bowls. Then top with raw or caramelized onion, then bread. Smitten Kitchen makes it into rounds, butters them, and outs it on the soup that way, but we all agreed it would be better toasted or even as stale cubes, to give some texture to the soup (butter unnecessary). Then top with shredded cheddar. Put in 350 degree oven and bake 15 minutes. You can broil if you want a darker top.”
“Roasted Butternut Squash with Goat Cheese, Pecans, and Maple, adapted from Cook’s Illustrated

@3 lb butternut squash
3 tablespoons unsalted butter, melted
salt/pepper
2 tablespoons maple syrup
pinch cayenne
1-1/2 oz goat cheese, crumbled
1/3 cup chopped and toasted pecans
2 teaspoons fresh thyme (or a little less dried)

Heat oven to 425. Peel squash and remove seeds. Then cube. Toss with melted butter, salt, and pepper, and arrange in single layer on cookie sheet. Roast until the squash on the back side of the sheet is well-browned, around 30 minutes; then rotate the sheet and roast another 10 minutes. Flip pieces over and roast another 10-15 minutes. While squash roasts, stir maple and cayenne together in small bowl. When squash is finished, transfer to a large serving platter and drizzle maple mixture over it. Then sprinkle the goat cheese, pecans, and thyme over the squash, and serve.”
“Fajitas, our way

2-3 lbs flank or skirt steak
olive oil
lime juice
soy sauce
garlic cloves
a good amount of fresh (only in summer) or frozen sweet peppers, any color
flour or corn tortillas (handmade if you have time, but store-bought are fine)
salsa (off your canning shelf? or store-bought)
guacamole (homemade if you have access to ripe local avocados)
caramelized onion or shallot - more than you think you’ll need

Marinate the meat in a good amount of soy sauce, lime juice, olive oil, and garlic. Overnight is best, but just do it for as long as you are able. Then take meat out of marinade and grill or broil. Slice against grain.
While meat is cooking, saute or roast peppers with olive oil and salt, and caramelize onion or shallot. Warm tortillas in foil in oven.
Let everyone assemble their own fajitas at the table. ”


Tags seasonal recipes, cooking, preserving
2 Comments

Raptor Day

January 4, 2019 Elizabeth Boegel
My manzanita is blooming!

My manzanita is blooming!

Do you remember me telling you about the rat problem?

To sum up: 2018 was the year we were inundated with roof rats. This is not uncommon in our neighborhood, which 100 years ago was part of the foothills leading to Mt Diablo. Well, it still is part of the foothills, but now it’s covered with houses. Living this close to open space and a state park means that we get wildlife of all kinds in our suburban yards - and most of the time we love that. The line of cars on the way to the freeway every morning, folks in a hurry to get to work? stops completely when a rafter of wild turkeys wants to cross the road. Folks with small dogs like chihuahuas and terriers? they keep ‘em inside when hearing reports of a coyote roaming the streets. Depending on the season, you’re likely to see whole families of deer munching on whatever they can find, and the opossums who make their nests under our outbuildings. Raccoons, moles, voles, snakes, foxes, we’ve got it all. But this past year, the rats were out of control.

And it wasn’t just in our house; most of our neighbors were also complaining of a surfeit of rodents. We would have guests over to eat, and as we sat around the farm table on the patio enjoying twilight and home brew, we’d see whole groups of them skittering along the fenceline. While we were accustomed to it, it put guests off, I can tell you. And when the rats moved into the walls of our home, we declared war. It took the better part of the year to figure out every single way they were getting into the house and close it off. We had vector control come out. We refurbished our garage door so it would shut tight against the floor when closed. We hired a guy to climb all over the roof and figure out where to put hardware mesh to close off holes. I checked and re-checked the protection around the chicken coop and food. We bought bin after bin for the garage to house anything remotely food-like, even potting soil. We had to get a new dishwasher because rats had chewed the water line in our old one and shorted it out. We stopped composting. We set traps. We set more traps. There were traps everywhere. We also had rat mites - a microscopic bug that lives on rats which moved on to biting some of our family, the itching driving them, sleepless, slowly out of their minds. The same hired rat guy spread a ‘safe’ sort of dusty poison in our crawl space and attic, several times, to kill the mites. It went on and on. The rat guy came every Wednesday and every Wednesday he found new places to fortify. It was crazy. We resorted to a Vitamin D-based poison that kills rats but not the things that eat rats.

Eventually, we did get a handle on the problem. We no longer have them in our house. But I just got a text from a neighbor asking about the guy who came out every week and could they have the contact info? because everyone in their house is itching like mad. So I know the rats are still out there. They are non-native and have found a very good home here, where every third house keeps chickens, everyone has dog or cat food lying around, folks feed the birds, and everyone composts.

Remember when we talked about insects, and about the prey-predator balance? There is always more prey than predator. This was the case with the rats. I pleaded to the trees every day: Where are you, hawks? Where are you, owls? I pleaded with the woodpiles too: Where are you, snakes? I all but did dances, shaking instruments and ululating. Praying, but instead of saying “come, Lord Jesus” I was saying “come, predators.” When would the balance be restored???

January 3rd, 2019, that’s when.

imagine credit: Evan Lipton, Macaulay Library

imagine credit: Evan Lipton, Macaulay Library

I know I posted before about the Cooper’s Hawk hanging out in our yard, hunting the little birds. Yesterday I watched her nab one, then sit on the fence for a good two minutes before flying off with the bird in her talons. Where there’s one hawk, there are others - and rats are good food for them too. I have also recently seen Red Tail Hawks circling our yard. The chickens know to head inside where they can’t be seen, when a hawk is overhead. They are on high alert.

image credit: Tony Varela, Macaulay Library

image credit: Tony Varela, Macaulay Library

Last night, we also heard a Great Horned Owl for the first time in a while. They have a very loud and striking call. This particular one was quite close, in our neighbor’s oak tree right across the street. They are voracious predators of rodents. They have a huge range in their diet and will eat almost anything, but small mammals are their bread-n-butter. They also eat squirrels.

image credit: Darren Clark, Macaulay Library

image credit: Darren Clark, Macaulay Library

We also heard a Barn Owl for the first time last night in a long while. I remember the first time I heard one and I thought, naturally, ‘that’s a screech owl.’ Because barn owls screech, or ‘scream.’ Screech owls actually have a very nice hoot. So how did those two get mixed up, way back when???? Anyway, the scream of a barn owl is quite startling. Last night there was one in close proximity to the Great Horned Owl and they were singing a duet of some kind. I was desperately hoping they were Game-of-Thrones type war cries, and the rats would soon see their doom.

After we both stood out in the cold, shivering and listening for a while, Tom declared it ‘Raptor Day.’ And so it was. Here’s to more of them, and less of the rats. And come summer, I’m hoping to have a ‘Snake Day.’ I shall report if it becomes so.

Predators always come. It’s a mantra worth repeating.

Today, however, I have declared it ‘Bread and Bean’ day. I am cooking up some of the rattlesnake beans I dried and saved this past summer, and making a bean and kale soup, or maybe pasta e fagioli. I haven’t made bread in two months, so that’s happening too, and it’s nice to have a warm and sourdoughy kitchen on a cold day.

One of my professors is teaching an Edible Landscaping class this spring and has asked for my help. I’m not sure how much help I can give, because I have a very full class load, but one thing I can do is share seeds. I spent some time clearing out old seeds and organizing what I have left, and then I put in five big orders: for veg, at Seed Savers, Baker Creek, and Johnny’s; for flowers, at Renee’s and Floret Farm. Tom also gave me some flower seeds from Larner which need sowing now. Anyway, I have plenty of seeds to share and it will be fun to swap with my teacher and try some of his varieties. I’ve got my beds laid out for summer planting (on paper that is) and it’s fun to think about the coming season. My teacher said “you’re so organized!” and then I told him how I’d gone out the garden a couple days ago and found three huge Daikon radishes that I don’t remember planting. So how organized am I, really?

We ate these, pickled with carrots, in Bahn Mi sandwiches last night, yum.

I’ll share my summer plans and seed varieties with you as we get closer to planting time. Meanwhile I’m imagining that we are all doing the same thing right now - planning and buying. It’s winter’s chief joy for gardeners. :)

Tags wildlife, IPM, vegetable garden, cooking, preserving
Comment

Happy New Year!

December 31, 2018 Elizabeth Boegel
Frittata made with our chicken eggs, kale from the garden, and freshly fermented cheese

Frittata made with our chicken eggs, kale from the garden, and freshly fermented cheese

All the holiday decorations have been put back in the garage, and the house is clean and bright for a fresh start in 2019. Outside there is quite a gale - I like to think the wind is blowing away 2018 and bringing in the new year. Tom and I will fall asleep long before midnight, but perhaps the kids will manage to stay awake.

One thing we like to do around now is set a theme for the garden for the coming year. 2018 was the year to ‘Improve the Soil,’ and I definitely think we accomplished that, even without the proof of any nutrient or soil-life lab test. The testimony is in our delicious produce and thriving, healthy ornamental plants and trees.

Of course, soil improvement is not something you can accomplish in one year; it’s taken us 15 years on this property and six dedicated years of best practice to get where we are today. However, as a ‘last gasp’ in our soil improvement year, we had 20 cubic yards of free wood chips delivered from a local tree company. We’ve spent the last two weeks moving it, wheelbarrow by wheelbarrow, to every bit of un-planted soil.

It also makes the garden look nice and smell good, on top of feeding the microbiology in the soil. And, of course, it also improves our own cardiovascular health. :)

I think 2019 is going to focus on making the garden really lovely. I so appreciated that one pollinator garden full of tall, blow-in-the-breeze, pollinator-attractant blooms that invited the whole neighborhood to stop and gaze every time they walked by - and kept me totally entertained with creatures of all kinds. Not to mention providing lots of cut-flower bouquets to give as gifts or to decorate our home. My garden-design skills are really rudimentary, but I do feel like I’m hitting my stride with annual flowers, and I want to do even more to keep the garden beautiful. So, more on that as I learn and try new ways of planning and designing.

IMG_1386.jpg

Another thing I wanted to do in 2019 was continue a ‘monthly’ thread that runs through the entire year, like I did in 2018 with the seasonal wreaths. I polled my family and they agreed that it would be fun to do a series of seasonal meals, using what you can find typically in season in the store or garden. So you can begin to look for that in January. However, in that spirit, I want to share how to make a fresh fermented cheese that is totally delicious.

I found this recipe on the One-Cow Revolution website. I watched a series this couple did for Living Web Farms, about how just having one cow (or other in-milk ruminant) on your farm can provide food for a family immediately, even as you wait for the garden to mature and the hens to lay eggs. Of course there is no way to have a cow (and her calf) on our 1/6 acre, but someday in the future I hope to make this a reality, so I’m always interested in learning about it. The series was terrific, and I’ve been enjoying reading their short-but-sweet blog posts about every farming subject under the sun. Lately they posted one about homemade cottage cheese, and that inspired me to give it a go in my own kitchen, with store-bought milk.

Tom and I have made all kinds of cheeses before, but all have used lemon juice or vinegar or rennet, none have just fermented naturally. So this was a little different - it’s incredibly simple, but it takes some time. You start out with the freshest milk you can find. Pour it into a nonreactive pan or bowl and cover with cheesecloth. Then, just let it sit on the counter for two days (in summer, this would take less time, as warm temperatures speed up fermentation). The milk will ‘clabber’ - that is, sour - and begin to look a bit like yogurt.

IMG_1388.jpg

Then, you stir it gently with a whisk, and put it in a warm place. I turned my oven on to the lowest available temp (175) and placed the bowl on top of the stove where the warm air from the oven blows out. I left it there for several hours, pivoting it regularly and stirring it, so that it heated evenly. I suppose you could also put it in a proofing drawer if you have one, or in your dehydrator set on low. As the soured milk heated, it started to form curds. After several hours, I drained it, tied it up in a cheesecloth, and let it drain some more.

IMG_1393.jpg

I started with a quart of milk and ended up with about a cup of cheese. I wouldn’t call it cottage cheese, like One-Cow Revolution did - I’d call it more like a farmer’s cheese, or ricotta. Once salted, it was delicious, and I ate it on my lunch-time frittata. The chickens enjoyed the whey.

Tom and I wish all of you a very happy new year. We are hopeful and excited to see what people like us, and you, can do in our small ways to improve everything around us and make the world a healthier, more productive, and better place to live. Cheers!

Tags cooking, goals
2 Comments
← Newer Posts Older Posts →

Subscribe

Sign up to get email when new blog entries are made.

We respect your privacy. We're only going to use this for blog updates.

Thank you! Please check your email for a confirmation notice to complete the subscription process.

Powered by Squarespace