• About
  • Blog
  • Contact
  • Favorites
  • Archive
Menu

Poppy Corners Farm

Street Address
Walnut Creek, California
Phone Number
Walnut Creek, California

Your Custom Text Here

Poppy Corners Farm

  • About
  • Blog
  • Contact
  • Favorites
  • Archive

Dramatic Flowers

June 21, 2018 Elizabeth Boegel
IMG_9651.jpg

The artichokes are blooming, and they always attract a lot of attention, from both humans and pollinators. It's impossible to take a photo of them without a bee of some sort, dusted in pollen. These neon purple blooms cause our local walkers to stop and take a second look. I love these dramatic blooms.

But they aren't the only showstoppers in the garden right now. The hollyhocks have been amazing, with bright pink and coral hues, but one just opened that takes the prize.

IMG_9655.jpg

This is the variety 'Black Watchman,' which was also grown at Monticello.  The bees like it as much as I do.

Another new plant for me is a dahlia that was an impulse purchase, because its dark foliage just called to me. It's a variety called 'Mystic Fantasy.'

IMG_9663.jpg

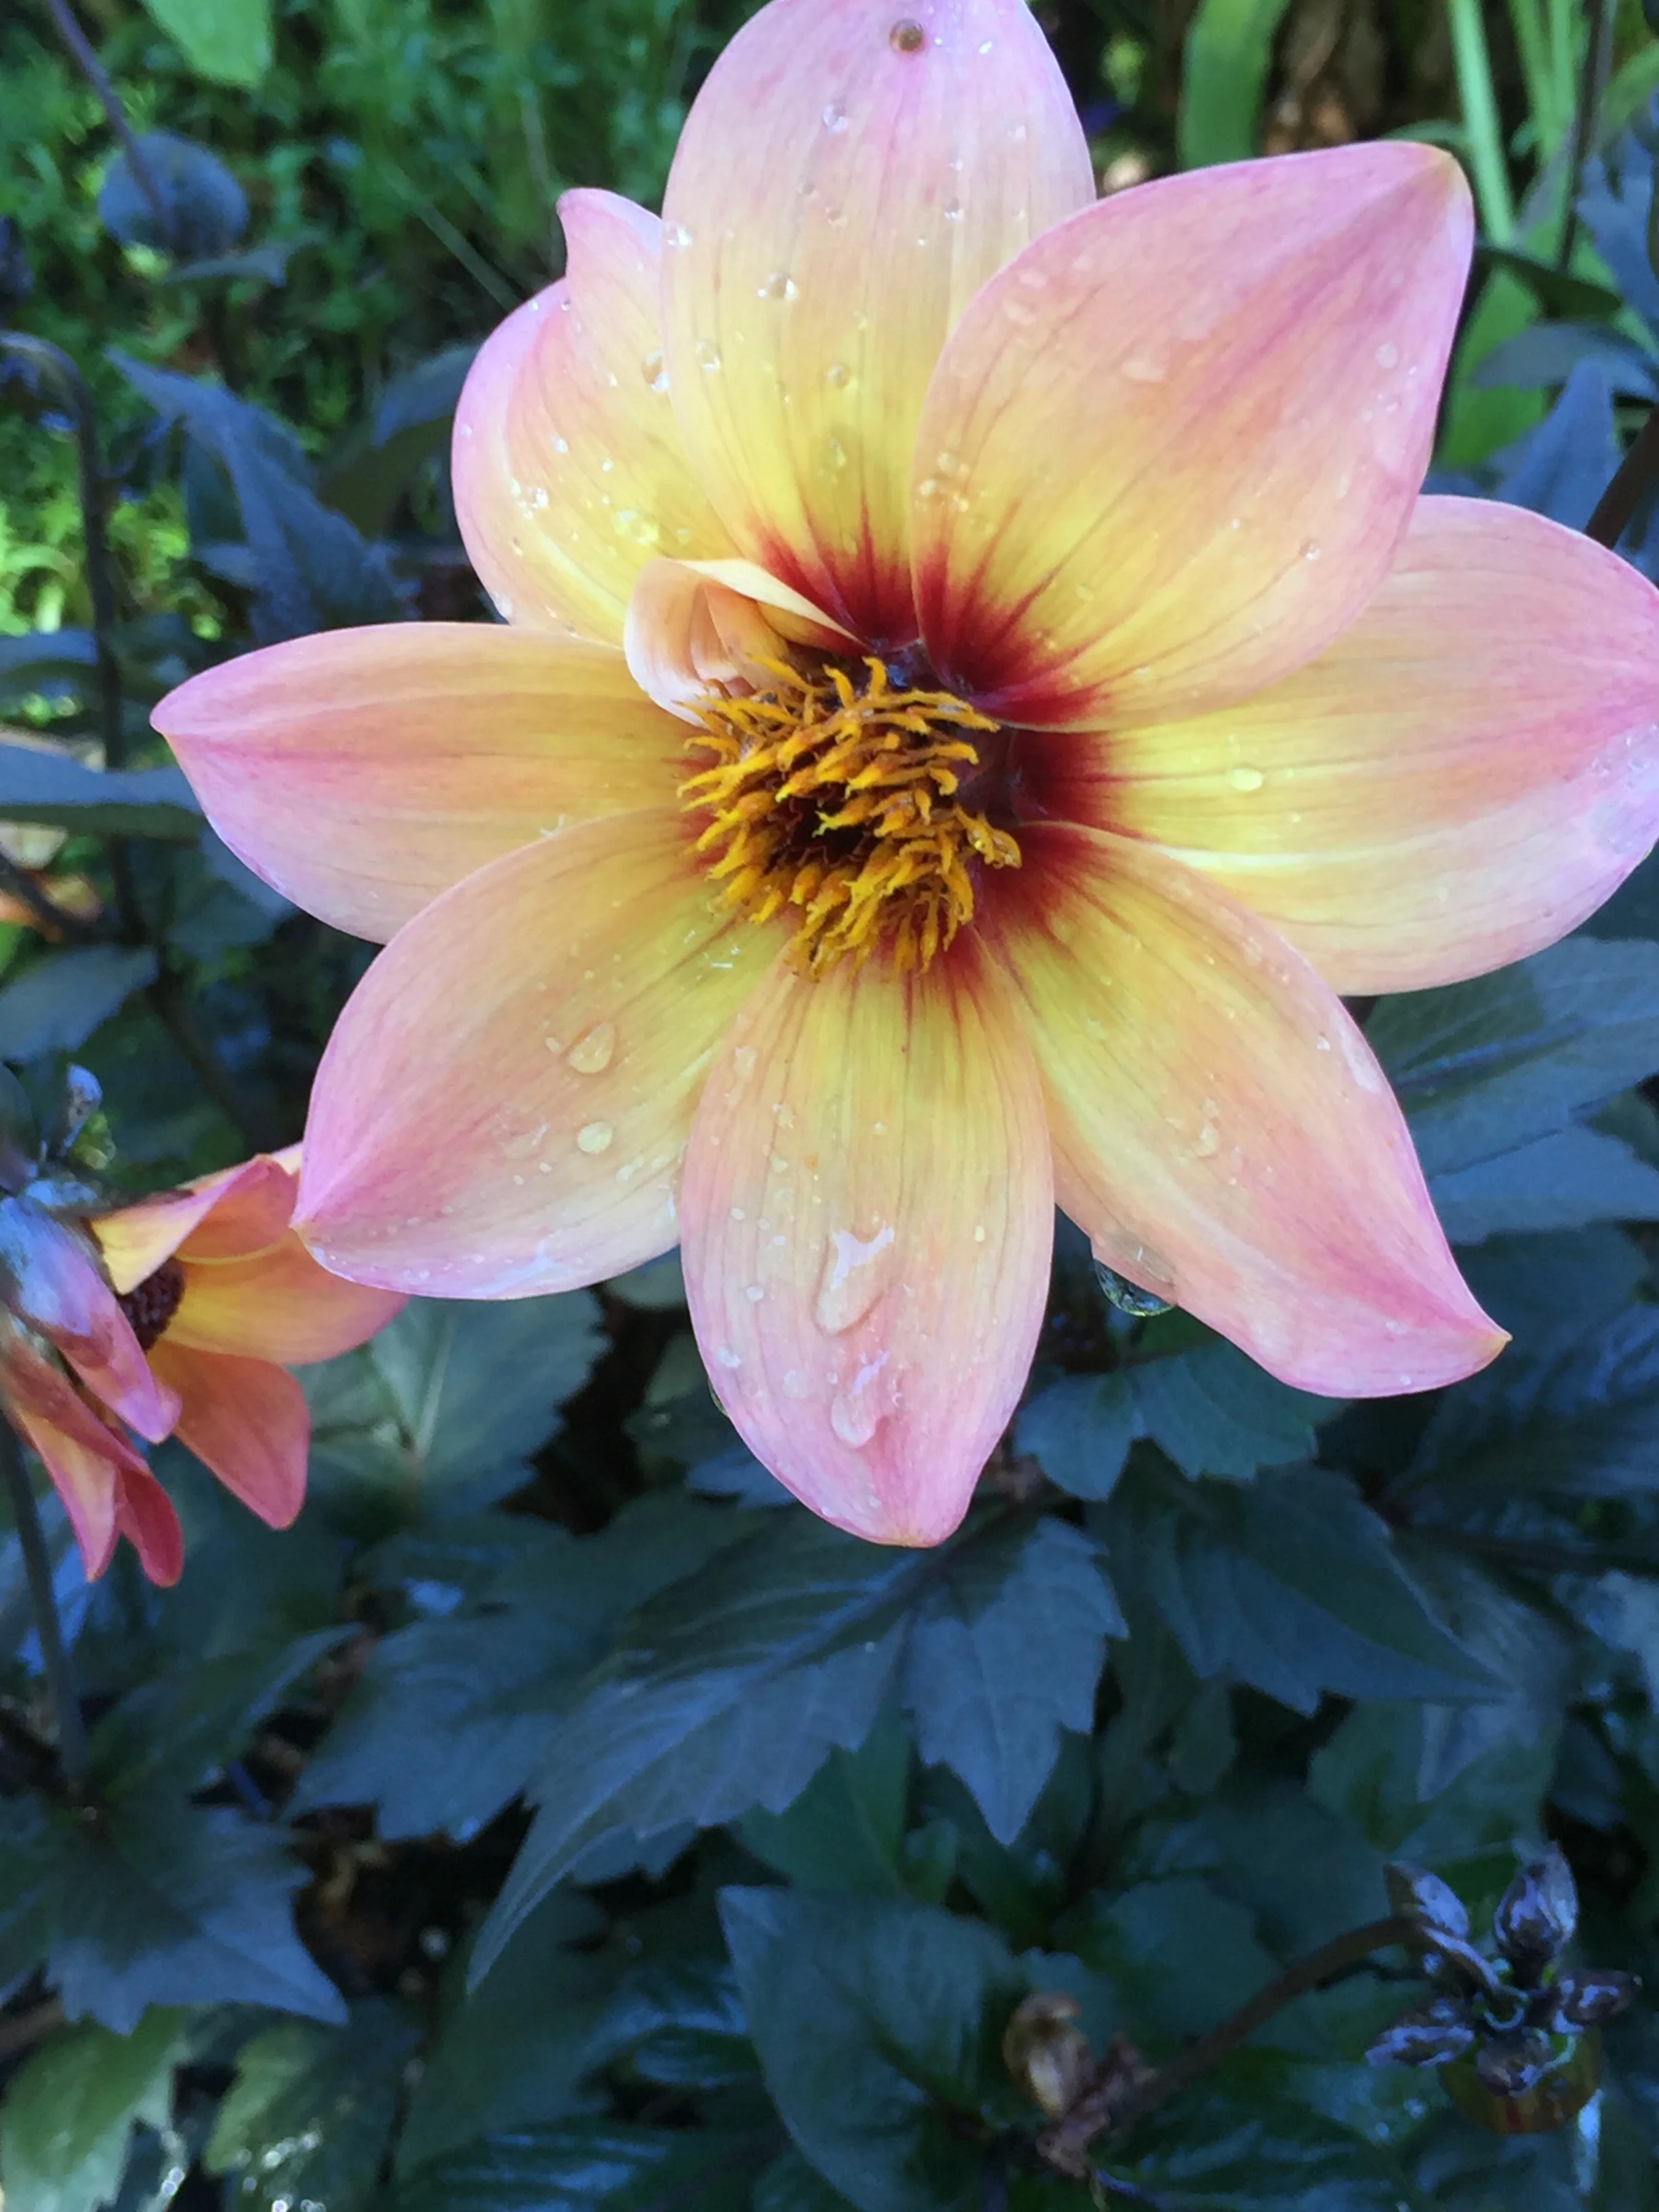
I just love the color of those flowers against the nearly-black foliage.

I had another impulse purchase (sensing a theme?) and ended up bringing home some liatris for a difficult part of my garden. This prairie native loves full hot sun and can take a drier soil. The plants are rewarding me with some fabulous blooms. This is Liatris spicata.

IMG_9658.jpg

And I know I've shown this sunflower before (Chocolate Cherry), but it's just so dark and lovely, I need to show it again. Here it is silhouetted against a clear blue sky.

IMG_9661.jpg

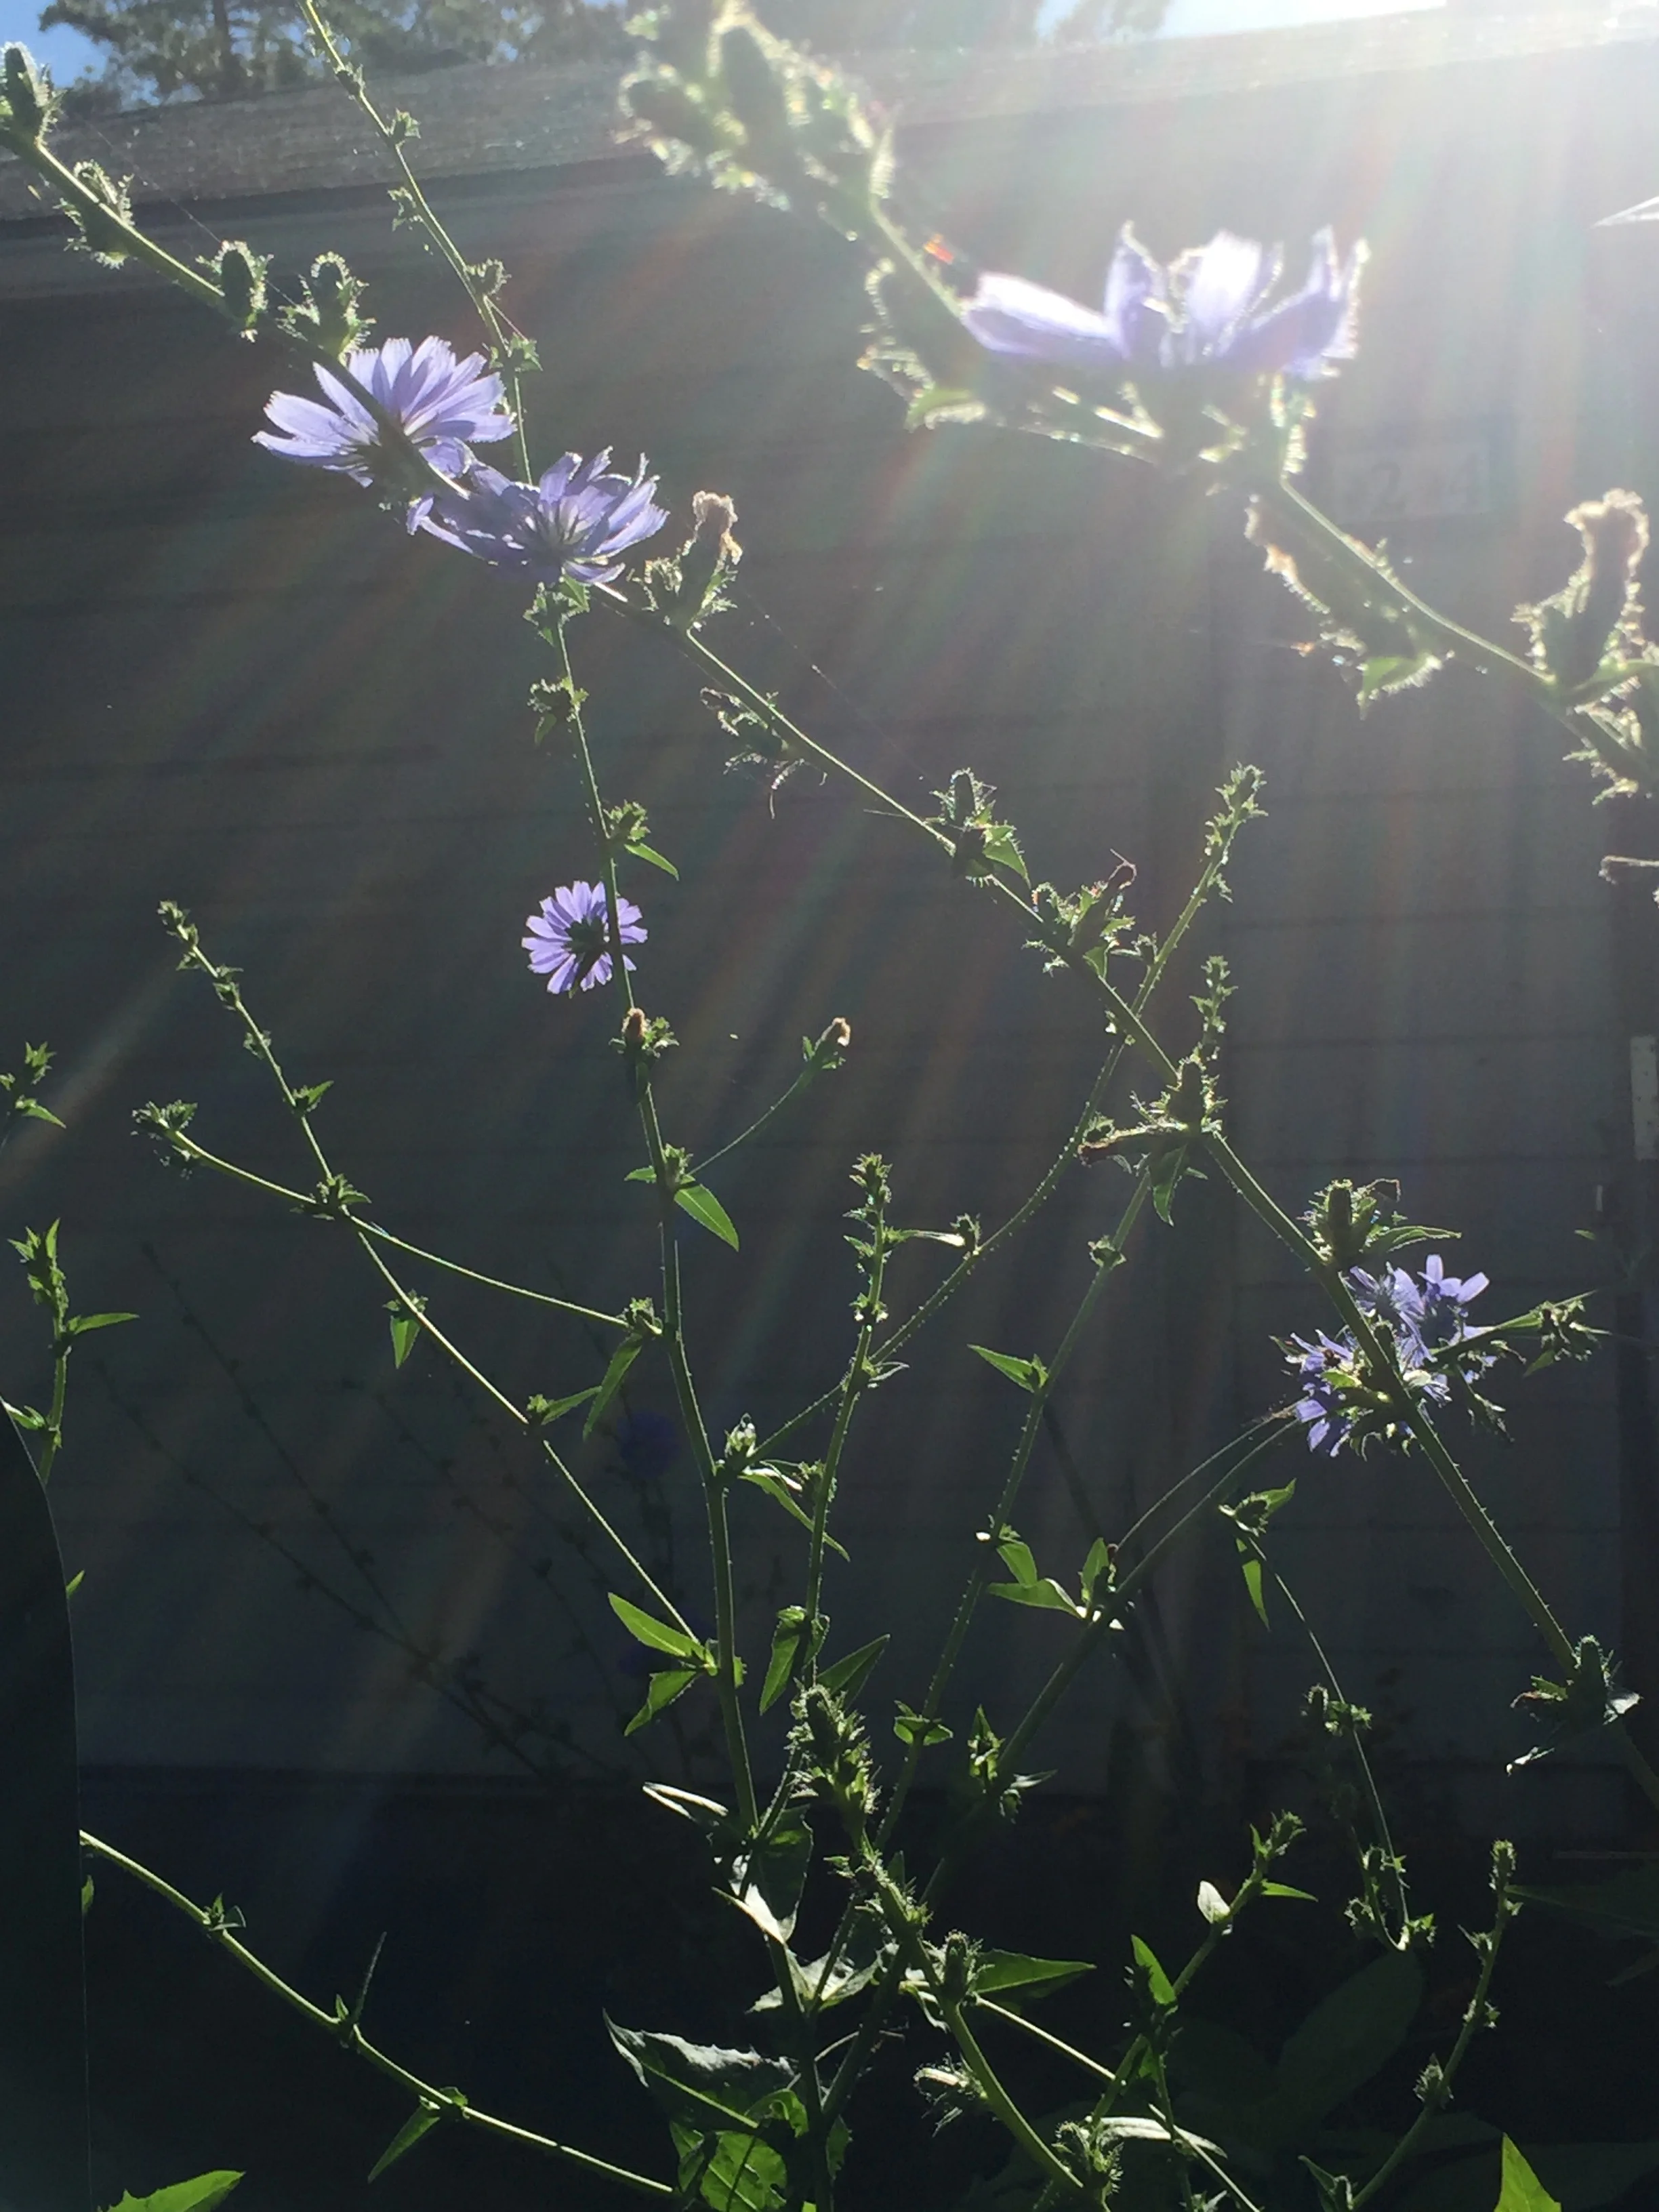
And the chicory that I seeded two years ago is finally up and blooming, in a difficult strip of dry soil next to the mailbox. I love this true-blue flower, and hope it reseeds abundantly.

I'm really enjoying these flowers in my garden. I tend toward the cottage-y things normally, but these dramatic options really add some flair and attract a lot of attention. They are also bridging the gap between spring and summer annuals - I pulled out all the spring annuals a while ago, and while the summer annuals have germinated, they are nowhere near blooming yet.

Tags flower garden
Comment

Plums, Peaches, and Potatoes

June 19, 2018 Elizabeth Boegel
'Santa Rosa' plum

'Santa Rosa' plum

The plums are beginning to ripen. I pruned this tree a little severely this past winter, probably too severely for a youngish tree, but I wanted to get started early on good structure. And the tree has rewarded us with some lovely-looking fruit. I've started picking them when they reach this color, and bringing them inside to soften. The squirrels are diabolical this year.

IMG_9635.jpg

I'm doing the same with the peaches, because I'm finding several half-eaten ones every morning at the base of the tree (they go to the chickens). The fruit this year is on the small side, but a good volume. I haven't sprayed it for peach leaf curl now in two years - there is a little bit of the disease on some of the leaves, but so far it's not terrible, and we still have a good harvest. I don't want to use that copper spray any more, so if this tree begins to suffer badly, we'll just remove it and try again with a resistant tree. The tree is at least 20 years old, maybe more, so it's a miracle it's still producing this well.

'Yukon Gold'

'Yukon Gold'

I finished harvesting all the potatoes. The fingerlings were ready first, and we had such a good harvest that we could share extras with family. Today I got the Yukon Golds and Pioneer Russets out of the ground. We had a decent harvest on the golds but not the russets. Several of the russets had a sort of watery, disgusting, smelly rot (fermenting?):

IMG_9644.jpg

Anybody else have this? I think it's a disease called 'Leak,' caused by a pathogen that likes saturated soil and warm temperatures. The three potatoes I found with this rot were in very saturated places in the raised bed. I'm not sure if there is a leak in the drip line, or it it's just naturally wetter on that side, but we certainly have had some very warm temperatures at times, so this could be it. The trick is not to plant potatoes in this same place next year, to avoid this pathogen. I've had potatoes in this particular bed every year for a while now, so I need to change locations. I'm not sure if I should go ahead with a pea crop in that bed, or put in a summer cover crop to heal the soil. When I was digging out the potatoes, the soil was really compacted, though absolutely full of worms. I mixed in the coffee chaff that I used as a mulch, and I'll probably cover it with a couple inches of compost, and let the bed sit for a couple of weeks. Then I'll decide what's next.

Meanwhile, I'll fix roasted potato salad for a pot luck tomorrow night, and we can enjoy the rest however we like (hash browns! roasted with olive oil and salt! mashed with butter!). It's fun to have our own organic potatoes. They taste so much better than store-bought.

Tags vegetable garden, diseases, fruit garden
Comment

Scratch That

June 15, 2018 Elizabeth Boegel
IMG_9596.jpg

After I was finished picking blueberries in my pj's this morning, I ambled over to the tomato patch and saw this. 

IMG_9602.jpg

Sigh.

So much for my new routine, spelled out for you in the last post, of adding cal-mag to the leaves and soil.

The good news: it's just on one plant. The bad news: I had forgotten everything I wrote last year in the blog post "My plan for blossom end rot in next year's garden." I mean, I'm kind of an idiot. I stepped into the shower with my glasses on this morning (not for the first time), so the fact that I forgot about what I learned just last year is not terribly surprising. 

It has helped to re-read that fabulous article by the University of California Ag extension, "Managing Blossom End Rot in Tomatoes and Peppers."  I needed a reminder about how calcium moves through the plant, and how transpiration is the biggest driver of that process. I learned last year that the tomatoes I planted on the other side of my garden, which only got morning and late afternoon sun, not mid-day blazing sun, had zero BER. I planted all my tomatoes, this year, on the blazing midday sun side. So naturally I am going to be dealing with some BER.

This is the beautiful, meaty 'Opalka' variety, a reliable producer of paste tomatoes, and a variety I have planted every year. I cannot explain how miserable it is to take five gorgeous, fat tomatoes off the vine and put them in the compost.

In happier news, I thought you'd like to see a new table we've acquired from my Dad. It's made in the Hepplewhite Pembroke style (late 1700's) and consists of mahogany with holly inlay. It lives indoors but I photographed it outdoors because I thought it complimented my garden.

The drop-leaf sides come up to form an oval, so this style of table was often used for tea or for bedside breakfasts, but it is also perfect as a sofa end-table which is how we are using it. For more information about my dad's furniture making, you can check out his videos on YouTube or his website, Killenwood. 

Tags tomatoes, vegetable garden, fruit garden
Comment

The Last Jar of Tomato Sauce

June 12, 2018 Elizabeth Boegel
IMG_9587.jpg

The last jar of canned tomato sauce will be used in tonight's dinner of chicken tamale pie. Sigh.

Instead of being sad, I should be happy - we really made progress on our goal of canning enough tomatoes to last us through the off-season. And we've almost made it to this season's ripe tomatoes. As you can see from the header picture, the tomato crop is really looking good this year.

'Green Vernissage'

'Green Vernissage'

I'm really pleased with my system of eight plants per bed, staking and hard pruning. The plants are responding well. I have had one or two mishaps; I mistakenly pruned the growing tips off 2-3 plants. But tomatoes are forgiving in that regard, they send out a side shoot readily which I then train to be the new main shoot. Those couple of plants are a little behind the others in growth, but they'll catch up. The season is long. I just needed to have a little lesson taught to me about being over-zealous. 

'Gezahnte'

'Gezahnte'

Since a classmate reported success in an experiment using cal-mag on his tomatoes, I immediately started to use it on mine. When the plants were small, I used it as a foliar spray. Now that they are bigger, I've been adding cal-mag to the soil once a week along with a very low-nutrient fish-based fertilizer (Neptune's Harvest Tomato Veg 2-4-2). It has a bit more phosphorus than nitrogen, to encourage nice flower and fruit production. 

I know I shared the results from my lab experiment in foliar feeding chard with an all-purpose fertilizer; those plants really did miserably, and I swore I'd never do any kind of foliar feeding again. But when new information comes along from a trusted source (in this case, my classmate), with data and photos to back it up, you gotta give it a try.

Also, I have shared in the past that I really don't believe we need fertilizer. I stand by that. As long as your soil is rich in microbes (bacteria, fungi, protozoa, etc), that should provide your plants all they need. Soil health absolutely comes first. You can't expect a crop to do well on fertilizer alone. (And for heaven's sake, don't use chemical fertilizers - they destroy soil life.) But, tomatoes need a lot of nutrients to feed all that biomass during their growing season. They suffer from fluctuating temperatures here, as well as getting a lot less water than they'd like. They're an important crop for us and we rely on them. So to me it seems like a good investment to make sure they are well-fed. And I'm tired of losing a quarter of my crop to blossom-end rot.

Since peppers also suffer from BER, I've given them the same regimen with the cal mag. And they are responding beautifully.

IMG_9591.jpg
IMG_9592.jpg

As for the rest of the garden, the pole beans (two successions) are doing quite well, we had our first pesto from our basil crop, collards are being harvested every day, cucumbers are starting to climb the trellis, the pumpkins and butternuts have started flowering, the melons look like they've finally got a hold, cilantro and dill progressing nicely, and the last of the artichokes have been harvested. We had our first crop of fingerling potatoes, with plenty more on the horizon; when those are finished, I'll plant peas in that spot. I've figured out a place to start a new asparagus bed (my older asparagus just slowly faded away, I think they needed more sun) and will do that this winter. I'm contemplating removing a couple of trees from around our water feature. Summer flower seeds are germinating and starting to grow tall, spring wildflowers are finishing up, with the stalwart Clarkia 'Farewell-to-Spring' announcing the end of that season. Sunflowers are blooming mightily all over the garden, as well as dahlias, poppies, lupines, hollyhocks, and fennel. It's a good time to be making bouquets.

And the bees, both honey and native, are very busy in our blooming Catalpa bignoniodes tree. I enjoy standing under the tree and just listening to the very loud humming coming from the high branches. I've also been watching a pair of Nuttall's woodpeckers forage for insects in this tree, for many days now. It feels like summer!

Tags tomatoes, peppers, vegetable garden, wildlife, birds, flower garden
Comment

New Worm Bin

June 8, 2018 Elizabeth Boegel

My next door neighbors are pretty awesome. Wes and Lavelle have lived in this neighborhood since it was built in the late 40's. They raised their children here, and are a big part of the community. They are often out walking their dog, or stopping by to bring me some banana bread, or helping me identify local trees. 

Lately the two have had some health problems, and it's tougher for them to get around. So one of their adult sons and his wife, recently retired, have come to live with them. This particular son is in the process of rebuilding the entire length of fence we share, which was built originally by Wes many, many years ago. The new fence is spectacular, and it's a lot of work. I'm enjoying having periodic open spaces in the fence to talk between houses, when Karl (the son) and I are both out working on our various projects. 

Every so often, Karl and his wife go back up to their property in gold country to take care of things there. When they came home from their last trip, they brought me their worm bin! Karl kept it so he would have worms ready for fishing, but since he's down here most of the time now, that hobby has gone by the wayside. He sees what I'm doing in our yard and knew I would appreciate another way of composting food scraps. So this worm bin is now mine!

He didn't just give me the bin, though. He also gave me all its inhabitants - thousands of worms - and the contents of the bottommost tray - the latest worm castings. Oh my goodness, this is like pure gold. Today I spent a good deal of time cleaning these out of the bin, separating the worms from the castings, filling the trays with bedding and old fruit/veg, and getting the bin all set up. The castings went into the containers that hold my Japanese maple trees - what a boon for those heavy feeders, a solid inch of nutrition as a mulch on top of the soil. The worms went back into the top-most bin along with coffee chaff as bedding, and some kitchen scraps.

There are four trays total. The top tray holds the worms and waste. As they eat, their excrement (castings) drop down through the tray to the trays below. And any liquid waste goes all the way to the bottom most tray, which has a solid bottom. That liquid is great fertilizer, but it can go anaerobic really quickly, so I just went ahead and filled that bottom bin with chaff to absorb the liquid. I'll periodically take it out and use it as mulch around my growing plants, and fill it up with fresh chaff.  If I used the liquid straight, I would dilute it first (way too 'hot' with nitrogen), but this way it is already semi-composted.

As I was going through the sorting/cleaning process, I noticed so many worm egg cocoons. So you know how worms often have that center band around their bodies, looking sort of like a cigar label around a cigar? That is where the eggs develop, and the worm wriggles out of it, allowing it to fold over on itself, and form these lemon-like egg cocoons. The babies hatch and look just like very tiny worms. Worms are both male and female, carrying both eggs and sperm, and they rub against each other to mate and fertilize the eggs in either worm.

By the way? Those big white things in this picture? Crushed eggshells that have never broken down in the worm bin, just as we discussed a week or so ago.

I'm happy to have another way to experiment with vermicomposting. As you know, I've used my 3x3 redwood compost bin as a sort of worm bin for years. This set up is a more streamlined affair. I'll continue to use both, plus my yard-waste compost pile, which is inside the chicken run. I'm finding that I really cannot have enough compost. I try hard to make all that I need, and I always fall short.


Tags composting, compost, worms
Comment
← Newer Posts Older Posts →

Subscribe

Sign up to get email when new blog entries are made.

We respect your privacy. We're only going to use this for blog updates.

Thank you! Please check your email for a confirmation notice to complete the subscription process.

Powered by Squarespace