Fruit Tree Pruning and Making Homemade Pectin

Yesterday I went to a fruit tree pruning workshop. I heard about it through Kathy Kramer, who organizes the Bringing Back the Natives garden tour each Spring (which is free and amazing!). The workshop was not free, it was $40 and worth every blessed penny. It was taught by Ann Ralph, who has a wonderful book out - Grow a Little Fruit Tree - and in two hours, I came home confident about pruning my own fruit trees.

We met in a idyllic garden in San Pablo, which had dozens of fruit trees waiting for us to prune. There were about 15 of us in the class. We got hands-on training which was terrific.
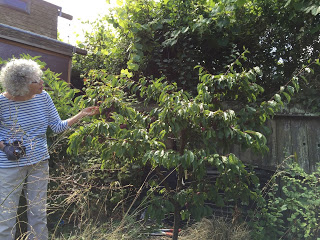

I learned an awful lot, but I don't want to give too much away - I want you to support Ann and buy her book or go to one of her workshops. However I'll give you a summation: Firstly, I realized that I need to re-think how much water I am giving my fruit trees - even the new ones can take much less than I give them. (Water less frequently and more thoroughly, is what Ann advised.) Also I should be mulching around the trees with worm castings; Ann says they are best for helping the trees to stay strong and avoiding pests. And she gave us some 'pruning rules to live by,' which I love.

* If you don't know what to do, cut some stuff out.
* Prune to keep in reach.
* Make aesthetic decisions.
* Pruning is a conversation between you and the tree.

I came home and immediately got out my tools and started. The new plum and cherry trees were easy, I just gave them a slight heading cut at the top. (Apparently I should have done this right away.) I also pruned some dead wood off the fig tree. Then I got started on the apple tree. Oy, this thing was about 15 feet tall at its highest points, very bushy, and totally out of control.
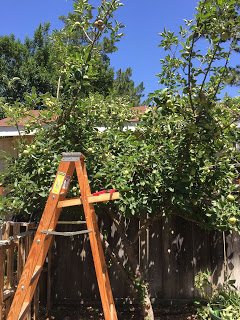

I got out my Felco bypass shears and the Japanese saw I've permanently borrowed from my dad. Loppers too.
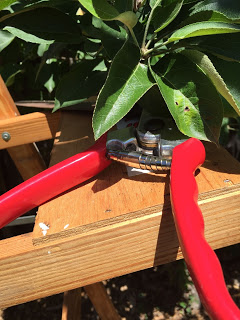
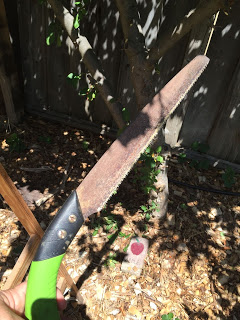

I spent part of yesterday on this project, and most of this morning. Finally I got the tree down to a reachable height, and had cut out all suckers, upward branches, downward branches, and crossing branches, plus all the dead and unproductive wood. It looks completely different.


Now more light and more air can flow through the tree, there is room between branches, and I also thinned out the fruit, which should all be eight inches apart. A side benefit is that the vegetables planted near the tree will get more sun, now.

I had a huge amount of compost. I gave a bucket of unripe apples to the chickens, put a ton in the bins, and brought a bucketful in to make homemade pectin.
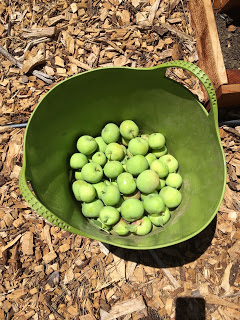

What is pectin? Pectin is a 'soluble gelatinous polysaccharide that is present in fruits and is used as a setting agent in jams and jellies.' Unripe apples have quite a bit of natural pectin, so why not make some to use this summer in our canning adventures?

I cut up about 4-5 pounds of apples and added them, cores and all, into a pot with six cups of water, and brought them to a boil.


I then simmered them for 45 minutes, mashing them with a potato masher as they softened.


Then I transferred the whole mess to my 'nut milk bag' (which I normally use for cold brew) and drained it for four hours.


Then I took the resulting juice and boiled it for quite a while, and at the same time, boiled the canning jars. The lids and rings also got a hot water bath.
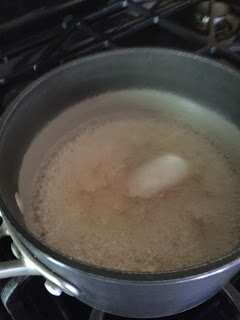
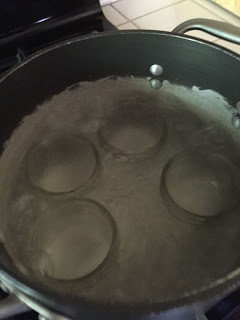


Then the syrup got poured into the jars and then the full jars had a boiling water bath for ten minutes.
Done!


I'm not sure when we'll next make jam, but this pectin will come in handy.

Tomorrow, I'll tackle the peach tree!!!

Garden Fountain

Tom here.

During the farm tour Elizabeth made a big point about how the fountain we’ve had for a number of years is a focal point for wildlife in our yard. We made the fountain at least six years ago, and it attracts all kinds of creatures — a full range of birds, as well as some four-footed creatures. Several people asked about fountain construction, and so it occurred to me that it would be a good project to share.

Here’s a picture of the fountain:


Here’s a quick cross-section showing the major components of the fountain:


The main component of the fountain is a large ceramic pot; it’s got a small-ish hole in the bottom. The pot sits on top of a reservoir that’s dug into the ground; the pot itself is supported by bricks that rest in the reservoir. A submersible pond pump pushes water up into the pot and over the top edge, where it flows back down over the surface of the pot and back to the reservoir. Here's a couple of short videos – one of the top of the fountain, and one of the side, showing the water falling down:


As you can see, there's not a lot of water flow over the edge. Birds can easily perch on the lip of the fountain and get a drink or take a bath.

We started fountain installation by digging a hole in the ground to accommodate a plastic basin that acts as the reservoir. The basin we chose was circular, about 2 1/2 to 3 feet in diameter. We dug the hole a little larger than the basin, then used some play sand so that the basin was nestled in something soft and non-rocky, and so that we could level the basin out a little more easily.

Next, we placed several bricks in the bottom of the reservoir to support the pot, and put the pond pump in place. We then covered the reservoir with 1/4” galvanized hardware mesh; the mesh extends a few inches beyond the edge of the basin, and serves as a support for a collection of rocks that surround the base of the fountain. The hardware mesh also does a pretty good job of keeping things like leaves out of the reservoir.

I've removed a rock so that you can see the hardware cloth covering the basin
The pond pump connects to a standard 1/2" PVC pipe that I extended to near the top of the ceramic pot. After putting the ceramic pot in place, I threaded the PVC pipe to the pond pump and sealed up the gap between the hold in the pot and the edge of the PVC pipe (more on that later). Once sealed, we were able to fill the pot, fill the reservoir, and plug in the pond pump.

A few things if you're thinking about making your own fountain:

When shopping for a pond pump, look for a graph that shows the flow rate for the pump vs. the pumping height (or head height) to make sure you get good enough flow for the height of your fountain. I don't really remember what flow rate we used for our pump, but I remember it cost us around $80.

If I had to do it over again, I would have chosen a bigger reservoir – wider and deeper. We had difficulty for quite a while with the fountain running dry – a combination of evaporative losses and (I think) water trickling down the side of the fountain and then just missing the edge of the basin. Having the reservoir run dry is a problem for the pond pump – they use water as a lubricant, and we had to replace the pump a few years ago, it's lifetime likely shortened by running dry periodically.

Finally, I struggled mightily for many years trying to find something adequate to fill the gap between the hole at the bottom of the ceramic pot and the PVC pipe running through it. Most caulks are not designed to operate underwater, and the water pressure itself is significant. I'd get something in there that would work for a few months, then one day I'd see an empty fountain, and see that the water had all escaped out of the bottom of the fountain.

I finally happened across pond sealant foam. It comes in a can, you spray it out and it expands to fill gaps. As of now, it's been holding up a couple of years with no problem.

Our fountain has been a nice focal point to our garden. We've got it placed so that we can see it from our kitchen window, and it's fun seeing all the goings-on.


Elizabeth here. Just wanted to add that the insects drink from the fountain too, but not from the top - honeybees (and other critters) need a safe place to perch in order to drink. The bees can rest on the rocks at the bottom of the fountain and drink from there. However, I also have many bowls filled with rocks and marbles and water, throughout the garden, for the insects. Butterflies prefer a mud patch - always leave a bit of bare ground in your garden for muddy puddles and ground-nesting native bees.

A Day at Home

Today was supposed to be my last day of work for the summer. I've worked as a para-educator for several years now, part-time. The work is very rewarding, but the best part about it is that I can take the summers off to be with my own kids. The school I work for ended classes Wednesday, but we are moving locations, and the latter days of this week were for packing and moving. Unfortunately Kate woke up with a fever and vomiting this morning, so I needed to stay home with her. I'm of two minds about this; while it's nice to have an unexpected day off (even if it does mean looking after a sick person!), I was hoping to see all my work-mates today and celebrate the end of the school year with them. I've really enjoyed my work this year, and it's mainly due to the fact that we had a very strong team of people in our classroom. Most of the folks are half my age, but they are all highly motivated, intelligent people whom I admire very much. Nearly all of them are moving on to other jobs in the Fall, so I won't see them again. This makes me sad. I learned a lot from them!!!

However, a day at home is never wasted. It's hot here, again - hovering around 100 - so I do a chore outside, then do a chore inside, etc. As always, there's plenty of interesting stuff to look at, work on,  and explore. So come on a tour of the garden with me, and then we'll talk some culinary stuff!

We're getting three eggs a day at the moment.
I'm not sure, but I think they are all coming from
two chickens. Today I noticed a barred rock
nesting, and then afterward I found this big 'un!
Looks like full sized eggs are soon to be in our future!
The corn is recovering from its deer-provided haircut. The
tallest are about hip-high. It's safe to plant an inter-crop
here now, so today or this weekend I'll put the
sweet potatoes in. The SP's have rooted and shooted
in their shallow pan of water after a month indoors.
I planted two varieties of pole beans this year, green and purple.
These are the green. I love watching them figure out how to wind
upwards on the trellis.
The delicata squash has gone crazy, growing up
between the trellis (not winding, like I'd hoped), with
these big leaves. No blossoms yet. The butternut
is not far behind in size.
The tomatoes are flowering freely and a lot of fruit
is forming. We removed the straw mulch from the
paste tomatoes and sprayed the leaves with copper;
that seems to have done the trick, and paste
tomatoes are growing as vigorously as the slicing and cherry
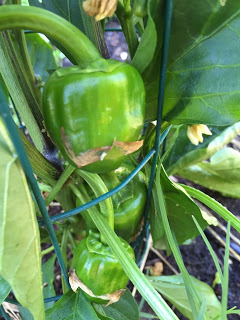
We have plenty of both sweet and hot peppers
fruiting; these are definitely preferring the
North Garden over the South Garden (last year's
spot) - more heat and sun
a fresh crop of cilantro is ready for harvest
the first patch of basil (with cosmos interplanted)
is nearly ready for pesto-making
We're letting our second (and final, for this year)
artichoke flower; I think it looks really cool
and I can't wait to see the blossom
One ripe raspberry so far! I ate it immediately
after taking this photo. Boy, was it good.
Another dog vomit fungus. I get these all over
the wood chips that surround the raised beds.
This one looks a little like popcorn. 
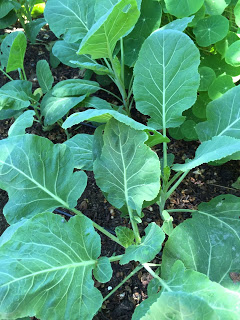
collards, which I like sautéed with bacon and eggs,
is a great summer alternative to kale and spinach,
which prefer cool weather. The leaves will get
enormous, but I like them younger and smaller.
The potato plants are huge, with holes everywhere from
those dang cucumber beetles

harvesting carrots daily, glad I planted in succession
over six weeks; we'll have carrots for a while

The shallots are ready for harvest. The bulbs are
gigantic. We'll cure these above the chicken coop,
just like we did garlic. I'll have to read up on
storage methods.
Ah, sweet blueberry, one of maybe 10 we've had
this year. I think I need to learn how to prune blueberry bushes
for more consistent fruiting 
We're harvesting huckleberries every day;
they are delicious and numerous, but fiddly to harvest,
as they are tiny. How does anyone ever get enough to make a pie???
We're getting a last burst of clarkia 'mountain
garland' before the truly hot weather sets in.
I'll harvest the seed for next year.
I must've planted Queen Anne's Lace seeds at
one time, and totally forgot. It's beautiful in the
pollinator garden, light and airy over the more
steadfast poppies and sage
I have beautiful 'aloha' nasturtiums all over the
garden, both in the flower beds and the veg beds.
I used to hate nasturtiums; then I discovered
different varieties other than that garish orange
and I've fallen in love with them
Black-Eyed Susan, reminding me of my home state of MD
So that's the news from the garden. There's a long list of jobs to do there, hopefully I'll get to them tonight in the cool evening, or tomorrow morning before it gets hot. 

Meanwhile, I spent a little time in the kitchen with some 'herb-y' projects. Alice Medrich is one of my favorite recipe-writers, she mainly handles desserts, and they are always interesting and different. I read a recent post she wrote for Food52 about mint chip ice cream using fresh mint from the garden. Well, if there's something I always have a lot of, it's mint. So I followed her instructions for infusing heavy cream with chopped mint, and it's steeping in the fridge for later, when I'll make a custard (using home-grown egg yolks!) and we'll make a delicious treat, perfect on a hot day. (I just hope Kate can eat it!)

I washed and chopped the mint, then wrapped it in cheesecloth...
tied it up...
then added it to the cream. It already smells so good, minty but delicately so!
Then our weekly meat delivery from Tara Firma Farms arrived. This week it's high-end grilling meats, so I kept the rib-eye steaks out to defrost and put the other items in the freezer. I decided that a freshly grilled steak wouldn't need any seasoning other than salt and pepper, but I'd make some compound butter, too. This is super-easy to do. Just soften a stick of butter. Go out into your garden and choose any combination of herbs you like. Chop 'em up along with some garlic and mash them into the butter, then roll into a cylinder and put back in the fridge. It'll keep for three days (long enough to enjoy with the filet mignon early next week!).

I chopped up thyme, sage, rosemary, marjoram, and oregano
squished some home-grown garlic 
added a stick of softened, grass-fed butter
mashed it up with a fork
rolled it into a tiny log, and wrapped in plastic wrap
Adam's home from school (7th grade done and dusted!), Kate's asleep on the couch as I type this, and I think I might brave an outside chore, next. Gotta get those shallots out of the ground and up on the coop for curing!

What is this, the East Coast?

It was 103 here on Monday. 103!!! I mean, c'mon, already? I don't expect those kinds of temps until late July/August, and I was simply not prepared. All the chores I meant to do after work got shelved until a cooler day, while I sat around reading about farming (I've just discovered Ben Hewitt).  The bees bearded outside the hive on the landing board, fanning desperately.

Then, Tuesday was very warm and humid. And now today, rain! Which is fabulous! and also unexpected. The rain feels warm and remember, we're not used to warm rain or warm humidity of any kind. I can't get the house cooled off, and I'm remembering summer days in the suburban Maryland of my youth.

So not only does the weather feel East-Coasty, but then this morning at 7 a.m., a sod truck pulled into our neighborhood.

A sod truck.

I'm trying to restrain myself, so I'll just say this: How obtuse do you have to be to plant your yard with GRASS in JUNE in the middle of the worst DROUGHT California has ever seen? I'm not a huge fan of the news and don't see much of it, but you can hardly escape the tone of disaster percolating here in Northern California when it comes to water.

Sigh.

But I'm a dingbat too. I have one rain barrel hooked up and ready to go as always, but I have a new rain barrel sitting here ready to receive water and it's not hooked up. Argh.

Anyway, the garden loves this rain, of course. I can feel everything exhaling in relief. With sun tomorrow, everything will have a fresh burst of growth, and everything will look washed.

We're harvesting peaches, strawberries, blueberries, huckleberries, Bibb lettuce, peas, collards, and carrots. The cucumber beetles seem to have settled in for the long haul and are deep in the Bibb lettuce, so sometimes after picking I just throw the whole harvest in to the chickens, so they get the greens and the bugs. I don't mind a few bugs in my produce, but there is a twisted sense of satisfaction in feeding bugs to the chickens.

We're getting 1-2 eggs every day, they are still small and super cute, but also quite tasty. Stand-up yolks and firm whites, the mark of fresh and healthy eggs. Every egg we get is still a miracle - I feel the same way about the eggs as I do a just-pulled carrot: How did THAT get here? Seeds are a miracle, and so are eggs. Thank you, chickens.


Rain in the wildflower seedlings

Trying out Preserving

A guest post from Tom...

On Sunday, I woke up to find a bunch of peaches on the ground, and while it's great that the chickens were going to get a treat, I've been hoping to capture more peaches for ourselves. Since my personal limit on peach consumption is about one or two a day, this means trying my hand at preserves.

For Christmas, Elizabeth's mom got her one of the books on her list – Mrs. Wheelbarrow's Practical Pantry: Recipes and Techniques for Year-Round Preserving. It's a tome that covers a variety of preserving techniques – canning, pickling, curing, the works. She's got a standard process for making fruit preserves that starts with three pounds of fruit and makes four half-pints. The recipe can be halved, so that's what I tried.

The process starts by peeling and slicing up peaches, adding sugar and lemon juice, and letting it macerate for several hours.


Next, strain the syrup from the fruit, put it in a pot, and bring it up to a boil.


Once the syrup boils, add the fruit back in, then boil it some more until the mixture gets thick. While I planned to get two half-pint jars full, I wound up with only about 1 3/4 jars of preserves. I processed the one jar in a water bath so that we could put it up on our new canning shelf, but the 3/4 jar was put into the fridge, as it has too much air at the top to safely jar.

The final product
So, it was a lot of work for what wound up being just one real jar of preserves, but it was a good first experiment:

I'd never really tried making fruit preserves before, so it was interesting working through that whole process – watching the syrup and the fruit boil, trying to figure out how long is long enough for the boil, wondering about pectin and seeing if there was enough natural pectin in the peaches for the preserves to set.

Also, I'd done some water-processing before (pickles, a few years ago), so it was good to go through that again and see it work.

It was also nice to try something small-scale and minimal impact. It's nice to have peach preserves, but it's not the end of the world if it fails miserably. Practicing on these preserves will hopefully lead to confidence when we get to a place where we have a lot of food that we'd like to preserve (I'm looking at you, tomatoes).

I tasted some of the final product from the bonus 3/4 jar, and while it's generally peachy, it's not super-peachy, and the preserves have a pretty hard set. This is probably the product of working with underripe fruit and/or an overly-long boil. It's a little tricky with the ripeness – you want to start with some slightly underripe fruit because the fruit loses pectin as it ripens, but underripe means not as flavorful. Timing the boil is tricky too – I want to watch some videos to see if I can get a better sense of what "done" looks like.

I'll definitely try making some more fruit preserves – my next thought is to work with some of the strawberries in the market now, and perhaps try introducing some additional flavors, using some herbs from the garden.

I'll end with a relevant quote from Adventure Time: