
Tom’s teaching this workshop! Please RSVP if you’d like to attend.
Tomato Talk at Annie's Annuals in Richmond

From Annie’s website:
Tomatoes! From Garden To Table. A FREE talk with Elizabeth Boegel
Follow the tomato through its entire story arc from garden to table! Elizabeth will start with some history and botany of the tomato, then move into the different kinds of tomatoes and which ones are best for different microclimates and growing conditions. Elizabeth will also go through the process of prepping the soil and planting, how and when to trellis and prune, possible problems, the process of pollination and how to attract native pollinators, common myths of tomato growing, harvesting and preserving!
Elizabeth Boegel has been a suburban farmer in Walnut Creek for 20 years (Poppy Corners Farm), growing and preserving the harvest for her family, keeping bees and chickens, and regenerating the landscape to support the ecological health of the soil and the surrounding insects and animals. Elizabeth teaches classes in Urban Agroecology, Edible Landscaping, and Permaculture at Merritt College in Oakland, and has (along with her students) revitalized an abandoned urban farm on the far reaches of Merritt’s campus, growing enough surplus to provide all of the students with food for their families. Elizabeth is also an avid hiker and naturalist, and loves to spot snakes and tarantulas in her local open spaces.
ADMISSION: FREE
WHEN: Saturday, April 6th from 10:00am-11:00pm
WHERE: Annie’s Annuals, 740 Market Ave, Richmond, CA
Hope to see you there!
Meet the new chickens

Last Friday, I picked up these four chickens from our local feed store. I ordered them from Dare2Dream Farms in Lompoc, which is where I’ve gotten many of our chickens over the years. They delivered them to the feed store for a small fee, I met their van at the appointed time, the chickens were boxed up for me, and I brought them home.
I installed them in a large dog crate made of wire mesh, that we bought years ago expressly for this purpose. Tom sets this crate up in the coop, underneath the hen house. I line it with straw, add a waterer and feeder, and then that’s the new chicken home for a few days. They can see out, the old chickens can see in, everyone has a chance to get used to each other before being thrown into a turf war.
Best practices dictate that you isolate the new chickens for a period of weeks to make sure they have no infections, but I just don’t have the capacity for that, either space-wise or brain-wise. I trust the farm where we got them, I know they’ll have plenty of fresh air and good food in our garden, and my old chickens are, well, old. One of them is showing signs of being egg bound and is likely not long for this world anyway, and the other is extremely robust.
It’s the robust chicken (Florence, a Plymouth Barred Rock) that made me order these new chickens to add to our flock. Chickens don’t like to be left alone, and Florence was destined for that. If I had introduced new chickens to the coop and Florence was the only one there, she would be pecked mercilessly. This way, the odds are better. The old chickens bully the young ones, but there are more of the young ones and so the ratio works out.
Anyway, they were all separated for a couple of days; it probably should have been longer, but I am always impatient to get the cage match out of the way. So Sunday night, after dark, Tom and I lifted the young chickens up into the hen house and put them on the bars to roost. The next morning everyone came down together, and while I can’t say they are bosom friends, everyone is mostly getting along.
The new chickens are not quite old enough to lay, but we should be getting lots of fresh eggs starting in a month or so. Yay for spring frittatas!
Oh, I forgot to say: We named these chickens after characters in a show we watch on PBS: Call the Midwife. It’s a great show, with nuns and nurses all tending to the women of post-war East End London. If you’ve seen it, you’ll know what I mean when I say the chicken’s essential characteristics seem to exactly match those of the show’s characters. Sister Monica Joan the character is a bit perplexed; so is Sister Monica Joan the chicken. Sister Julienne and Shelagh are best buddies and both very gentle. Trixie preens a lot and is a bit forceful. We are enjoying finding new appropriate names each time we get new chickens.
Hive Check

Other than snipping lettuce for delicious salads (one such harvest above), I’ve had little time to hang out in the garden. Between work and the rain (and the rain, and the rain, and the rain), I’m very rarely in a place where I am doing any observing. That stinks, really, because observing the natural processes in my garden is one of the great joys of my life.
Anyway, we finally had a break in the rain late last week, so I went outside to do some exploring in between writing lectures. Spring peepers were making a racket in the nearby creek, our almond and nectarine trees were opening their buds, there were a few asparagus spears popping up, and I found chrysalis’ hanging on the fence wires.
But all was not well. Standing by the beehive for a while, I noticed a distinct lack of activity. The day was warm, above 50 degrees, and as I said, we were having a break in the rain. There should have been all sorts of busyness happening - new bees being born and orientating to the hive entrance, foragers out searching for nectar - but nope. Nothing. Later on I checked in with Tom and he said that he had noticed less activity, too.
You can tell a lot about a hive by just sitting by the entrance for 15 minutes, but sometimes you’ve just got to suit up and get in there to find out what’s going on, and this was one of those times. Saturday morning, Tom did just that, while I ran to school to water the new seedlings. When I came home, he met me outdoors with a sad face. The bees were gone.

It’s a hard thing, when your colony just disappears. Were they too cold this winter, or too wet? Did the leveling of the hive last autumn make them restless? I had noticed some ant activity but thought my heavy application of diatomaceous earth solved that problem. Was there some other sort of predation or disease? Tom didn’t find any dead bees, so it was a bit of a mystery. We already had a full afternoon planned, so we waited until Sunday to do a more thorough post-mortem. I’ve become allergic to bee stings over the last ten years, but since the bees were gone, I knew I could safely help Tom clean out the hive.
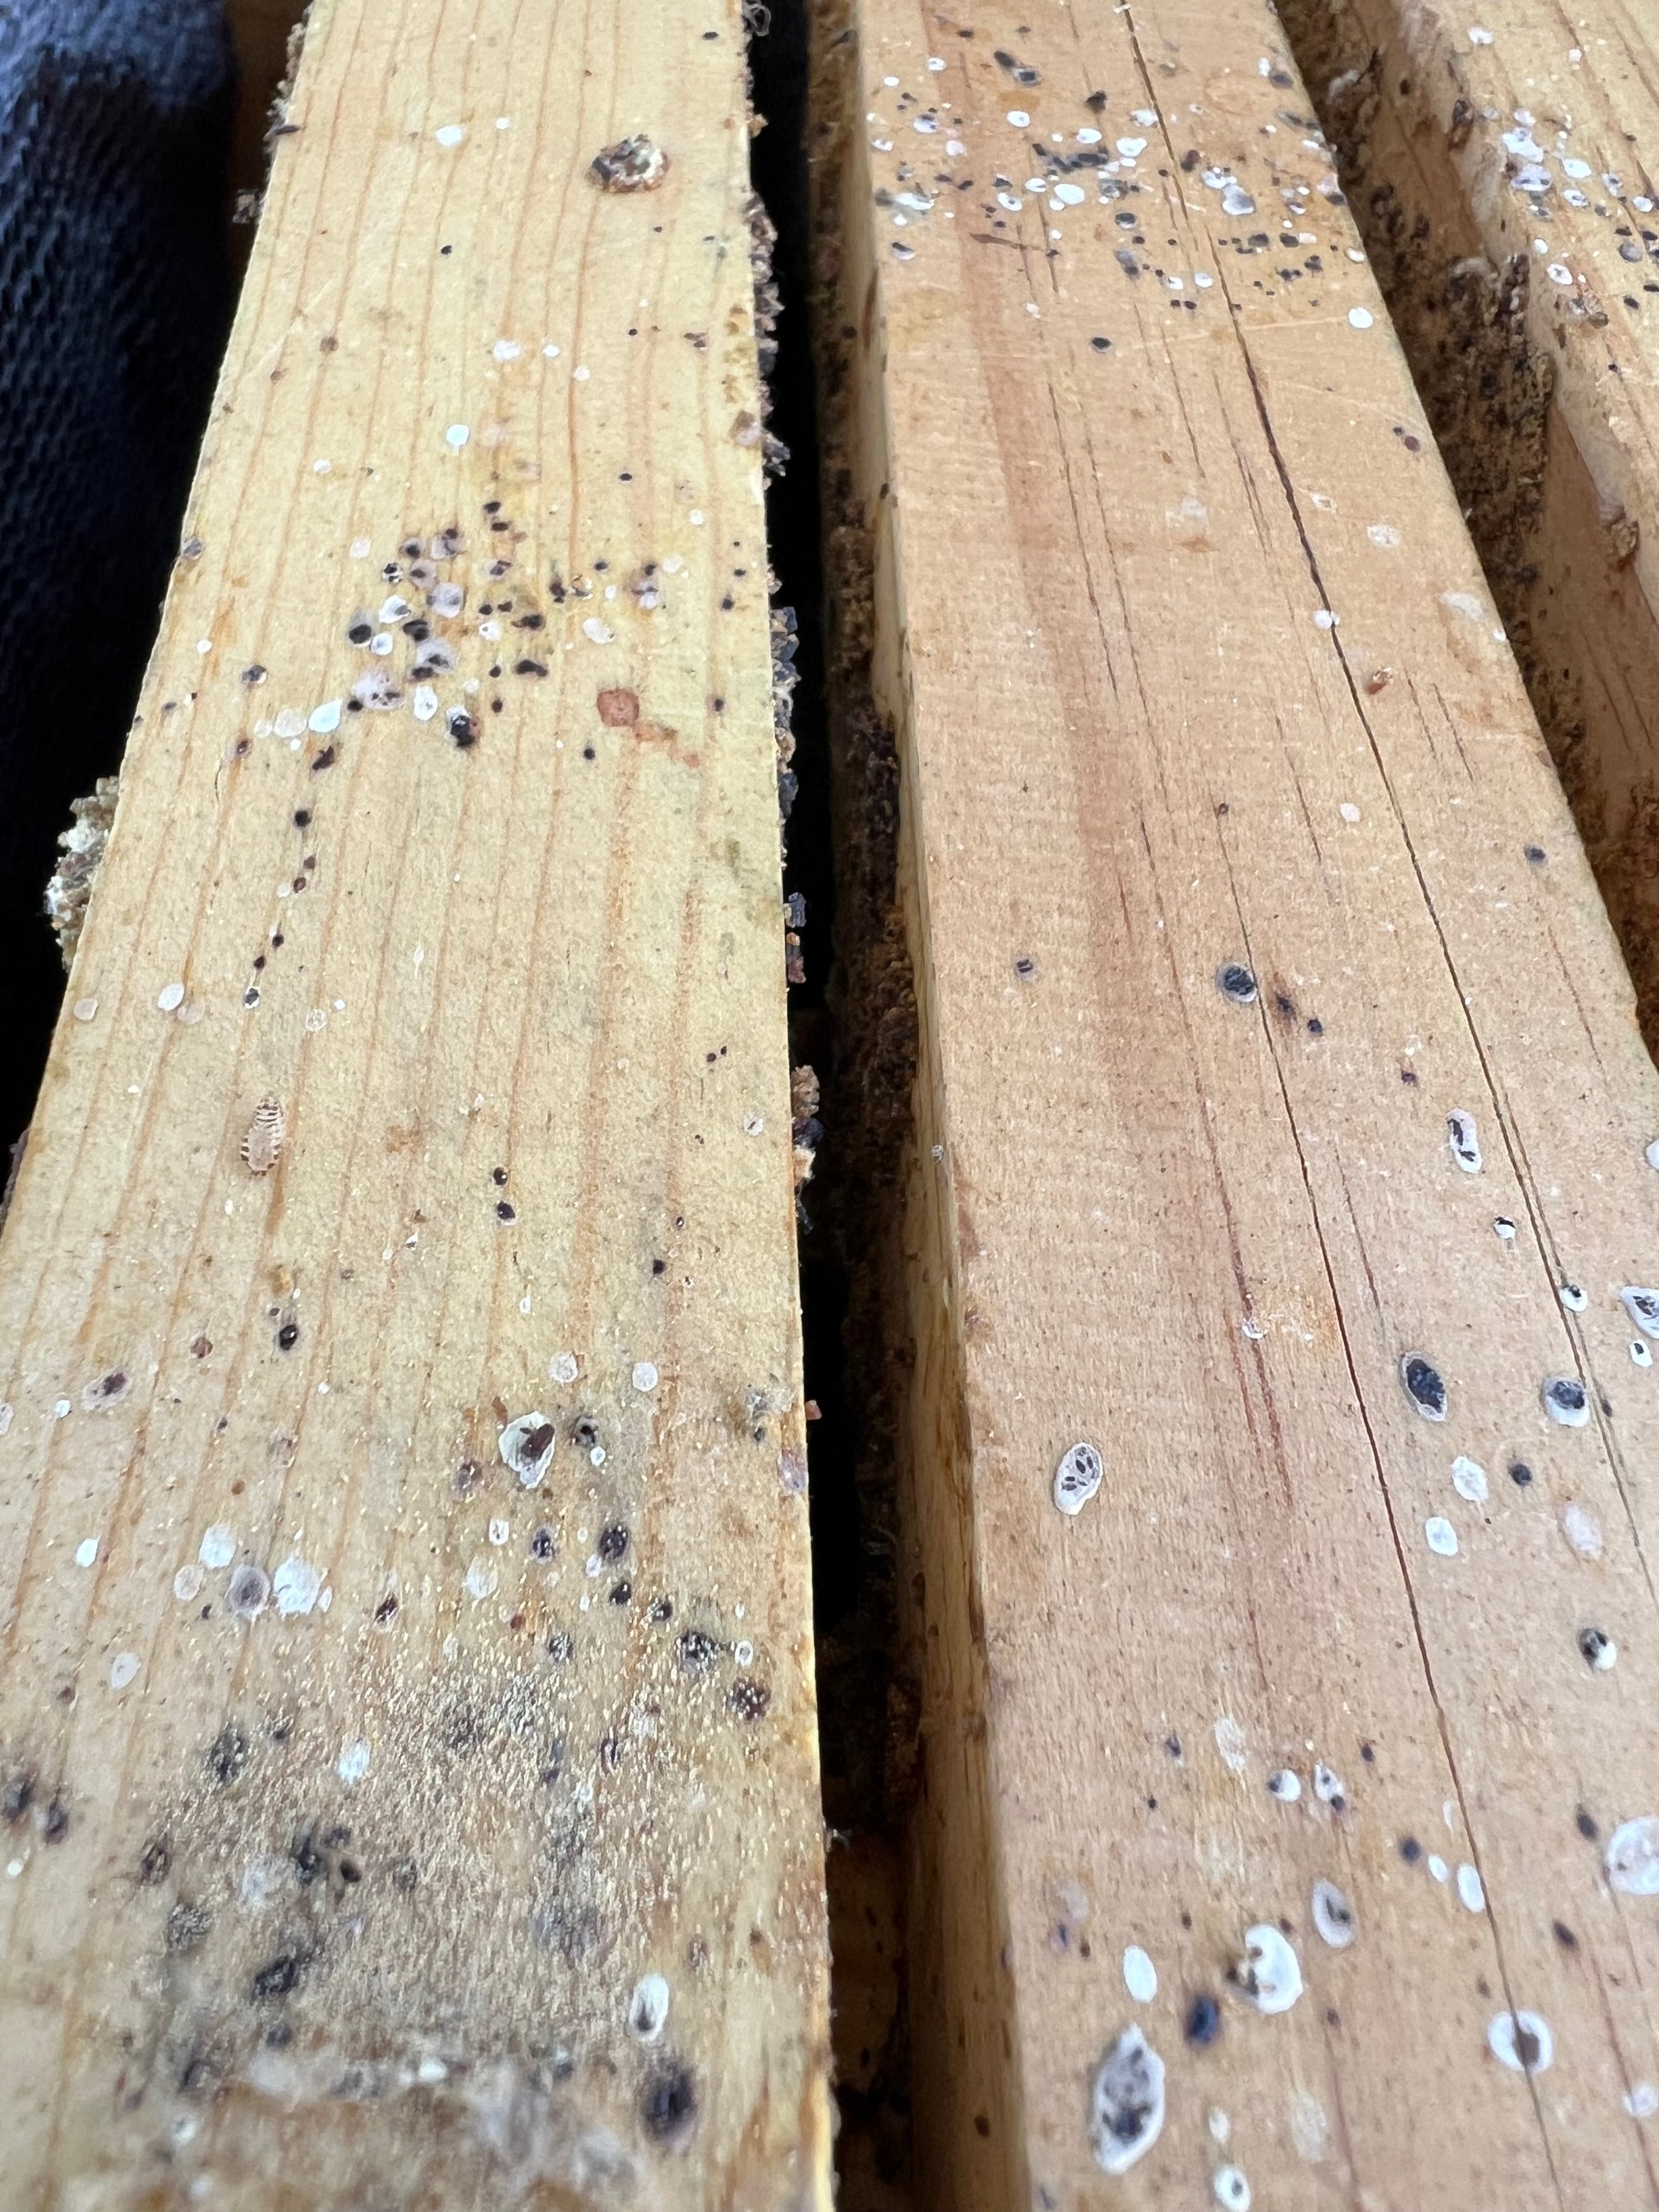
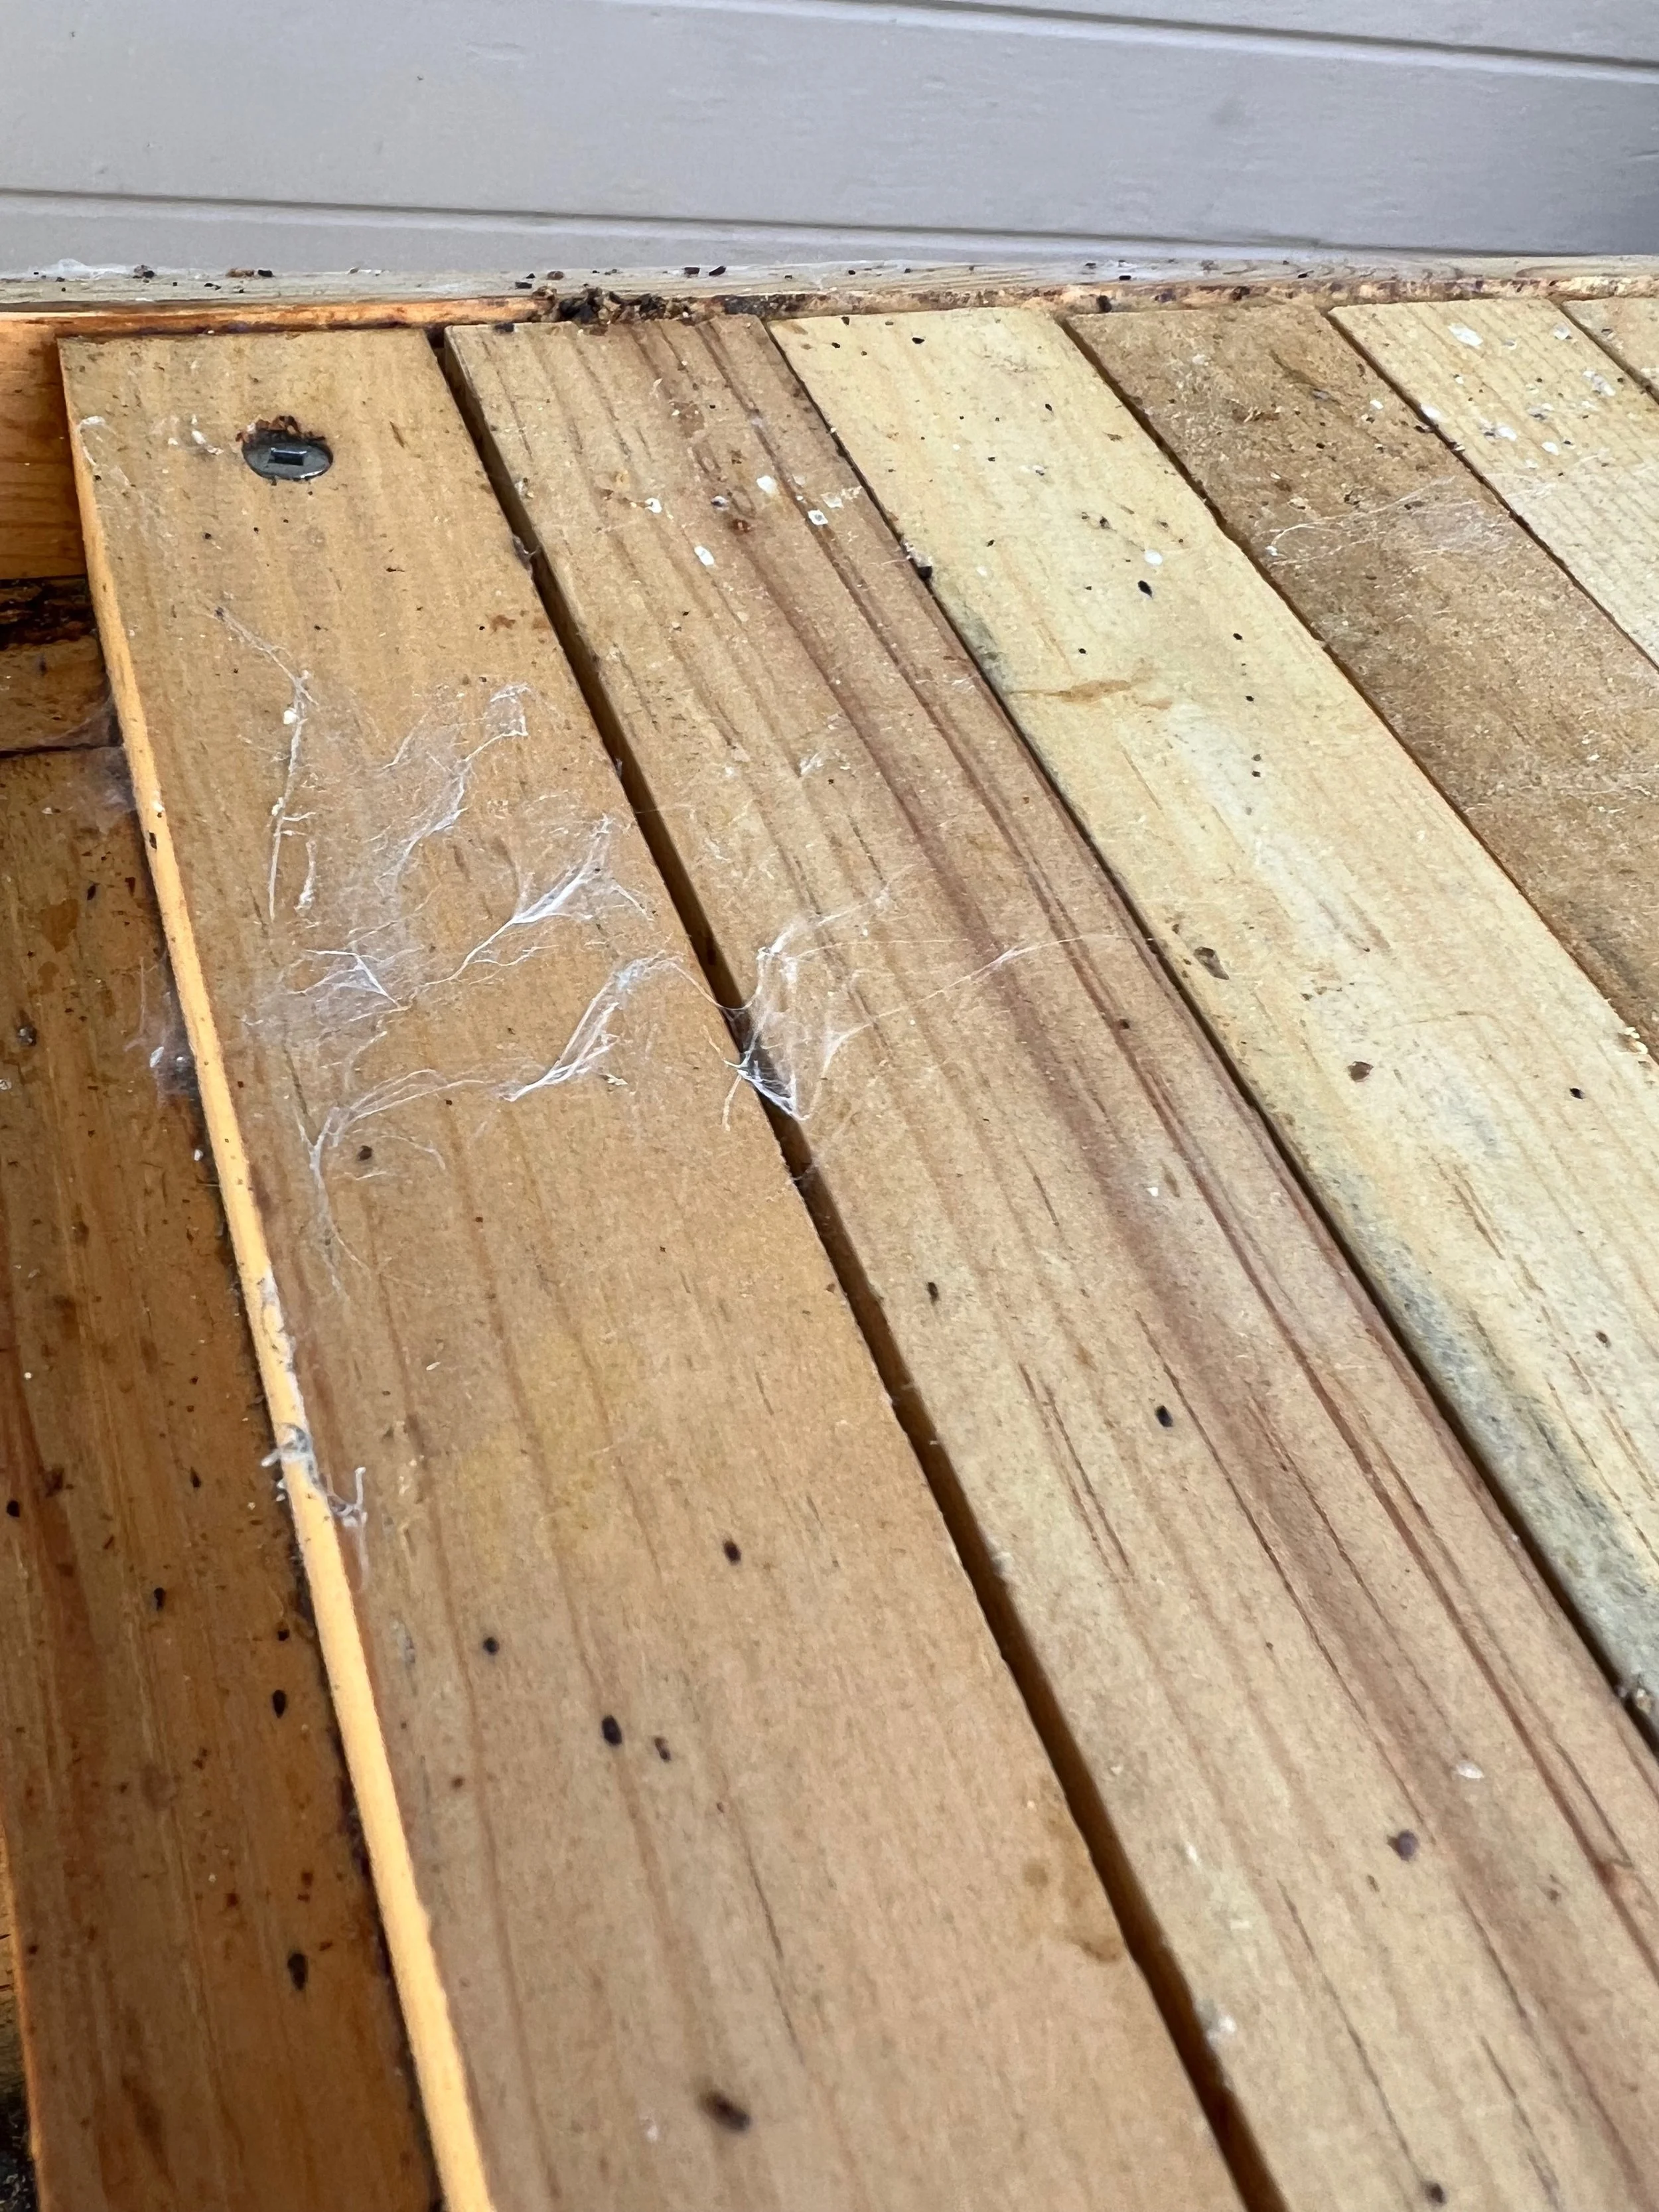
So on Sunday morning, we opened it up and started going through the bars one by one. I noticed some wax moth activity - no larvae, or moths, or eggs, or tunneling (all of which would have been extremely disgusting and concerning) but something that I’ve always suspected was frass (basically, insect poop). And it might be, I’m still not sure. You can see it below. There was also a little bit of webbing, which is how wax moths begin to pupate, but we found no pupae at all. We caught it in time, and got in there before the moths took hold. That was excellent, because there was a lot of honey in there, and it was not affected at all.
We took out bar after bar of honey, six full capped bars in total. We rarely take more than a bar at a time, so there was a lot in there to clear out. We cut the comb off the bars and put it all into our high-tech big bucket/colander system for draining. Then we started taking out the bars that had an inch of capped honey at the top, but were empty below.
Suddenly, we started noticing bees. Hmmmm. These must be bees from neighboring hives, we mused, coming around to take the honey - easy pickings! So we kept going through bars. Soon, there were more bees. Hmmmm. Tom pointed a finger at me and firmly directed me indoors, then suited up to continue cleaning out the hive.
I went inside and promptly ordered a new colony to be picked up in Davis in April. About five minutes later, Tom comes in and shows me a video on his phone. Turns out, when he got closer to the front of the hive, he found more bees - and a queen!
Well, that changed the game! I realized, it wasn’t just the ants, or the wax moths, or the moving of the hive, or the wet conditions. It was also that sudden swing in temperature, the sudden arrival of spring! The bees had swarmed.
A swarm, as you know, happens when the colony becomes discontent with their old queen for some reason (or when the hive gets too crowded, or when there are predations or disease - or a combination of all of the above), and they make a new queen. Once the new queen is born, the old queen flies off with roughly half the colony to find a new place to live, leaving the new queen to get busy laying eggs. This must be a new queen, left behind with some of the previous colony.
Ok then! Tom stopped taking out bars, and made sure the small group was tucked up tight within a very small space (six bars or so, with some honey). Then he furiously cleaned up old wax and vacuumed everything out of the back of the hive. It was an excellent opportunity to remove old comb and excessive propolis, as well as a few spiders.

Our hopes are not high that this tiny colony will survive. But, there will never be a better time to try, with warmer daytime temps and flowers blooming. Maybe, just maybe, they’ll make it. And if they do, what am I going to do with the new colony I ordered??? Oy.
Well, at least we’ll have plenty of honey for the year ahead!

Bird Boxes
Another guest post from Tom today…
Having chickens and compost in our suburban setting has put us into a situation where we’re fending off varmints – specifically, rats. I’ve written about our rat trapping efforts before (see The RRZ and RRZ Part Two), and our rat situation is pretty cyclic – we start noticing evidence of them, I get a little more diligent about setting up the traps, we trap a few, and then the trapping slows down and we don’t see as much of them again.
We’ve got a variety of hawks and owls in the neighborhood, and while we’ve not necessarily seen them making off with any rats, we figure that they’re also helping to keep the rat population in check (one of the reasons we’ve stuck with snapping traps and not poison). I’m not sure where we heard this, but the phrase “you don’t have a rat problem, you’ve got an owl deficiency” has been in our heads, and so this winter I did some research into nesting boxes for owls.
You can find bird box plans all over the internet. My most trusted source of all things bird is the Cornell Lab of Ornithology. They’ve got a specific site, Nestwatch, that has instructions and plans for bird boxes for all kinds of species of birds. The information is excellent – in addition to plans, they’ve got advice on how high up to put a box, which direction to face it, whether a specific bird is going to nest in your area of the country (and when), etc. (Note: downloading specific plans requires you to enter an email address, which I always find a little concerning (please no newsletters!), but it’s been okay).
After quite a bit of looking and thinking and perseverating, I decided to start off small, making a couple of boxes for some of the smaller birds that frequent our yard. The Nestwatch site has a single plan for a series of smaller birds we see – Bewick’s wrens, nuthatches, chickadees, and the oak titmouse – with the only real difference being the size of the hole in the front. I found that I could make the whole box from a single piece of simple 5-foot 1”x6” cedar fence board. No real special tools required – I used a circular saw to make all the cuts, including the few angled ones. Total cost was maybe $10-20, and a couple of hours of effort. I think they turned out good:

The top is angled to let rain run off, and the gap on the side is intended to keep the box cool when the weather heats up. There’s a little hinged side that’s screwed in securely, but will allow for cleaning out the box at the end of the nesting season. You can’t see it from this picture, but the bottom has some small holes in the corners to let any water that gets inside to drain out.
With these smaller boxes proving that this kind of build is within my grasp, I set off to make a larger box for a western screech owl. This box was going to need to be bigger – about 12” wide, 9” deep, and 18” tall. After kicking around our local home supply store a bunch, thinking about how much I wanted to invest in this and what size boards I could fit in the car, I decided to try using that same 1”x6” cedar fence board, gluing them up to make boards of a sufficient width, This proved to be a little tricky – I wound up using a LOT of clamps, as well as some internal bracing to hold things together, but overall I think it turned out okay. I got the box put up in our catalpa tree yesterday before the rain started again:

Overall a pretty similar design - it’s just a box with an angled roof and a hinged side. It was a little tricky getting it put up in the tree - that branch looks vertical from our bedroom window but in fact curves quite a bit.
I have no real sense of whether we’ll be successful in hosting any bird families at all this spring. We’re set up for success – they’re in the right place, they’ve got the right dimensions – but you never know. We heard a great horned owl outside the house last night, and while they don’t use nest boxes (they tend to just take over someone else’s big stick nest), we feel like this was a good omen.
“But what about nest cameras?,” you ask. “Don’t you want to host the Poppy Corners owl box live stream?” Yes, gentle reader, you can be assured that I spent quite a bit of time looking into ways that we could get owl baby video online - the Nestwach site has a whole section on this. In the end, it seemed like a bit of a pricey proposition, and kind of a pain — running an ethernet cable out so that we could be assured of good connectivity, dealing with lighting and power, etc. If we do have owls set up shop, I’ll try to figure out a way to rig up our trail camera to get some pictures.
If you’re looking for a good weekend project, I’d encourage setting up some nest boxes!
Quisque iaculis facilisis lacinia. Mauris euismod pellentesque tellus sit amet mollis.